

In this guide, we’ll show you how to remove yellow contrast step by step using Premiere Pro, so your footage looks more neutral, clean, and color-accurate.
If you're trying to reverse a previous grading style, here’s the full guide on how to add yellow contrast so you can understand how it affects your footage.
How to Remove Yellow Contrast in Premiere Pro: Step-by-Step
Step 1: Select the Clip in the Timeline
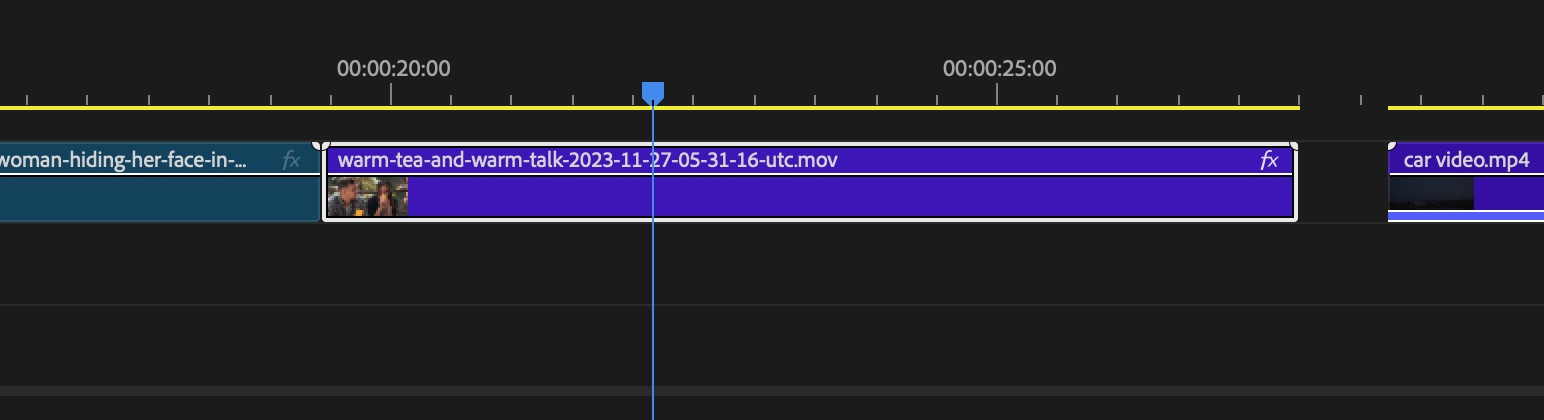
- Open Premiere Pro and load your project.
- Click the clip that looks too warm or yellow.
Step 2: Open the Lumetri Color Panel
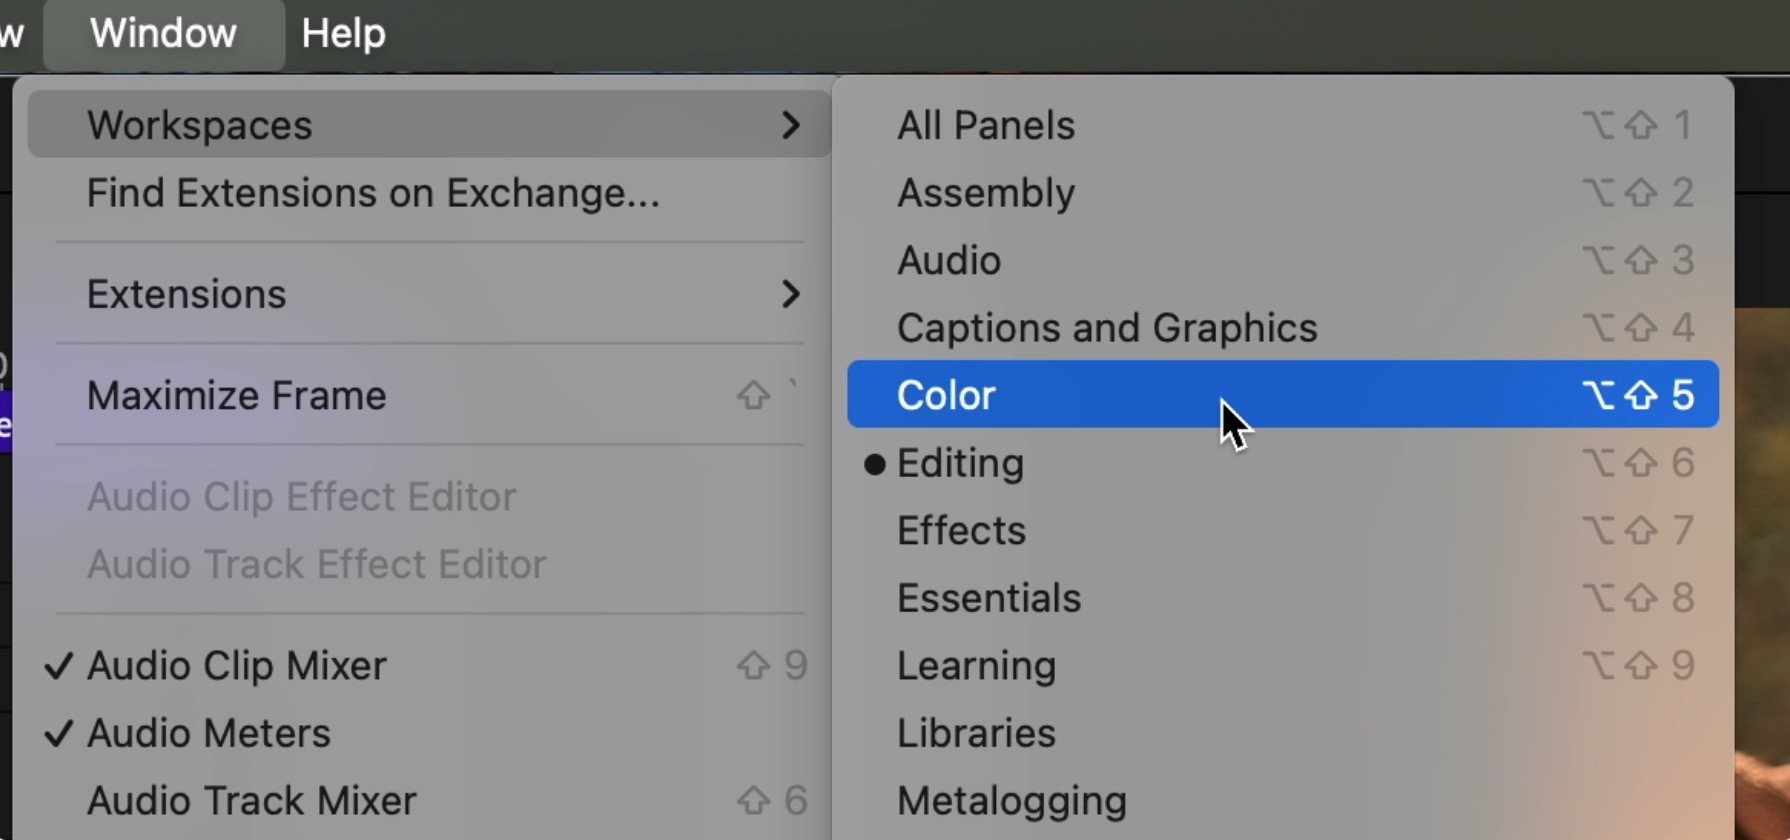
- Go to Window > Lumetri Color.
- Switch to the Color workspace if it’s not already active.
For adjustments that need precise masking control, learn how to change mask box square on Premiere Pro. And if your mask shifts during playback, here’s how to stop a mask from moving.
Step 3: Neutralize with Basic Correction
In the Basic Correction tab:
Use White Balance Selector to auto-correct based on a neutral tone (like a white shirt or grey object in frame).
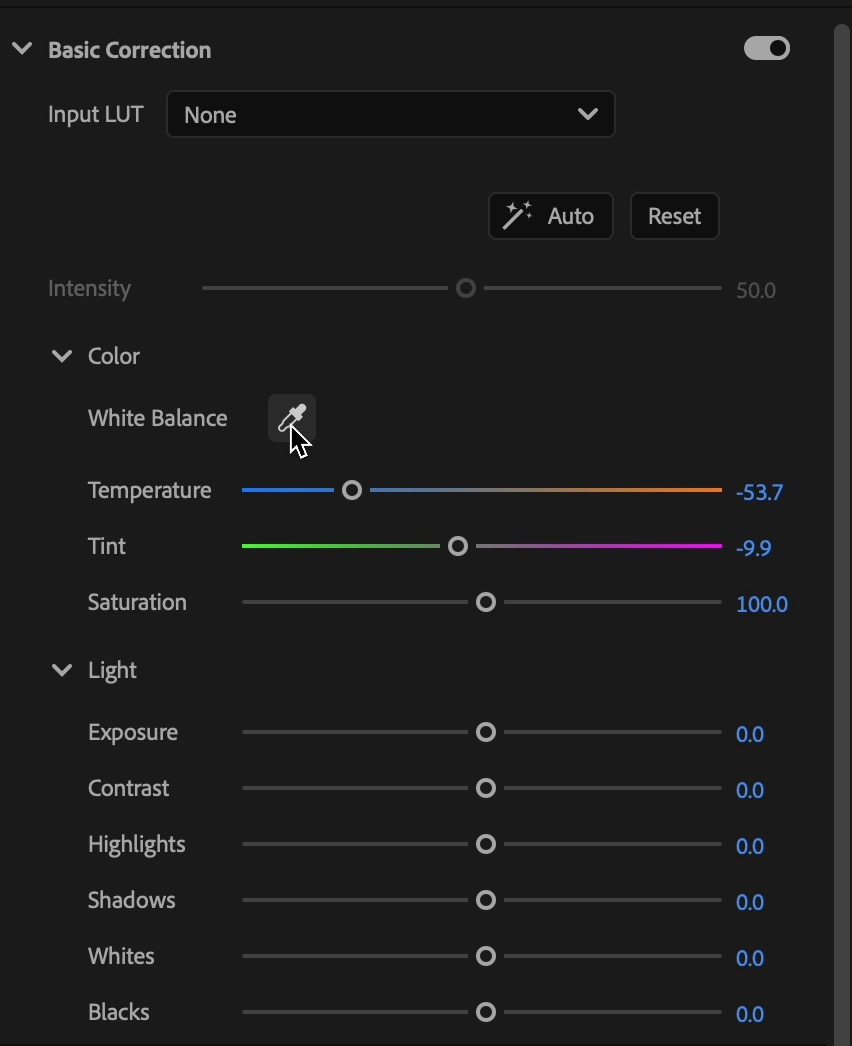
Lower the Temperature (e.g., from +20 to 0 or negative) to reduce yellow/orange warmth.
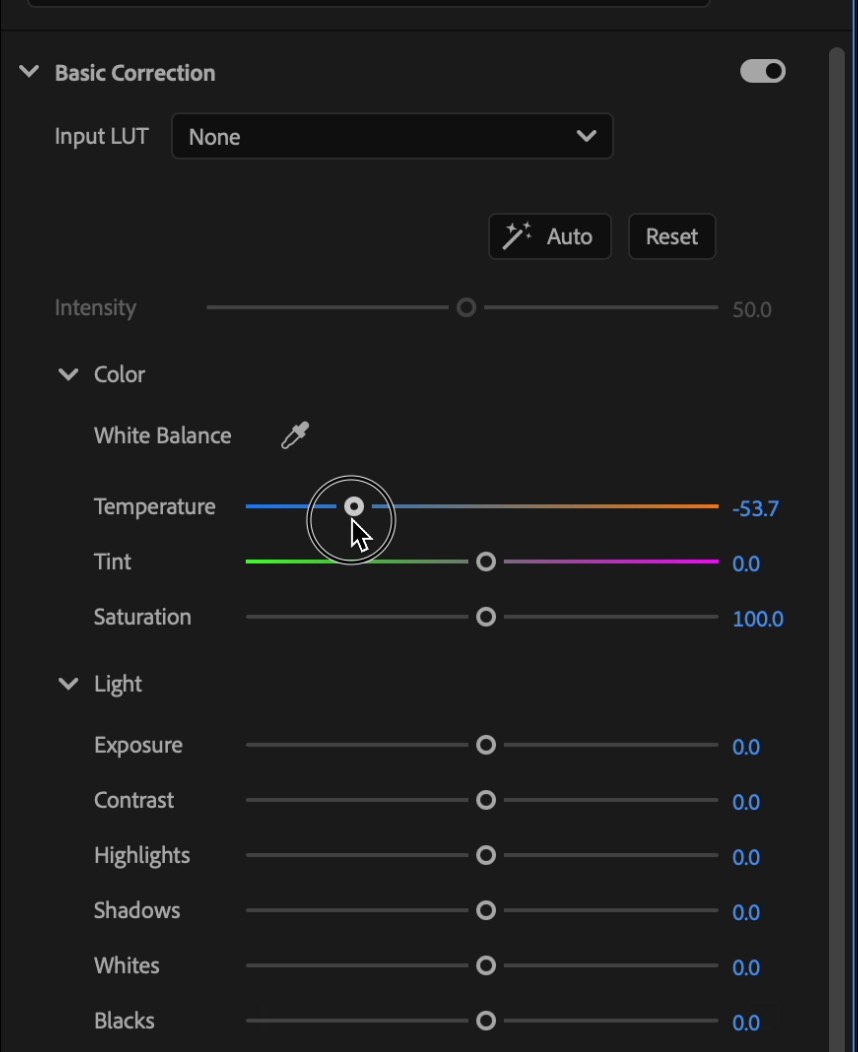
Adjust Tint slightly toward green if pink tones are present.
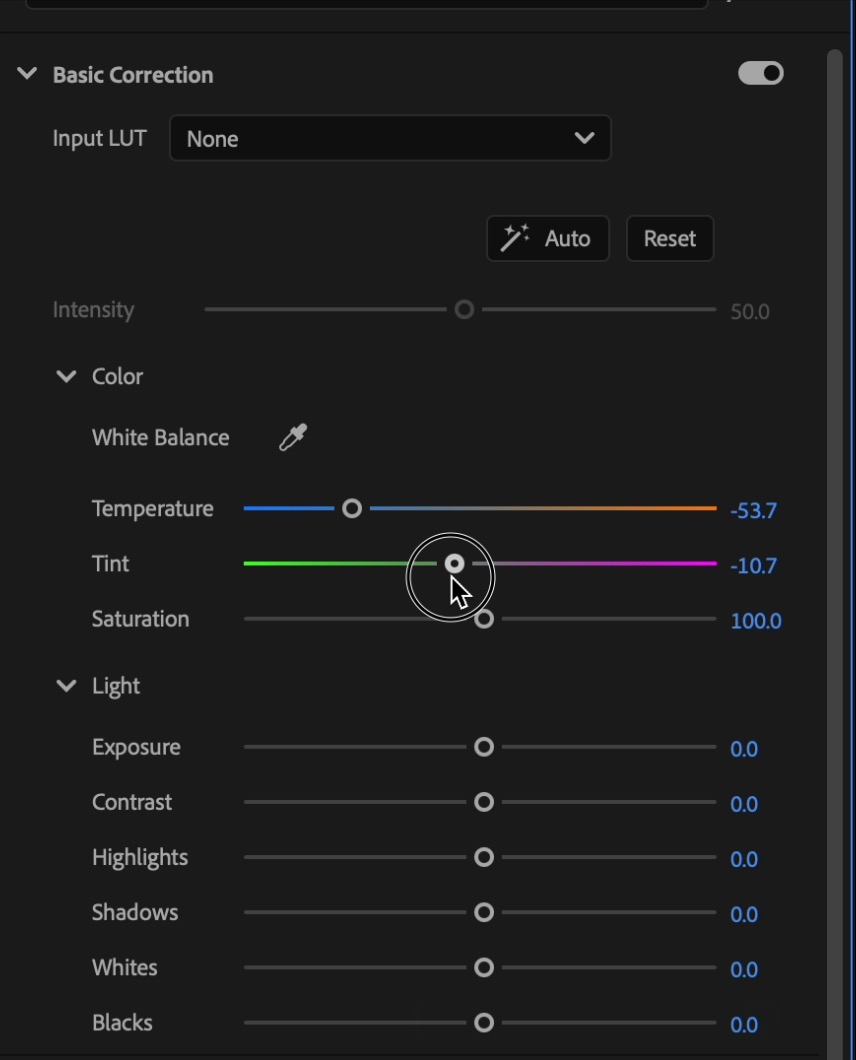
📌 Tip: Use scopes (Waveform + Vectorscope) to monitor color balance.
Step 4: Use Color Wheels to Rebalance Tones
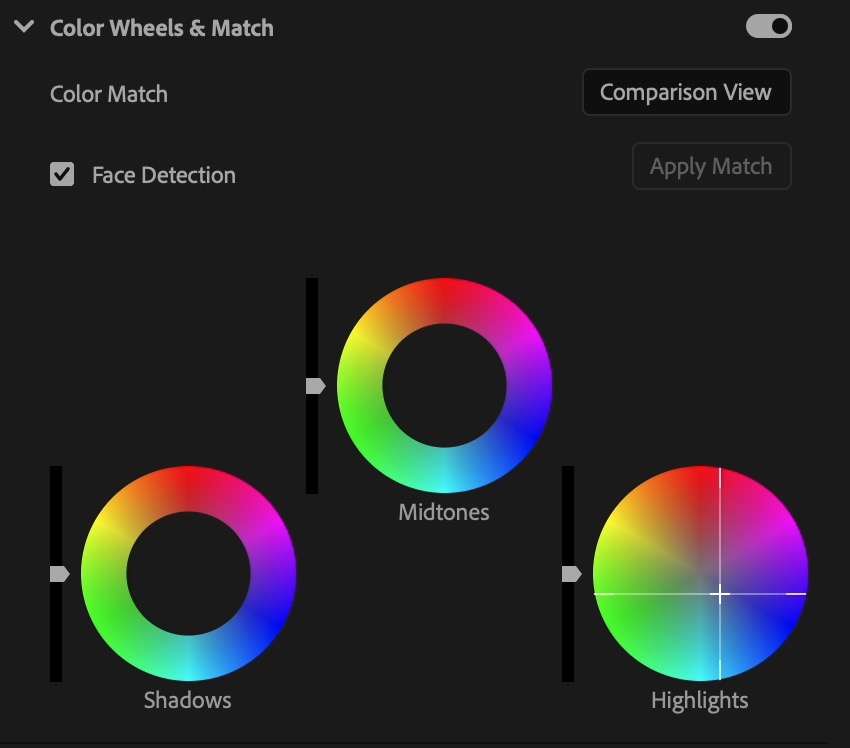
- Highlights: Push gently toward blue to cool down overly warm bright areas.
- Midtones: Shift slightly toward cyan or blue for skin tone correction.
- Shadows: Keep neutral or add blue to balance contrast.
🎯 This technique reverses the effect of yellow-heavy grades like those applied in add yellow contrast.
Step 5: Adjust Curves for Precision
Under Curves > Hue vs Hue:
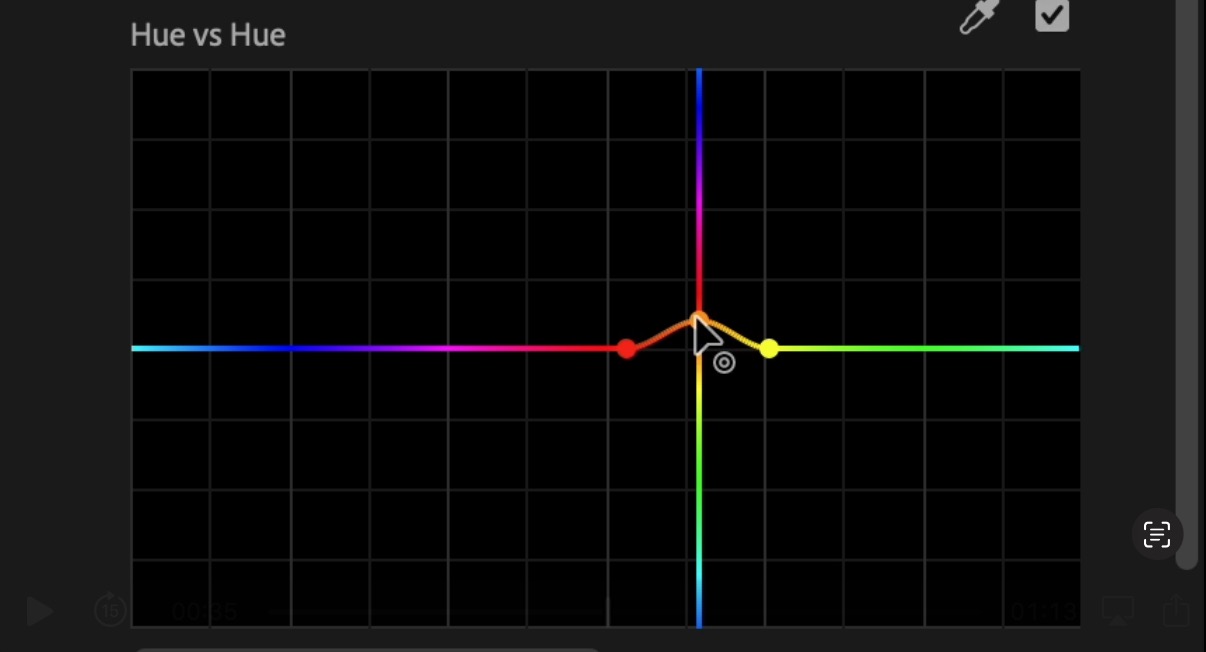
- Select yellow and orange hues and shift them slightly toward neutral or pink tones.
- Use Hue vs Sat to desaturate yellows if they still overpower the scene.
📌 Pro Tip: This method lets you clean up only the affected tones without flattening your entire color grade.
If you need clean, geometric masking for local corrections, check out how to create a perfect square mask.
Step 6: Recover Natural Look with Contrast and Highlights
In the Basic Correction or Creative tab:
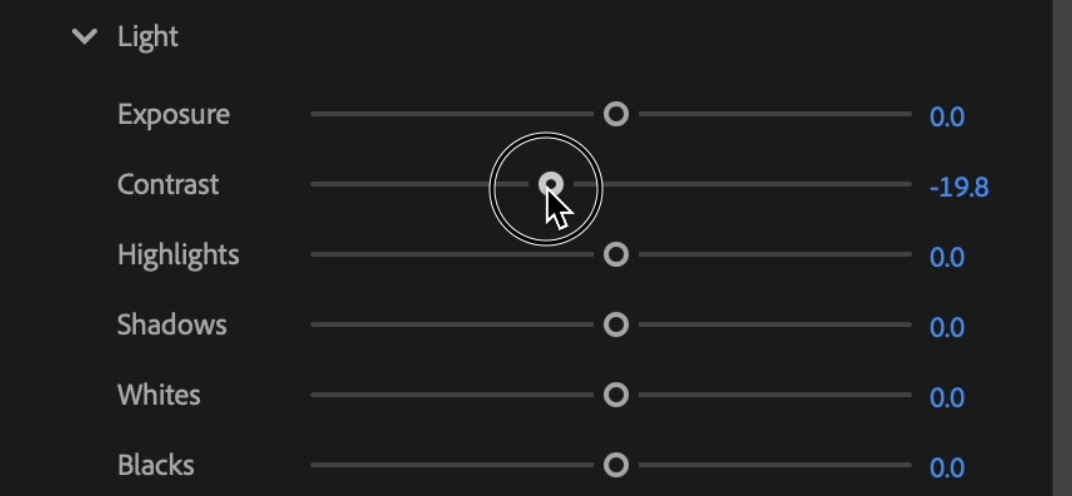
- Decrease Contrast slightly if shadows feel crushed.
- Reduce Highlights to tame bright yellow areas.
- Use Sharpen (+5 to +10) to bring back detail lost in soft, warm color grading.
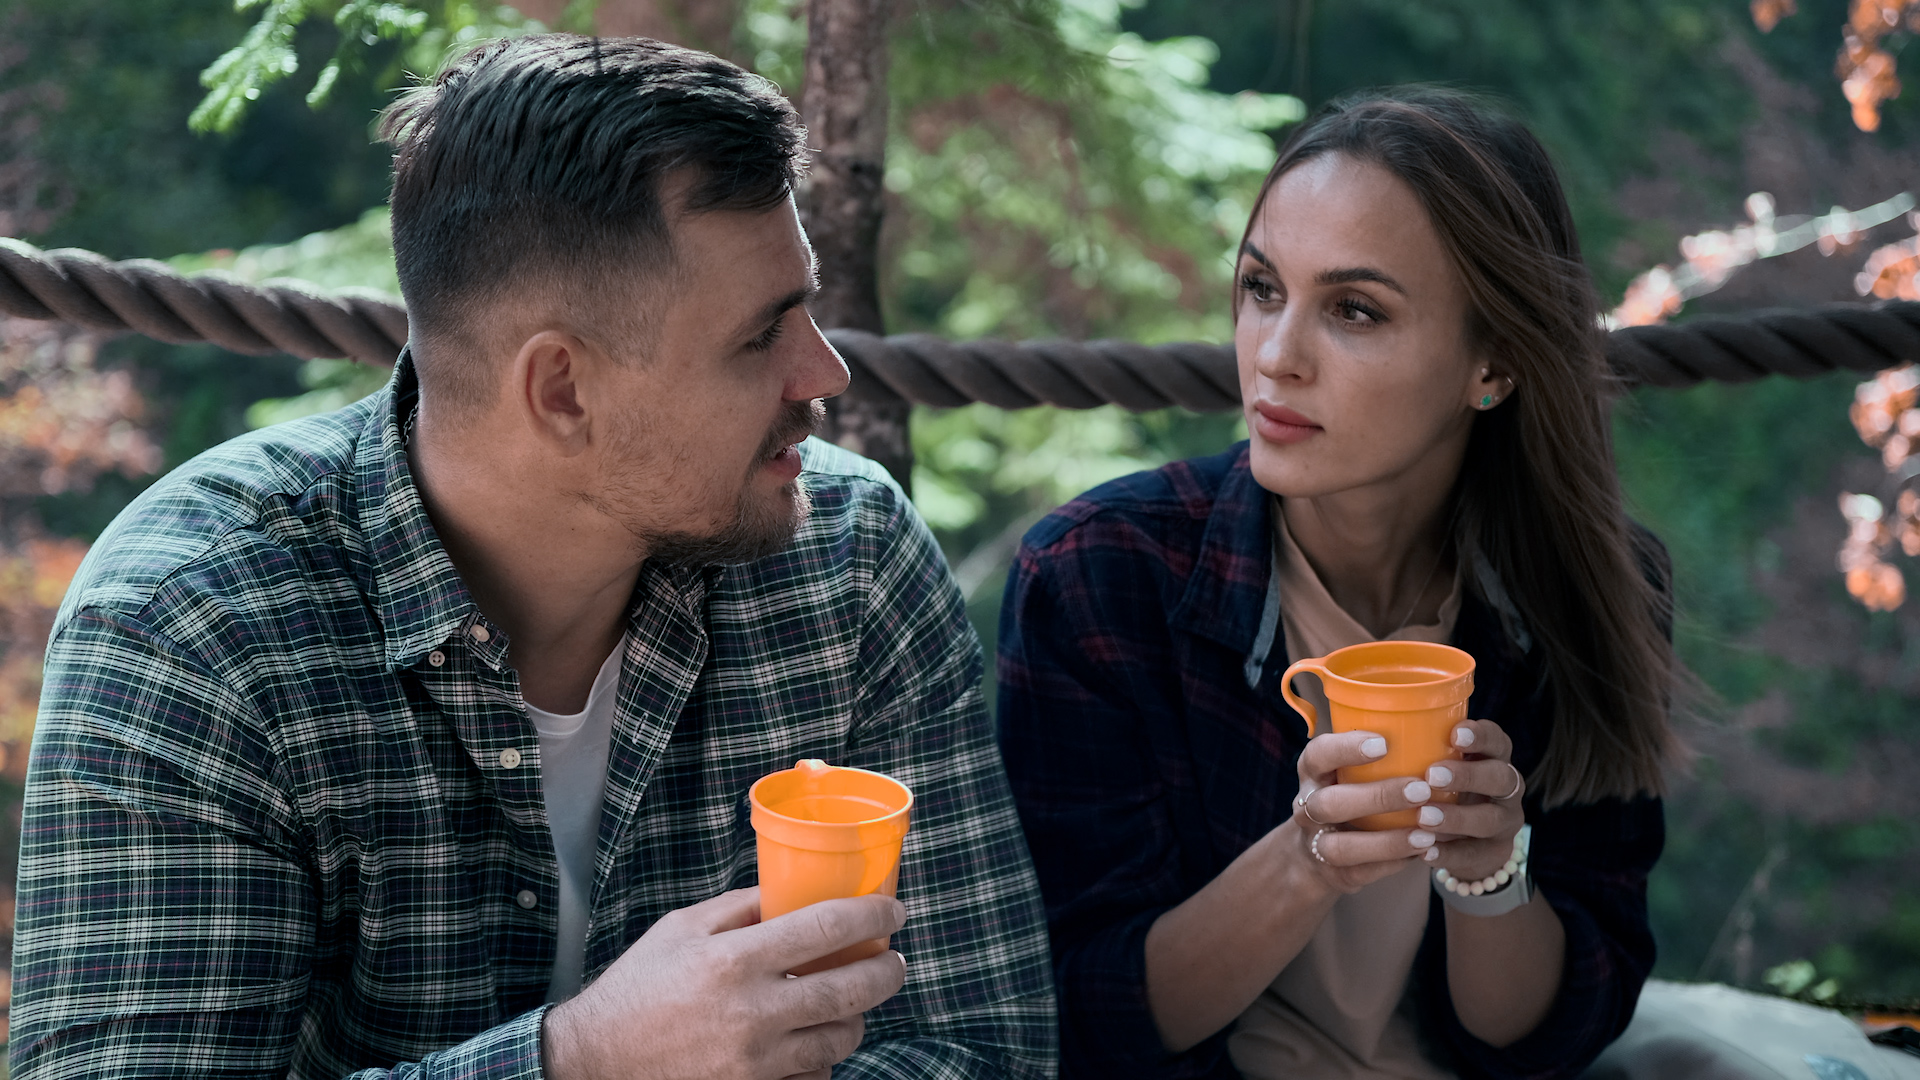
Result
Image Before
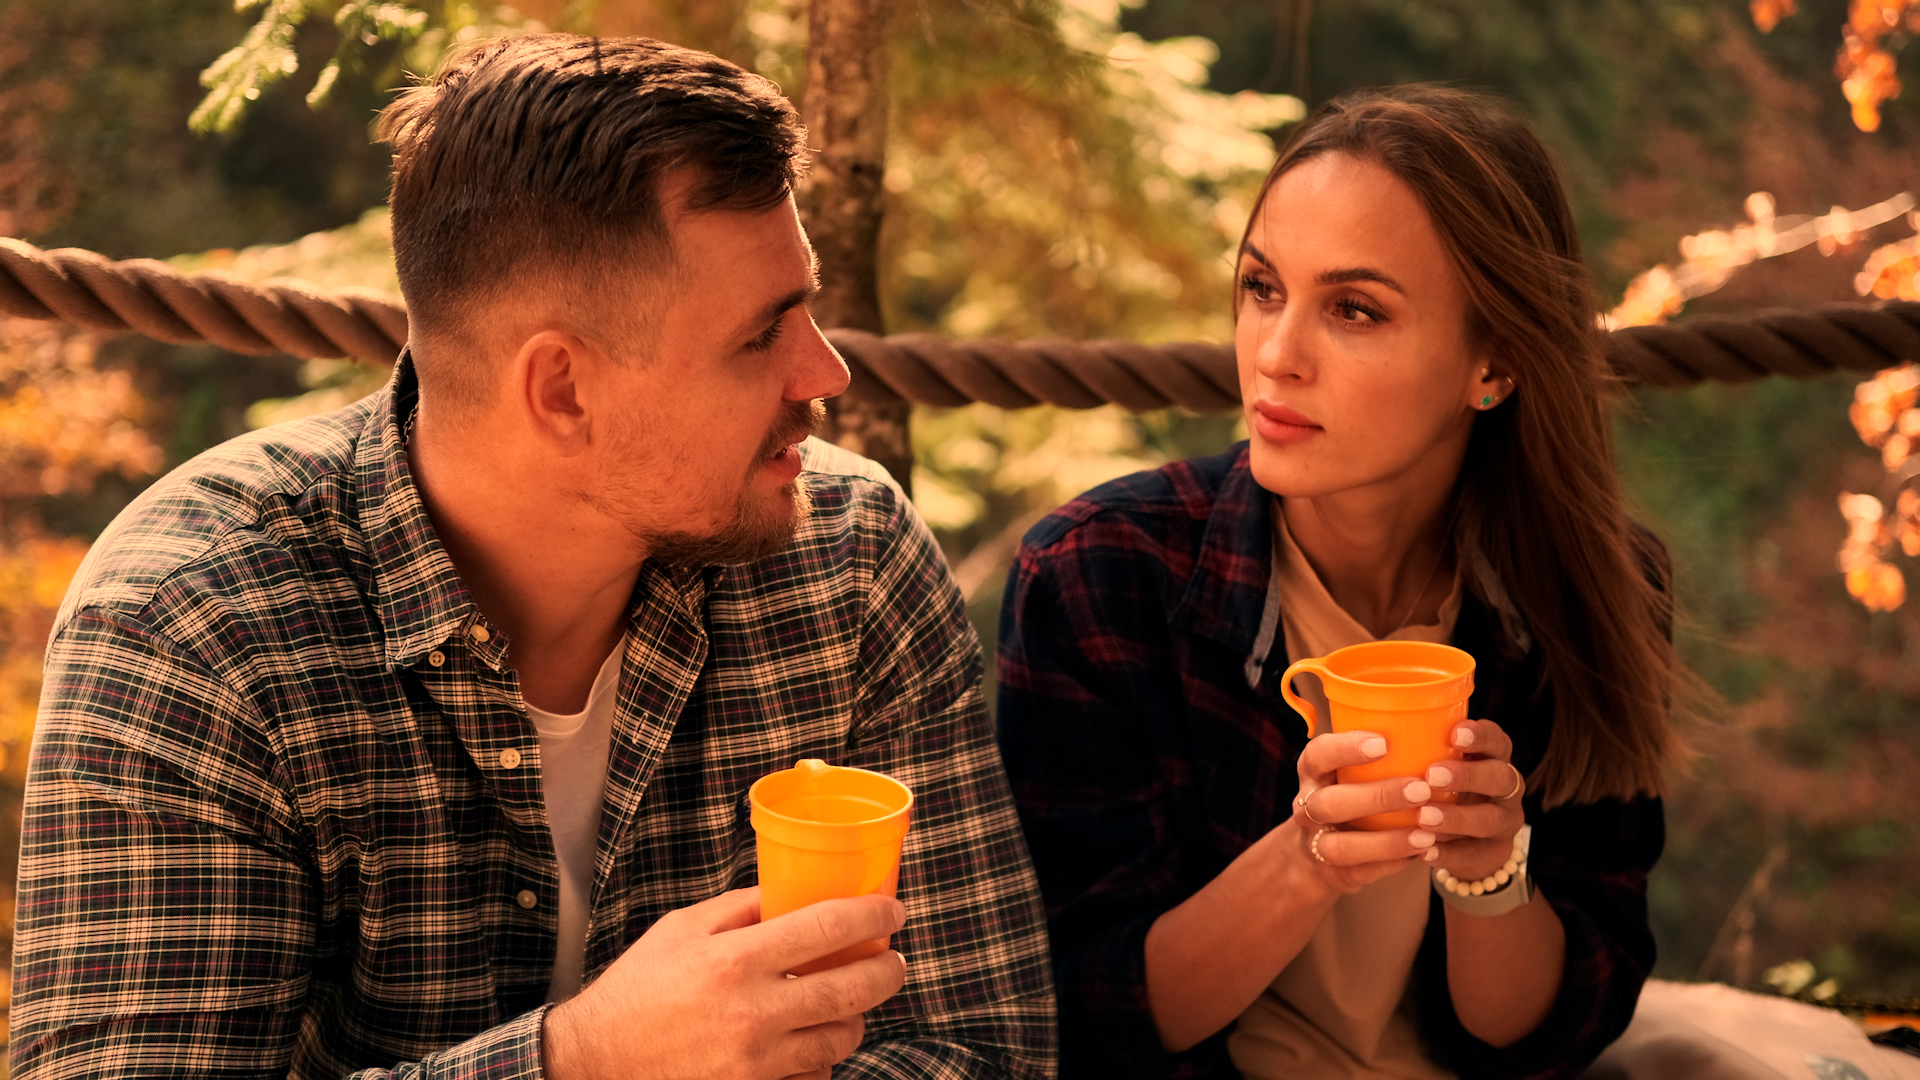
Image After
Expert Tips for Preventing Yellow Overtones
- Use manual white balance while filming instead of auto, especially in golden light.
- Avoid stacking warm LUTs without checking final skin tone.
- Always grade with reference monitors or calibrated color scopes.
Why Remove Yellow Contrast?
Too much yellow in your footage can cause:
- Unnatural skin tones
- Washed-out whites and highlights
- A loss of color separation and depth
This often happens after using golden-tone LUTs or manually applying a style like this add yellow contrast method.
Final Thoughts: Bring Balance Back to Your Footage
Whether you're correcting a previous add yellow contrast style or dealing with warm lighting, Premiere Pro gives you precise control over your color balance. A few careful tweaks using Lumetri Color tools can bring your footage back to a natural, polished, and professional look. If you want to give your footage a more stylized look after fixing the color, you can also learn how to add cinematic lines / black bars letterbox effect.
🎓 Want to go deeper into color correction, grading styles, and professional video editing?
Join the Adobe Premiere Pro Course by Miracamp and learn how to edit, fix, color, and deliver stunning content—step by step. From foundational tools to advanced workflows, it’s your shortcut to editing like a pro.
FAQ Removing Yellow Contrast in Premiere Pro
How do I remove yellow contrast in Premiere Pro?
Open the Lumetri Color panel in Premiere Pro, lower the Temperature slider in the Basic Correction tab, and shift the Color Wheels toward blue or cyan to neutralize yellow tones.
Why does my footage look too yellow in Premiere Pro?
Footage can look overly yellow due to incorrect white balance, warm LUTs, or color grading styles like add yellow contrast. Adjust temperature, color wheels, and curves to fix it.
How do I fix unnatural skin tones caused by yellow contrast?
Use the Hue vs Hue curve in Lumetri Color to target yellow and orange tones, then shift them toward more neutral or pink hues. Adjust midtones in Color Wheels for balanced skin tone.
Which tool is best to reduce yellow saturation in Premiere Pro?
Use Hue vs Saturation in the Lumetri Color panel. Select yellow on the curve and lower its saturation to reduce the overpowering yellow without affecting other colors.
Can I reverse yellow-heavy color grading in Premiere Pro?
Yes, by lowering the temperature, adjusting color wheels, and using curves, you can reverse a previous add yellow contrast style and restore a more neutral color balance.
What’s the fastest way to make my video look less warm?
Lower the Temperature slider in the Basic Correction tab, then use Auto White Balance or the White Balance Selector to target a neutral gray or white area in the shot.
Can I use scopes to monitor yellow contrast in Premiere Pro?
Yes, enable Waveform and Vectorscope in the Lumetri Scopes panel to accurately measure warmth and color shifts, helping you maintain accurate balance while editing.
How do I cool down highlights in Premiere Pro?
In the Color Wheels, drag the Highlights wheel toward blue. This will reduce warm yellow in bright areas like skies, sunlight, or reflective surfaces.
Will removing yellow contrast affect my entire color grade?
Not necessarily. Use Hue vs Hue and Hue vs Sat curves to isolate adjustments to specific tones like yellow and orange, without flattening the overall grade.
Where can I learn advanced color grading techniques in Premiere Pro?
Join the Adobe Premiere Pro Course by Miracamp to master color grading, contrast correction, and professional workflows with real-world editing techniques.


