
The Adobe Premiere Pro interface is a professional video editing workspace designed to streamline post-production workflows. It consists of panels, each serving a specific purpose, including media organization, timeline editing, effects, and export settings. Mastering these panels allows for faster, more efficient editing.
Before diving deeper, make sure your setup meets the Premiere Pro system requirements to avoid crashes and slow performance.
Key Sections of the Premiere Pro Interface
1. Project Panel (Media Management)
- Stores all imported files: video clips, audio, graphics, sequences.
- Use bins to categorize footage and maintain an organized workflow.
- Drag clips directly into the timeline for quick editing.
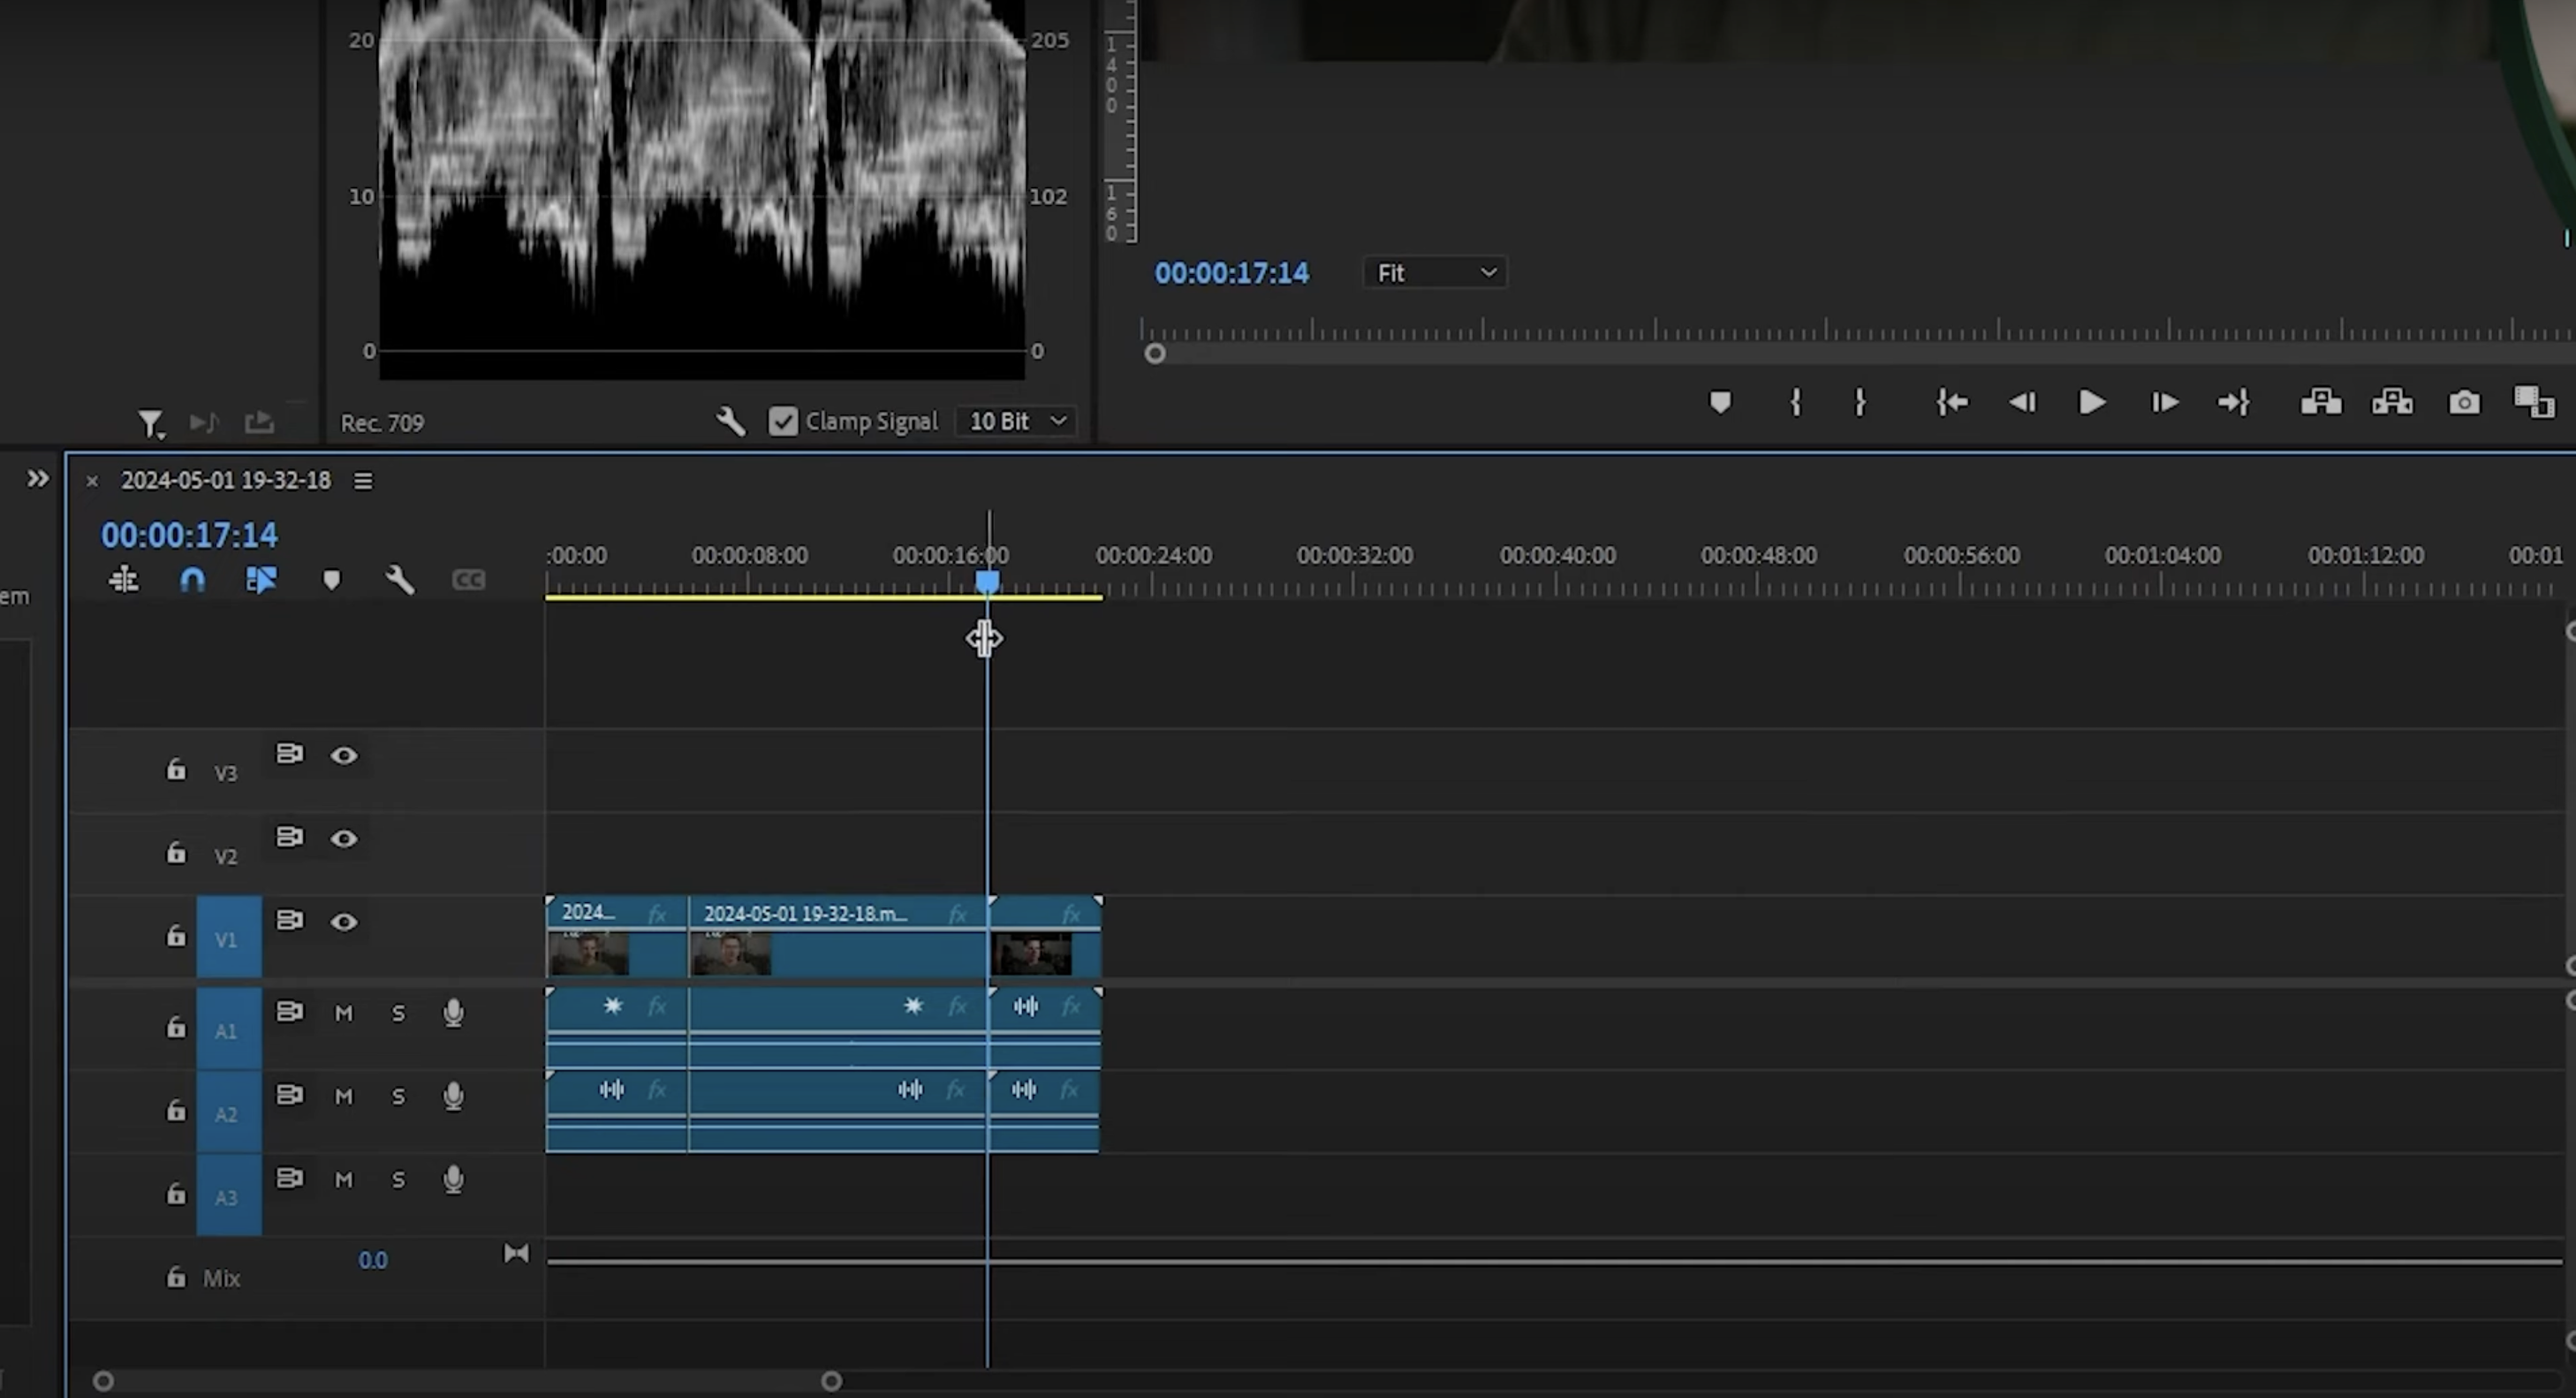
2. Timeline Panel (Editing & Sequencing)
- The core workspace where you arrange clips, cut, and apply transitions.
- Tracks for video and audio layers enable multi-layer editing.
- Use shortcuts like C (Razor Tool) to cut clips quickly.
3. Program Monitor (Preview & Playback)
- Displays your edited sequence in real-time.
- Use the Playhead and Mark In/Out for precise editing.
- Toggle Full-Screen Mode (Ctrl + `) for a better view.
4. Source Monitor (Clip Previews & Trimming)
- Allows previewing of raw clips before adding them to the timeline.
- Set In (I) & Out (O) points for precise trimming.
- Ideal for reviewing interviews and multi-camera setups.
5. Effects Panel (Transitions & Adjustments)
- Apply video effects, color grading, and transitions.
- Use Lumetri Color Panel for professional color correction.
- Drag & drop effects directly onto clips for instant application.
For smoother playback while applying heavy effects, optimize your GPU using the best NVIDIA Control Panel settings for Premiere Pro.
6. Audio Panel (Mixing & Adjustments)
- Adjust audio levels, remove background noise, and add effects.
- Use the Essential Sound Panel for quick audio fixes.
- Synchronize voiceovers with visual content.
If you're updating from an older version, check how to update Premiere Pro properly to ensure full compatibility with the latest interface improvements.
Premiere Pro Interface | Video Presentation
Understanding the Interface for Specific Use Cases
For Beginners: Simplify the Layout
- Use the Editing workspace for a minimal, focused view.
- Drag essential panels into easy-to-access positions.
- Start with basic tools like Cut, Move, and Ripple Edit before exploring advanced options.
You can also study this complete breakdown to fully understand the Premiere Pro interface and build editing confidence faster.
For YouTube & Social Media Editors: Optimize Workflow
- Set your sequence settings to match platform requirements (16:9 for YouTube, 9:16 for TikTok).
- Use Auto-Reframe for quick resizing of content across platforms.
- Apply fast cuts and jump edits for engaging content.
For Multi-Camera Editing: Sync & Switch Angles
- Use the Multi-Camera Source Sequence to align footage.
- Label different angles (Cam A, Cam B) for quick switching.
- Use shortcuts (1, 2, 3) for seamless camera cuts.
For Professional Filmmakers: Customize Workspaces
- Adjust workspace layouts for color correction, motion graphics, and sound design.
- Use Proxies for smoother playback on high-resolution files.
- Integrate with After Effects for advanced VFX and animations.
Conclusion: Master Premiere Pro for Efficient Editing
Understanding the Premiere Pro interface is the foundation of professional video editing. Whether you're a beginner, YouTuber, or filmmaker, optimizing your workflow will save time and improve your edits.
🚀 Ready to become a Premiere Pro expert? Join our Adobe Premiere Pro Course at Miracamp and learn from industry professionals!
FAQs Understanding the Adobe Premiere Pro Interface
What is the Adobe Premiere Pro interface?
The Premiere Pro interface is a professional video editing workspace made up of panels for organizing media, editing clips, adding effects, and exporting videos. It allows for a streamlined, efficient workflow.
What are the main panels in Adobe Premiere Pro?
- Project Panel: Stores imported clips, audio, and assets.
- Timeline Panel: Where you arrange, cut, and edit clips.
- Program Monitor: Previews your edited video in real-time.
- Source Monitor: Lets you trim and preview raw clips before adding them to the timeline.
- Effects Panel: Houses video effects, transitions, and color grading tools.
- Audio Panel: Adjusts volume levels, removes noise, and enhances sound quality.
How do I customize the Premiere Pro interface?
You can rearrange panels by dragging and resizing them. Save your custom layout under Window > Workspaces > Save as New Workspace for quick access.
What is the best Premiere Pro workspace for beginners?
Use the Editing workspace for a simplified layout. It keeps essential tools visible while reducing clutter for a more beginner-friendly experience.
How do I reset the Premiere Pro interface?
Go to Window > Workspaces > Reset to Saved Layout to restore the default workspace if you accidentally move or hide panels.
How do I use the Timeline Panel in Premiere Pro?
The Timeline Panel is where you edit video and audio clips. Use shortcuts like C (Razor Tool) to cut clips and V (Selection Tool) to move them.
What is the difference between the Source Monitor and Program Monitor?
- Source Monitor: Previews and trims raw clips before adding them to the timeline.
- Program Monitor: Shows your edited sequence in real-time as it appears in the final video.
How do I apply effects in Premiere Pro?
Open the Effects Panel, search for an effect, and drag it onto your clip in the Timeline. Adjust effect settings in the Effect Controls Panel.
How do I adjust audio levels in Premiere Pro?
Use the Audio Panel to increase volume, remove background noise, and enhance clarity. The Essential Sound Panel provides quick fixes for voiceovers and music.
What is the best workflow for editing videos in Premiere Pro?
- Import media into the Project Panel.
- Arrange clips in the Timeline Panel.
- Trim and edit using the Source Monitor.
- Apply effects and transitions from the Effects Panel.
- Adjust audio in the Audio Panel.
- Preview edits in the Program Monitor.
- Export the final video via the Export Settings Panel.
How do I switch between different workspaces in Premiere Pro?
Go to Window > Workspaces and select Editing, Color, Audio, Effects, or Graphics, depending on your current editing needs.
Where can I learn more about mastering Premiere Pro?
Join the Adobe Premiere Pro Course at Miracamp to learn professional editing techniques, color grading, and cinematic storytelling from industry experts. 🚀


