In this comprehensive guide, we’ll walk you through the essential steps of mastering color grading in video editing, from understanding the basics of color correction to applying advanced techniques using top industry tools. By the end of this article, you'll be equipped with the knowledge and skills necessary to transform raw footage into stunning visuals that captivate your audience.
Step 1: Mastering the Fundamentals of Color Grading in Video Editing
Before diving into advanced techniques, it's crucial to understand the fundamentals of color grading. This process goes beyond simple color correction, which aims to make footage look natural by adjusting exposure, white balance, and contrast. In contrast, color grading is where the creative aspect comes into play—it gives your film a distinct look and feel, enhancing its emotional and visual narrative.
Color Correction vs. Color Grading
- Color Correction: Adjusts your footage to ensure the colors appear natural and consistent. This includes fixing any lighting imbalances, such as adjusting white balance or exposure, and correcting color inconsistencies across different shots.
- Color Grading: Adds a stylistic touch to your footage. Whether you want a cinematic, vibrant, moody, or bright tone, color grading allows you to evoke the intended emotional response in your audience.
Pro Tip: Always start with color correction before moving to color grading. A well-corrected image serves as the foundation for creating visually stunning footage.
Color grading is only one part of the post-production workflow. This complete guide to video editing and post-production explains how color correction, grading, sound design, and final exports work together to create professional-quality videos.
Step 2: Choosing the Best Color Grading Software for Video Editing
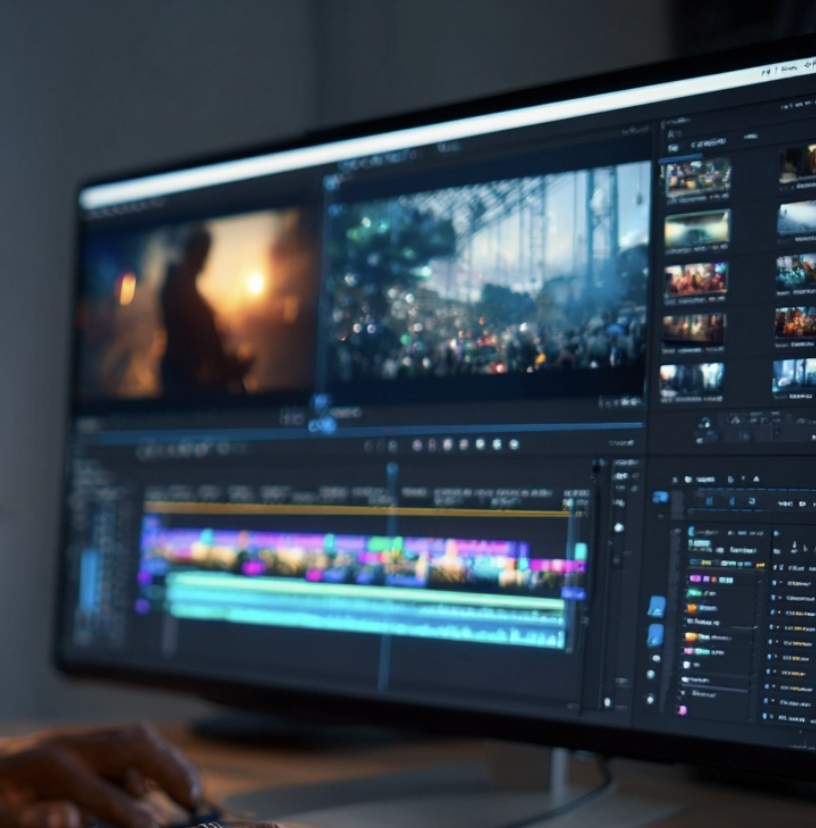
The right software is critical for mastering color grading. Although many video editing programs come with built-in color grading features, a few industry-standard tools dominate the professional video editing world. Here’s a look at the top three:
- DaVinci Resolve
DaVinci Resolve is known for its superior color correction and grading capabilities. Used by professional filmmakers, it offers a wide range of advanced tools, making it the go-to choice for editors who want precise control over their grading. Even its free version includes comprehensive features, which makes it an excellent option for beginners. - Adobe Premiere Pro
Adobe Premiere Pro is a favorite among content creators and professionals alike. Its Lumetri Color panel provides powerful color grading tools that are user-friendly for beginners yet sophisticated enough for advanced users. Premiere Pro also integrates seamlessly with Adobe After Effects, giving editors additional flexibility. - Final Cut Pro
Designed specifically for Mac users, Final Cut Pro offers a smooth, efficient workflow with intuitive color grading tools. It may not be as robust as DaVinci Resolve in terms of color features, but its performance, especially on Mac systems, is unparalleled.
Pro Tip: If you're new to color grading, start with DaVinci Resolve’s free version. It includes many features found in the paid version, allowing you to experiment and hone your skills before investing in professional-grade software.
If you’re still deciding which tool to invest time in, this detailed comparison of the best video editing software in 2025 breaks down the strengths of DaVinci Resolve, Premiere Pro, Final Cut Pro, and other popular editors.
Step 3: Understanding Color Wheels and Curves
Color wheels and curves are the backbone of color grading. They allow you to adjust the highlights, midtones, and shadows in your footage with precision, giving you full control over the visual tone of your project.
Color Wheels
Color wheels let you manipulate specific parts of your image:
- Shadows: Adjust the darkest areas of your video, giving depth to your images.
- Midtones: Fine-tune the middle range of your image, ensuring balance and drawing attention to key features.
- Highlights: Make the brightest areas pop without losing critical details.
Curves
Curves allow for more nuanced adjustments in exposure and color balance. They enable you to tweak contrast and brightness in specific areas of your footage, which can bring life to otherwise flat visuals.
- RGB Curves: You can manipulate the red, green, and blue channels individually to create specific color effects, such as the teal-and-orange look often seen in Hollywood blockbusters.
- Luminance Curves: These control the brightness and contrast of your footage, allowing for subtle or drastic changes.
Example: For a classic cinematic look, you can use the orange-teal color grading technique by warming up the highlights and pushing the shadows toward a blue tone. This combination helps make skin tones more natural while giving your film a professional aesthetic.
Step 4: Using LUTs (Look-Up Tables) for Quick Color Grading
Look-Up Tables (LUTs) are a powerful tool for achieving a consistent and professional look across your footage. LUTs are essentially color grading presets that apply specific color adjustments to your footage. They are particularly useful when you need to quickly establish a mood or aesthetic in your video.
How to Use LUTs
- Importing LUTs: Most video editing software allows you to import LUTs easily. Once applied, they instantly adjust the colors of your footage to match a pre-defined look.
- Customizing LUTs: While LUTs can be a great starting point, avoid using them straight out of the box. Make adjustments to fine-tune the settings according to the specific lighting, mood, and style of your footage.
Pro Tip: Use LUTs as a baseline and tweak them to match the visual style of your project. Over-reliance on generic LUTs can result in footage that lacks originality or feels out of place in the context of your film.
Step 5: Achieving Natural Skin Tones in Color Grading
One of the biggest challenges in color grading is maintaining natural-looking skin tones while applying creative effects. Skin tones are a crucial element in making your footage look realistic and professional. Misaligned skin tones can make your subject look unnatural, which can distract your viewers.
How to Balance Skin Tones
- Use the Vectorscope: Most color grading software includes a vectorscope, which helps you ensure that skin tones are accurately aligned on the red-yellow axis. This is a crucial tool for adjusting skin tones without affecting the overall color scheme of your video.
- Isolate Skin Tones: Many color grading tools, like DaVinci Resolve’s qualifiers, allow you to isolate skin tones and adjust them independently of the rest of the footage. This way, you can achieve both a stylized look and natural skin tones.
Case Study: Films like Mad Max: Fury Road demonstrate exceptional color grading, where even the bold, vibrant palette doesn’t compromise the natural appearance of skin tones. This careful balance keeps the visuals both exciting and grounded.
Step 6: Mastering Advanced Color Grading Techniques
Once you're comfortable with the basics, it's time to take your color grading to the next level with more advanced techniques. Here’s how to elevate your skills in 2024 and beyond:
1. Using the Right Tools
Stick with industry-standard software like DaVinci Resolve, Premiere Pro, or Final Cut Pro, as they offer advanced grading tools that you’ll need for professional results.
2. Focus on the Basics First
Always start by correcting exposure, white balance, and contrast before diving into more complex color grading. Ensuring that your footage has a natural, well-balanced look is essential before adding any artistic flair.
3. Use Color Wheels and Curves for Precision
Small adjustments in highlights, midtones, and shadows can make a significant difference in your footage’s final look. Mastering the use of color wheels and curves allows for precise control over your visuals.
4. Leverage LUTs but Customize Them
LUTs are great for speeding up your workflow, but don't rely on them alone. Use them as a foundation, and then make adjustments to suit the specific needs of your project.
5. Perfect Skin Tones
The vectorscope plays a crucial role in maintaining natural and consistent skin tones throughout your footage. No matter how stylized your color grade is, always make sure your skin tones remain realistic.
Step 7: Mastering Color Grading Across Genres
There is no universal approach to color grading. Different types of videos and genres require different color grading techniques to achieve the desired mood and tone.
Action Films
Action films often use strong contrasts and cooler shadows to emphasize intensity and drama. You’ll frequently see a lot of teal and orange combinations in these films to create visual excitement and to make key elements, like skin tones, stand out.
Documentaries
Documentaries tend to lean toward neutral color palettes to maintain a sense of realism. Subtle color grading that corrects inconsistencies without introducing strong stylization is often the goal here.
Music Videos
Music videos frequently employ bold, vibrant colors and heavily saturated hues to create a dynamic, high-energy atmosphere. Grading for music videos allows more creative freedom, with an emphasis on visual style over realism.
Step 8: Ensuring Consistency Across Shots
Maintaining a consistent color grade across all shots in your video is essential, especially when working with footage from different cameras or locations. Inconsistent color grading can disrupt the viewer's experience and make your video feel disjointed.
How to Ensure Consistency
- Use Split-Screen Tools: Many editing programs, including DaVinci Resolve, allow you to compare multiple shots side-by-side. This feature helps you match color balance, brightness, and contrast across different scenes.
- Reference Shots: Always have a reference shot that defines the look and feel of your project. Compare all other shots to this reference to ensure consistency throughout your video.
Step 9: Exploring HDR Grading for High-End Productions
High Dynamic Range (HDR) grading is a must for high-end productions that require a wider tonal range and more vivid colors. HDR grading provides more detail in the highlights and shadows, offering greater depth and visual impact.
Getting Started with HDR
- Use HDR-Capable Software: DaVinci Resolve is an industry leader when it comes to HDR grading. It allows you to adjust the dynamic range of your footage, creating a more immersive visual experience.
- Ensure Compatibility: Make sure your editing hardware and monitors are compatible with HDR, as the process requires more advanced equipment for proper calibration and display.
Color grading is also a highly valued professional skill in the video industry. This step-by-step guide to becoming a professional video editor shows how advanced grading techniques can help you stand out and access higher-end projects.
Conclusion: Begin Your Color Grading Journey Today
Mastering color grading is a journey that combines technical skill with artistic vision. Whether you're working on YouTube videos, commercials, or feature films, learning how to manipulate color effectively will set you apart as a professional video editor.
Are you ready to take your color grading skills to the next level? Enroll in Miracamp’s Video Editing Course and learn to create stunning visuals that captivate your audience.
FAQ About Color Grading in Video Editing
What is color grading in video editing?
Color grading is the process of enhancing the visual tone and mood of a video by adjusting its colors, contrast, and brightness. It’s a creative step that goes beyond basic color correction, allowing video editors to give their footage a unique style, such as a cinematic, vibrant, or moody look.
How is color grading different from color correction?
- Color Correction: Focuses on fixing technical issues to ensure the footage looks natural, such as balancing white levels, exposure, and correcting inconsistencies.
- Color Grading: Adds artistic and emotional flair by altering the colors and tones to match the mood or narrative of the video.
Which software is best for color grading?
Some of the best tools for color grading are:
- DaVinci Resolve: Industry-standard software with powerful color grading capabilities.
- Adobe Premiere Pro: A versatile tool for both beginners and professionals.
- Final Cut Pro: Ideal for Mac users looking for seamless performance.
What are LUTs in color grading?
LUTs (Look-Up Tables) are pre-designed color grading presets that can be applied to footage to achieve a specific look or style instantly. They save time and help maintain consistency across videos.
How do I ensure consistent color grading across my video?
- Use tools like split-screen comparison in software such as DaVinci Resolve to compare shots side by side.
- Set a reference shot that defines the look and feel of your video, and match all other footage to this reference.
How can I create cinematic color grading?
To achieve a cinematic look:
- Adjust shadows to cooler tones and highlights to warmer tones for the teal-and-orange effect.
- Use curves and color wheels to fine-tune contrast and balance.
- Rely on tools like DaVinci Resolve or Adobe Premiere Pro for precise adjustments.
What are the essential tools for mastering color grading?
- Color Wheels: Adjust shadows, midtones, and highlights to create balanced visuals.
- Curves: Fine-tune contrast and individual RGB channels for advanced control.
- Vectorscope: Ensures accurate skin tones and color balance.
How do I maintain natural skin tones during color grading?
- Use the vectorscope in your software to ensure skin tones align with the red-yellow axis.
- Isolate skin tones using qualifiers in tools like DaVinci Resolve to adjust them independently from the rest of the footage.
Can beginners learn color grading effectively?
Yes, beginners can learn color grading by starting with free tools like DaVinci Resolve. Tutorials, bootcamps like the Miracamp’s Video Editing Course, and practice with basic techniques such as color correction will help you build your skills over time.
How important is color grading for YouTube videos?
Color grading is essential for YouTube videos to create a professional and visually appealing look. It helps set your content apart, improves viewer engagement, and aligns the visual tone with your brand or message.