In this guide, we’ll dive deep into what keyframes are, why they’re essential, and how you can use them effectively in DaVinci Resolve. From the basics of setting up your first keyframe to advanced techniques like animating multiple attributes and creating layered transitions, this article covers it all. By the end, you’ll be confident in using keyframes to enhance your content and wow your audience.
1. What Are Keyframes and Why Do They Matter?
1.1 What Are Keyframes?
In video editing, a keyframe marks a specific point on your timeline where a change occurs in a property of a clip, such as position, opacity, scale, or color. Keyframes act as anchor points, allowing DaVinci Resolve to calculate the transition between two values, creating smooth animations or effects.
For example, if you want a title to move across the screen, change its size over time, or fade it in and out, keyframes are how you achieve this. The power of keyframes lies in their ability to give you precise control over the timing and movement of elements in your video, allowing you to create smooth transitions, eye-catching animations, and professional-grade effects.
1.2 Why Keyframes Are Essential
Keyframes are indispensable for anyone serious about video editing. Here’s why:
- Dynamic Animations: Bring life to still elements like text, graphics, or video clips by animating their properties.
- Smooth Transitions: Use keyframes to fade, zoom, or pan elements seamlessly for polished visuals.
- Professional Effects: Keyframes allow for precise control over timing and motion, enabling advanced effects like parallax animations or object tracking.
- Efficiency: Once mastered, keyframes save time by automating repetitive tasks, like gradual color adjustments or volume fades.
If you're interested in becoming a professional Video Editor, mastering keyframes is a critical skill that can set you apart in the competitive video editing industry.
2. Getting Started: How to Add Keyframes in DaVinci Resolve
To help you get started with keyframes, we’ll go through a detailed step-by-step guide on how to add, adjust, and manipulate them in DaVinci Resolve. Whether you're a beginner or an experienced editor, these instructions will help you create professional-grade animations and transitions.
2.1 Setting Your First Keyframe
- Open DaVinci Resolve and load your video project.
- Navigate to the Edit Page, the primary workspace for timeline-based editing.
- Select the clip you want to animate and open the Inspector Panel on the top-right of the screen.
- Choose a parameter to animate, such as Position, Zoom, Rotation, or Opacity.
- Click the Keyframe Button (a diamond icon) next to the parameter to set your starting keyframe.
Keyframes are now activated for this parameter, and you'll see a marker on your timeline indicating where the animation begins.
Pro Tip: Always begin with a clear vision for your animation. Define the start and endpoint of your changes to ensure smoother transitions and cohesive storytelling.
2.2 Moving and Adjusting Keyframes
Once your first keyframe is set, it’s time to create the animation:
- Play the clip to identify where you want the change to occur.
- Navigate to that point on the timeline and adjust the parameter (e.g., move the object, change opacity, or zoom in). A new keyframe will automatically be created.
- To reposition a keyframe, click and drag it left or right on the timeline. The spacing between keyframes controls the speed of the transition:
- Farther apart = slower transitions.
- Closer together = faster transitions.
Pro Tip: Zoom in on the timeline by pressing the "+" key to make more precise adjustments to your keyframes. For greater accuracy, use the Keyframe Timeline Editor, which provides a visual representation of all active keyframes.
3. Using Keyframes for Transitions in DaVinci Resolve
Creating smooth transitions is one of the most common and impactful uses of keyframes. Whether you’re working on Instagram Reels, TikTok videos, or professional films, mastering transitions is crucial for professional storytelling.
3.1 Adding Smooth Fades
Fades are a staple of video transitions, allowing for seamless visual flow:
- Fade In/Out: Use the Opacity parameter to gradually introduce or remove elements from your video.
- Add a keyframe at 0% opacity for the starting point.
- Add another keyframe where the opacity reaches 100%.
Fades are particularly effective for creating intros, outros, or transitioning between scenes in vlogs, tutorials, or documentaries.
3.2 Mastering Motion Transitions
Keyframes can also be used to create motion-based transitions, such as zooms, pans, or slides:
- Zooms: Gradually zoom in or out by animating the Zoom parameter in the Inspector. For example:
- Start with a Zoom value of 1.0 (default) at the beginning of the clip.
- Add a second keyframe at the end with a Zoom value of 1.5 to simulate zooming in.
- Pans: Move your subject across the screen by animating the Position parameter. Combine panning with zooming for a parallax effect that adds depth to your transitions.
Pro Tip: For vertical content like Instagram or TikTok videos, ensure your transitions are optimized for a 9:16 aspect ratio. Consider combining pans and zooms to create dynamic storytelling tailored for short-form content.
If you prefer a more automatic option for transitions, learn how to create a professional video crossfade in DaVinci Resolve without manually keyframing opacity.
4. Advanced Keyframe Techniques: Taking Animations to the Next Level
Now that you know the basics of keyframes, let’s explore advanced techniques to give your animations a professional edge.
4.1 Customizing Keyframe Curves
One of the easiest ways to elevate your animations is by adjusting keyframe curves:
- Right-click on a keyframe and select Ease In, Ease Out, or Ease In/Out to smooth the transition.
- Open the Keyframe Graph Editor in the timeline to manually adjust the curve and add more dynamic motion.
Why Use Curves? Smooth curves help create natural-looking animations, like accelerating a zoom or decelerating a pan. For storytelling, these transitions feel less mechanical and more polished.
4.2 Animating Multiple Parameters
For more complex animations, you may want to animate several parameters simultaneously. For instance:
- Use Zoom, Position, and Rotation keyframes to create a spinning zoom effect.
- Combine motion-based keyframes with color grading to create a dramatic mood shift.
To animate multiple parameters:
- Open the Inspector and activate keyframes for each parameter you want to animate.
- Adjust each parameter individually to create layered animations.
Pro Tip: If you’re working on professional projects, like YouTube intros or cinematic trailers, use the Fusion tab in DaVinci Resolve to create advanced motion graphics with multiple layers of keyframes.
4.3 Creating Advanced Transitions with Fusion
DaVinci Resolve’s Fusion tab is a powerhouse for creating intricate transitions, like particle effects or 3D animations.
- Use nodes to control animations at a granular level.
- Pair keyframes with Fusion tools like Glow, Lens Flare, or Motion Blur for cinematic-quality transitions.
For effects that require both tracking and animation, check out our full guide on motion tracking in DaVinci Resolve to combine keyframed elements with tracked motion for ultra-precise results.
5. Best Practices for Efficient Keyframe Editing
- Plan Ahead: Sketch out your animation ideas before diving into keyframe placement.
- Use Keyframe Shortcuts: Save time with shortcuts like Ctrl+K (Windows) or Cmd+K (Mac) for adding keyframes.
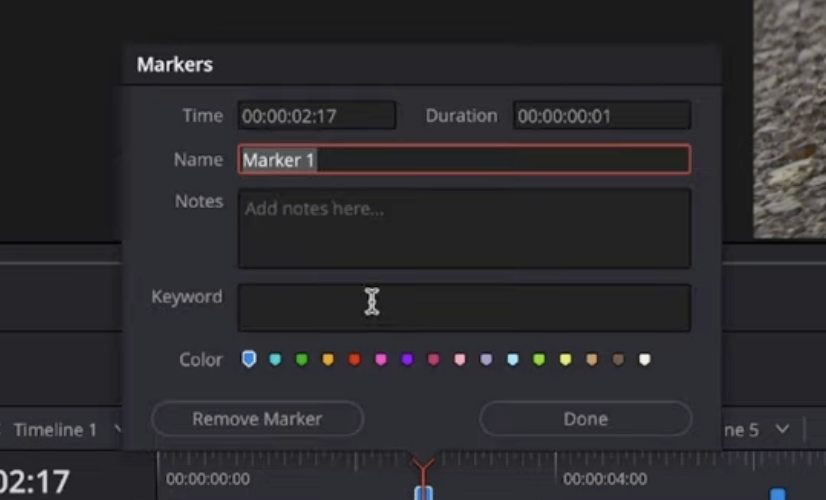
- Stay Organized: Use markers and labels to manage complex projects with multiple layers of keyframes.
To speed up your workflow even further, learn how to copy effects between clips in DaVinci Resolve and reuse your keyframed animations across multiple shots.
6. Real-World Applications of Keyframes
Keyframes aren’t just for professionals—they’re essential for anyone creating social media content, commercials, or personal projects.
- Instagram and TikTok Content: Use keyframes to create trending effects, like zoom transitions or animated text overlays.
- YouTube Videos: Add professional polish to intros, outros, and tutorial highlights using animated effects.
- Music Videos: Sync animations with the beat of the music for rhythmic transitions and engaging visuals.
Conclusion: Take Your Video Editing Skills to the Next Level with Keyframes
Mastering keyframes in DaVinci Resolve unlocks limitless possibilities for creating dynamic, polished video content. Whether you’re working on Instagram Reels, cinematic transitions, or TikTok videos, keyframes are your gateway to professional-level editing.
Ready to elevate your skills? Enroll in the DaVinci Resolve Course today and learn advanced keyframe techniques, transitions, and more from industry experts. Your journey to becoming a pro video editor starts here!
FAQ DaVinci Resolve Keyframes
What are keyframes in DaVinci Resolve?
Keyframes are markers on the timeline that define specific changes in properties like position, opacity, zoom, and rotation. They enable smooth animations and transitions by allowing DaVinci Resolve to interpolate between different values over time.
Why are keyframes important for video editing?
Keyframes allow for precise control over animations, effects, and transitions. They make it possible to create smooth motion graphics, professional-grade effects, and seamless visual storytelling.
How do I add keyframes in DaVinci Resolve?
To add a keyframe, select a clip, open the Inspector panel, and click the diamond icon next to the property you want to animate. Adjust the timeline position and modify the value to create an animation.
How can I adjust keyframes for smoother transitions?
To adjust keyframes, move them along the timeline to control the speed of transitions. Use the Keyframe Graph Editor to apply ease-in and ease-out curves for natural motion.
What’s the difference between linear and eased keyframes?
Linear keyframes create uniform movement between points, while eased keyframes add acceleration or deceleration, making animations appear more natural and polished.
How do I create a zoom transition using keyframes?
Set a keyframe at the beginning of the clip with a default zoom value. Add a second keyframe later in the clip and increase the zoom value to create a gradual zoom effect.
Can I animate multiple parameters with keyframes?
Yes, you can animate multiple properties simultaneously, such as zoom, position, and rotation, to create complex and dynamic animations in DaVinci Resolve.
How do I remove or edit keyframes in DaVinci Resolve?
To remove a keyframe, navigate to the Inspector panel and click the keyframe icon again to delete it. To edit, move the keyframe on the timeline or adjust its value in the properties panel.
What is the best way to smooth animations in DaVinci Resolve?
Using the Keyframe Graph Editor, apply ease-in and ease-out adjustments to keyframes. This prevents abrupt motion and creates more fluid animations.
How do I use keyframes for text animations?
Select a text clip, open the Inspector panel, and animate properties like position, opacity, and scale. Use keyframes to make text fade, move, or zoom dynamically.
Can I create professional transitions with keyframes?
Yes, keyframes allow you to create custom transitions like fades, zooms, and pans. You can fine-tune these effects to match the pacing and style of your video.
What is the Fusion tab used for in DaVinci Resolve?
The Fusion tab is used for advanced motion graphics and visual effects. It allows you to use nodes to create complex animations, particle effects, and cinematic transitions.
How do I speed up keyframe editing in DaVinci Resolve?
Use shortcuts like Ctrl+K (Windows) / Cmd+K (Mac) to add keyframes quickly. Zooming into the timeline and organizing layers can also improve workflow efficiency.
What are the best practices for using keyframes in video editing?
Plan animations in advance, use easing for smoother motion, and manage keyframes efficiently with markers and labels. These practices help streamline editing and improve results.


