

Shaky footage can ruin the quality and professionalism of your video projects. Whether it's from handheld filming, action shots, or unsteady camera equipment, stabilizing shaky videos is essential to achieving polished and professional results. Adobe Premiere Pro’s Warp Stabilizer tool makes stabilizing shaky video quick, easy, and effective.
Stabilize Your Shaky Videos: Tutorial
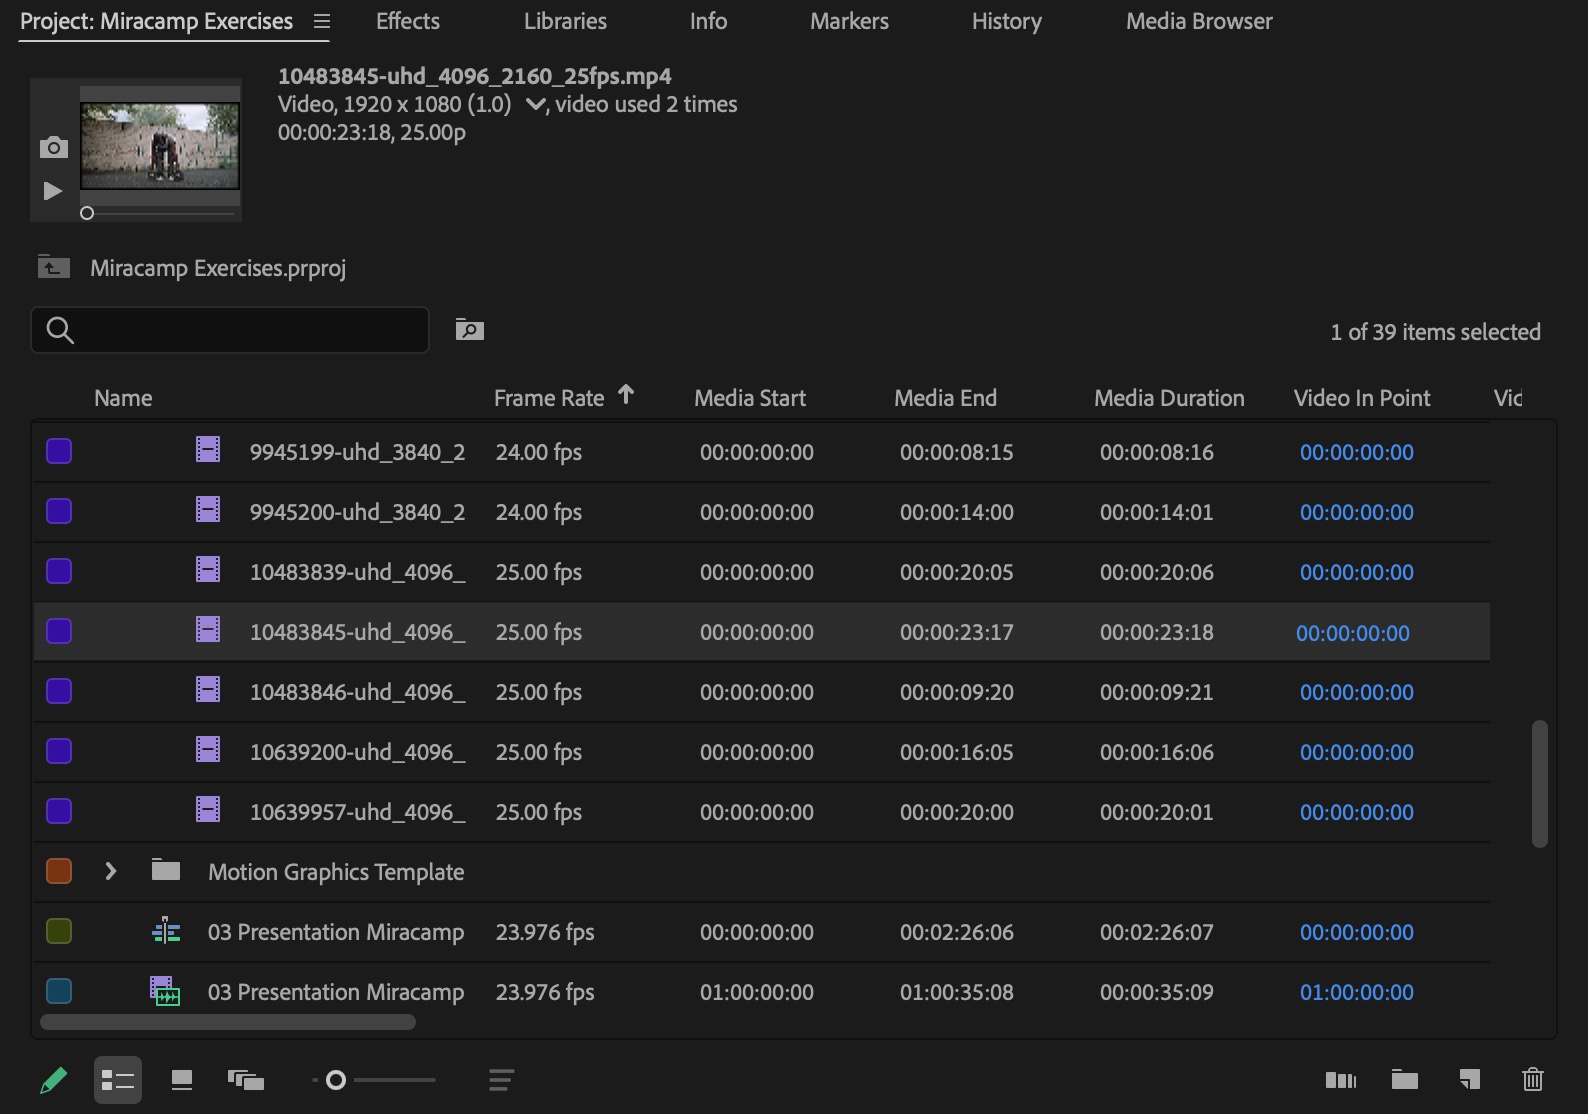
Step 1: Import Your Shaky Footage
Before stabilizing, ensure your footage is ready for editing.
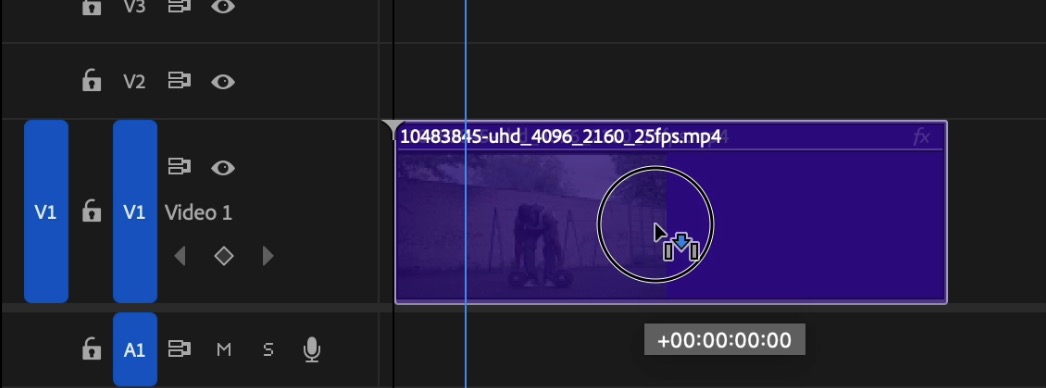
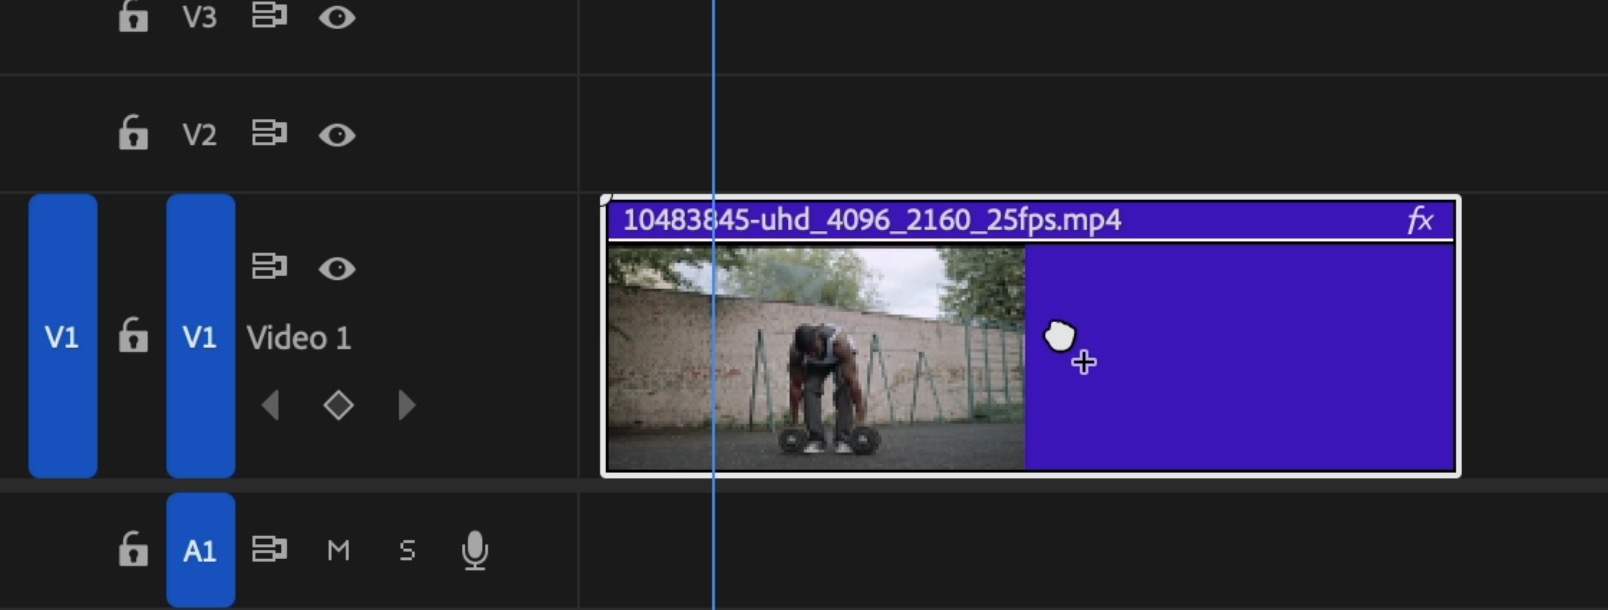
Step 2: Apply the Warp Stabilizer Effect
The Warp Stabilizer effect is the key tool for stabilizing video in Premiere Pro. Follow these steps:
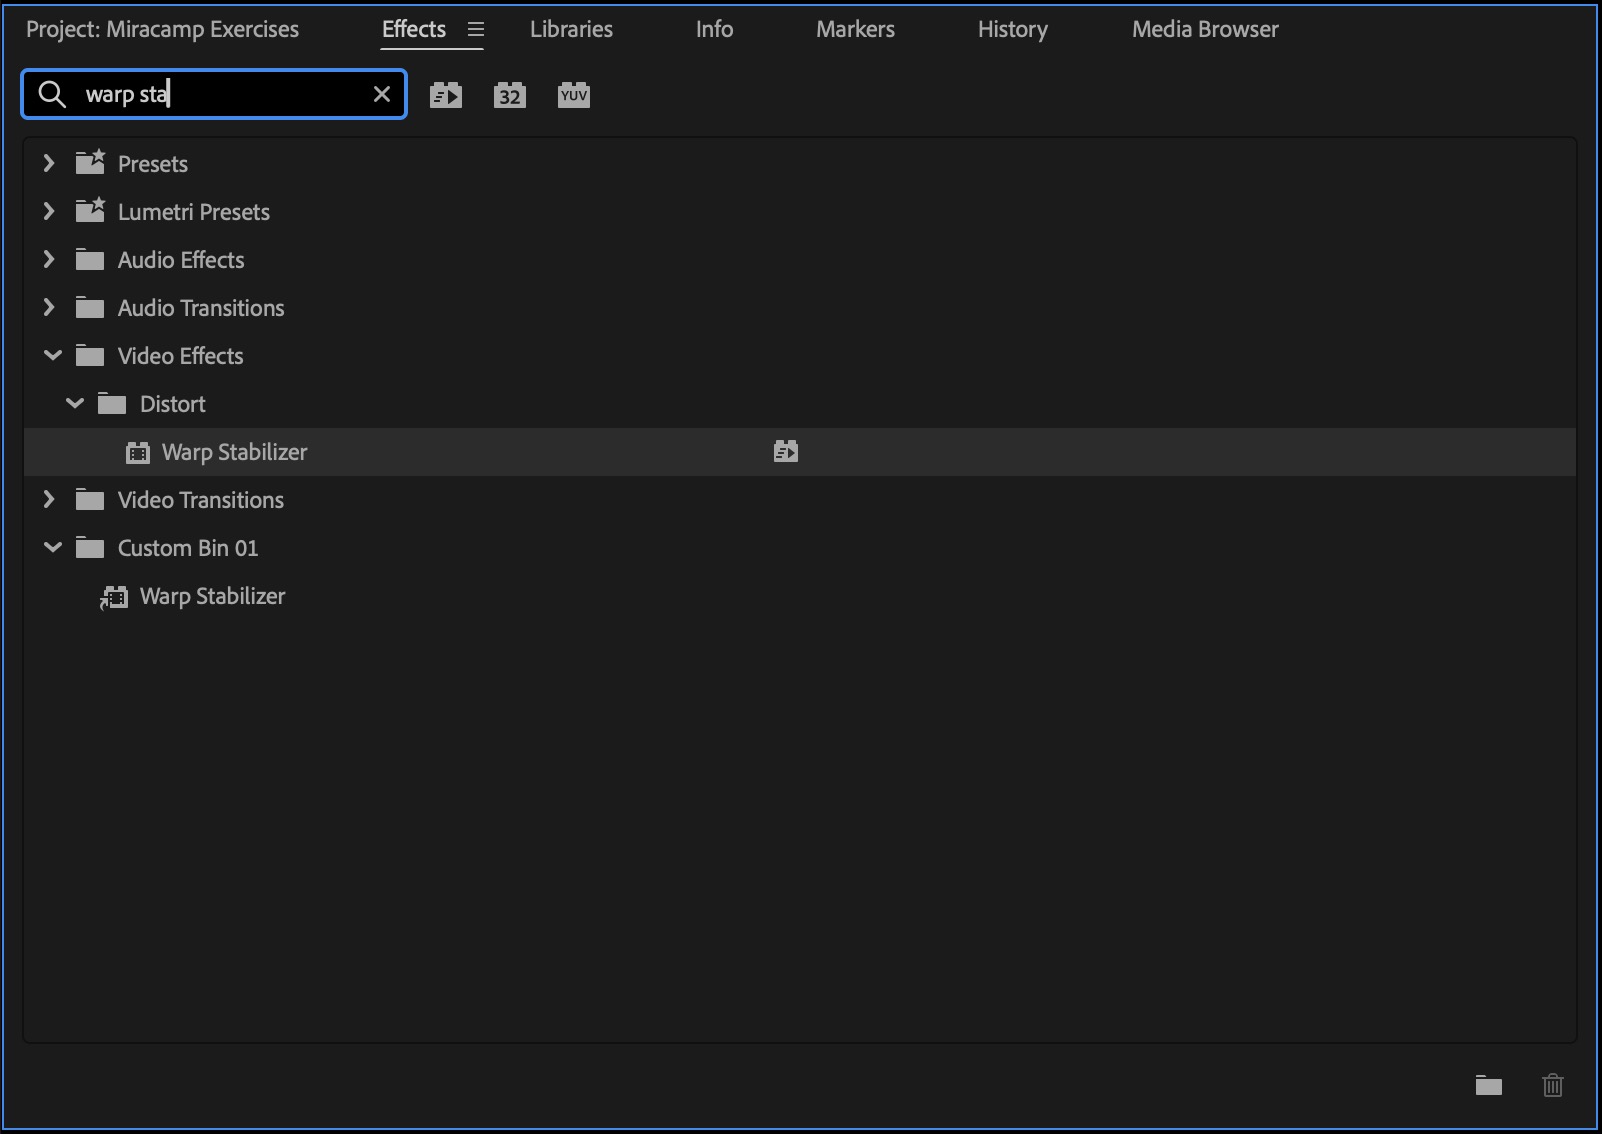
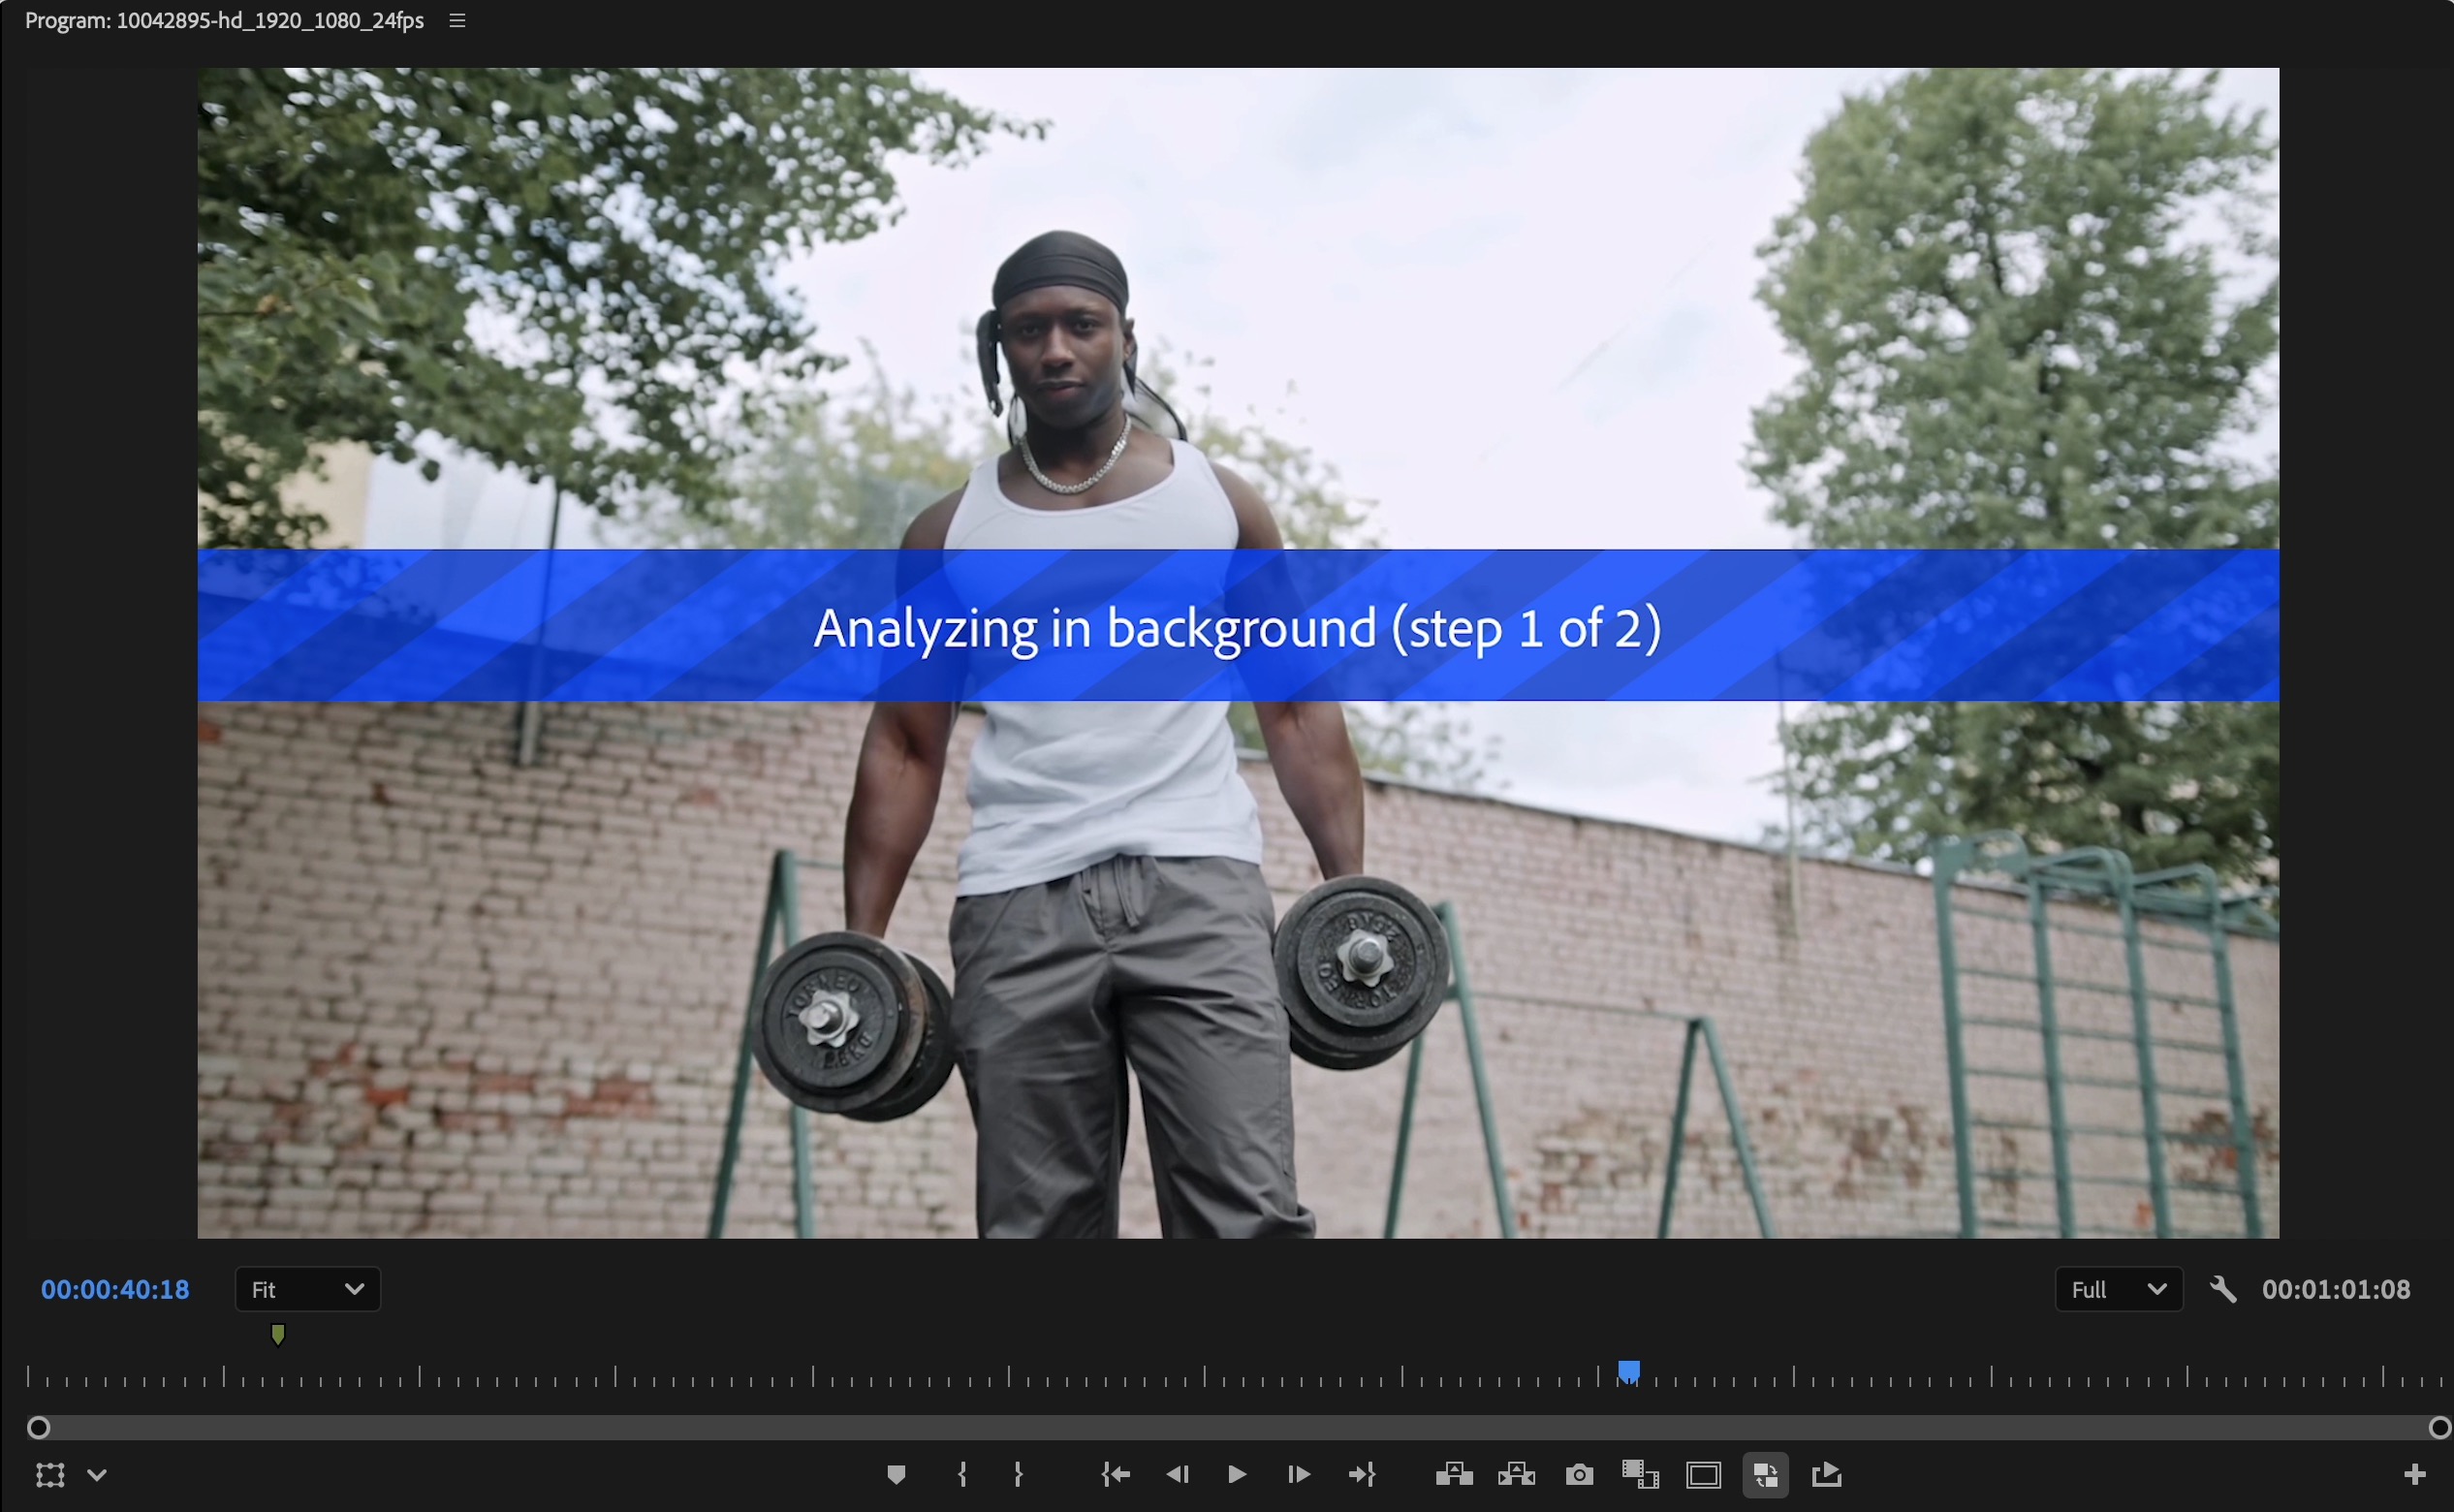
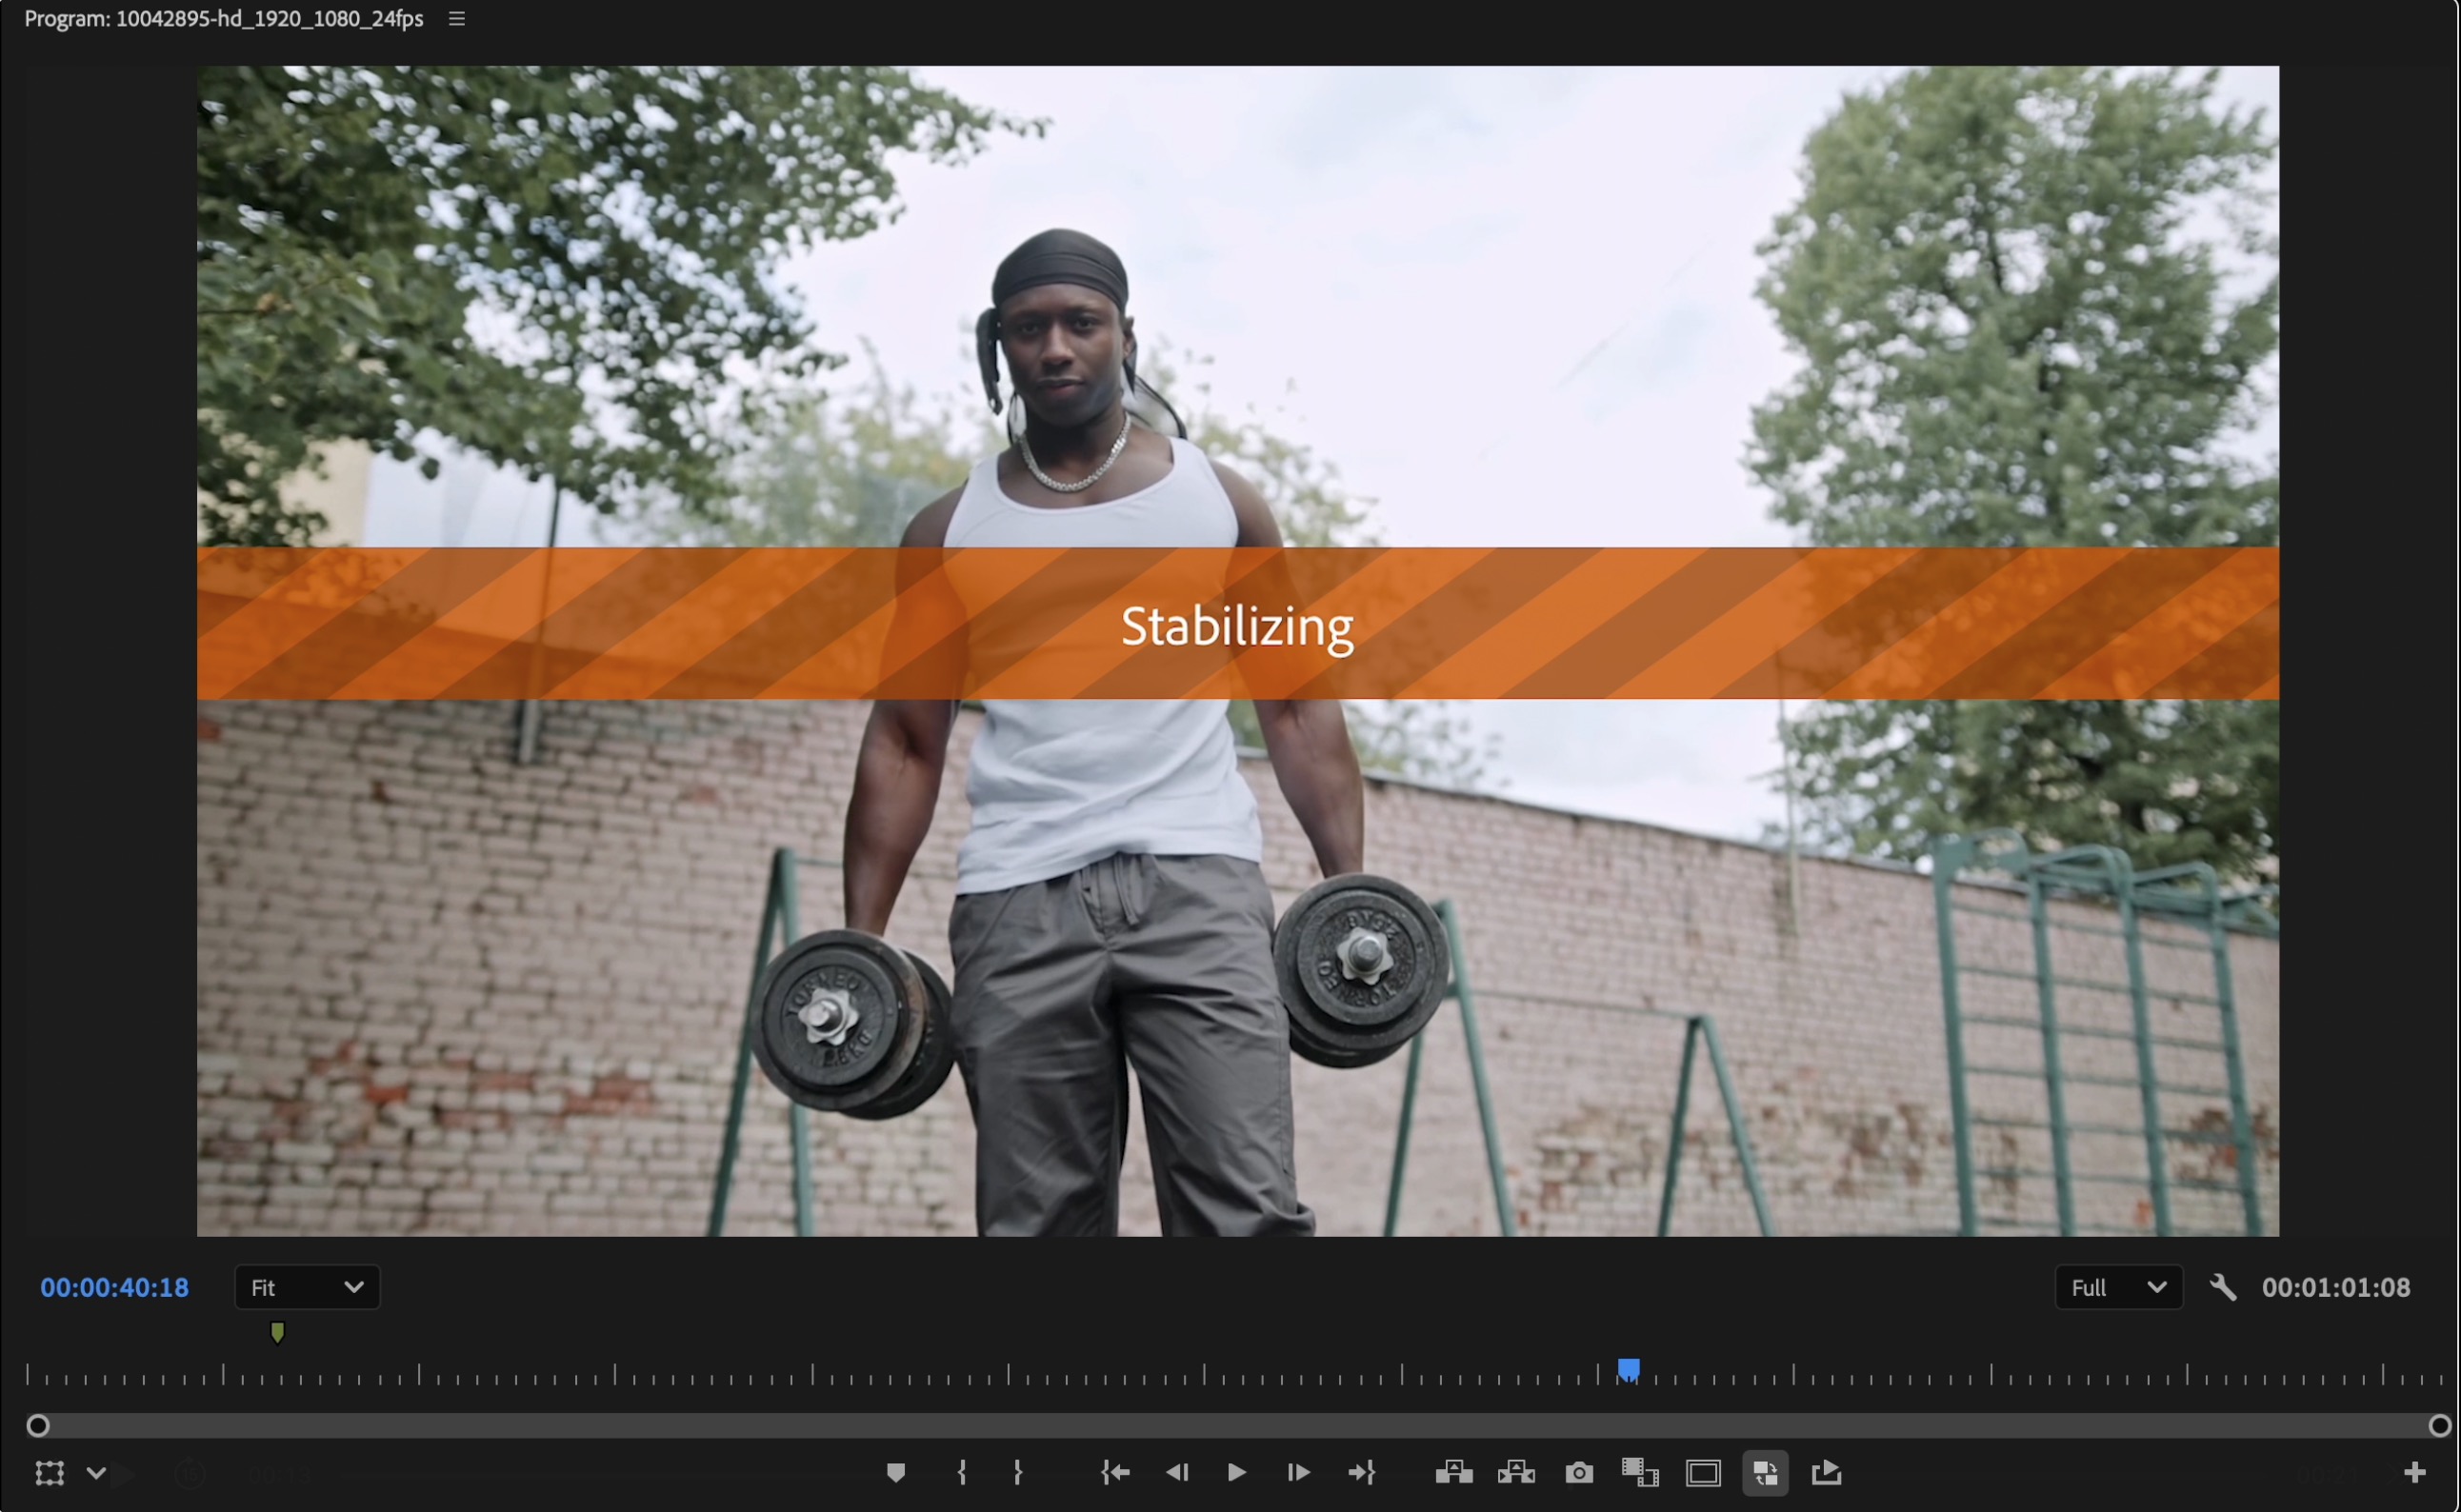
Step 3: Let Warp Stabilizer Analyze Your Footage
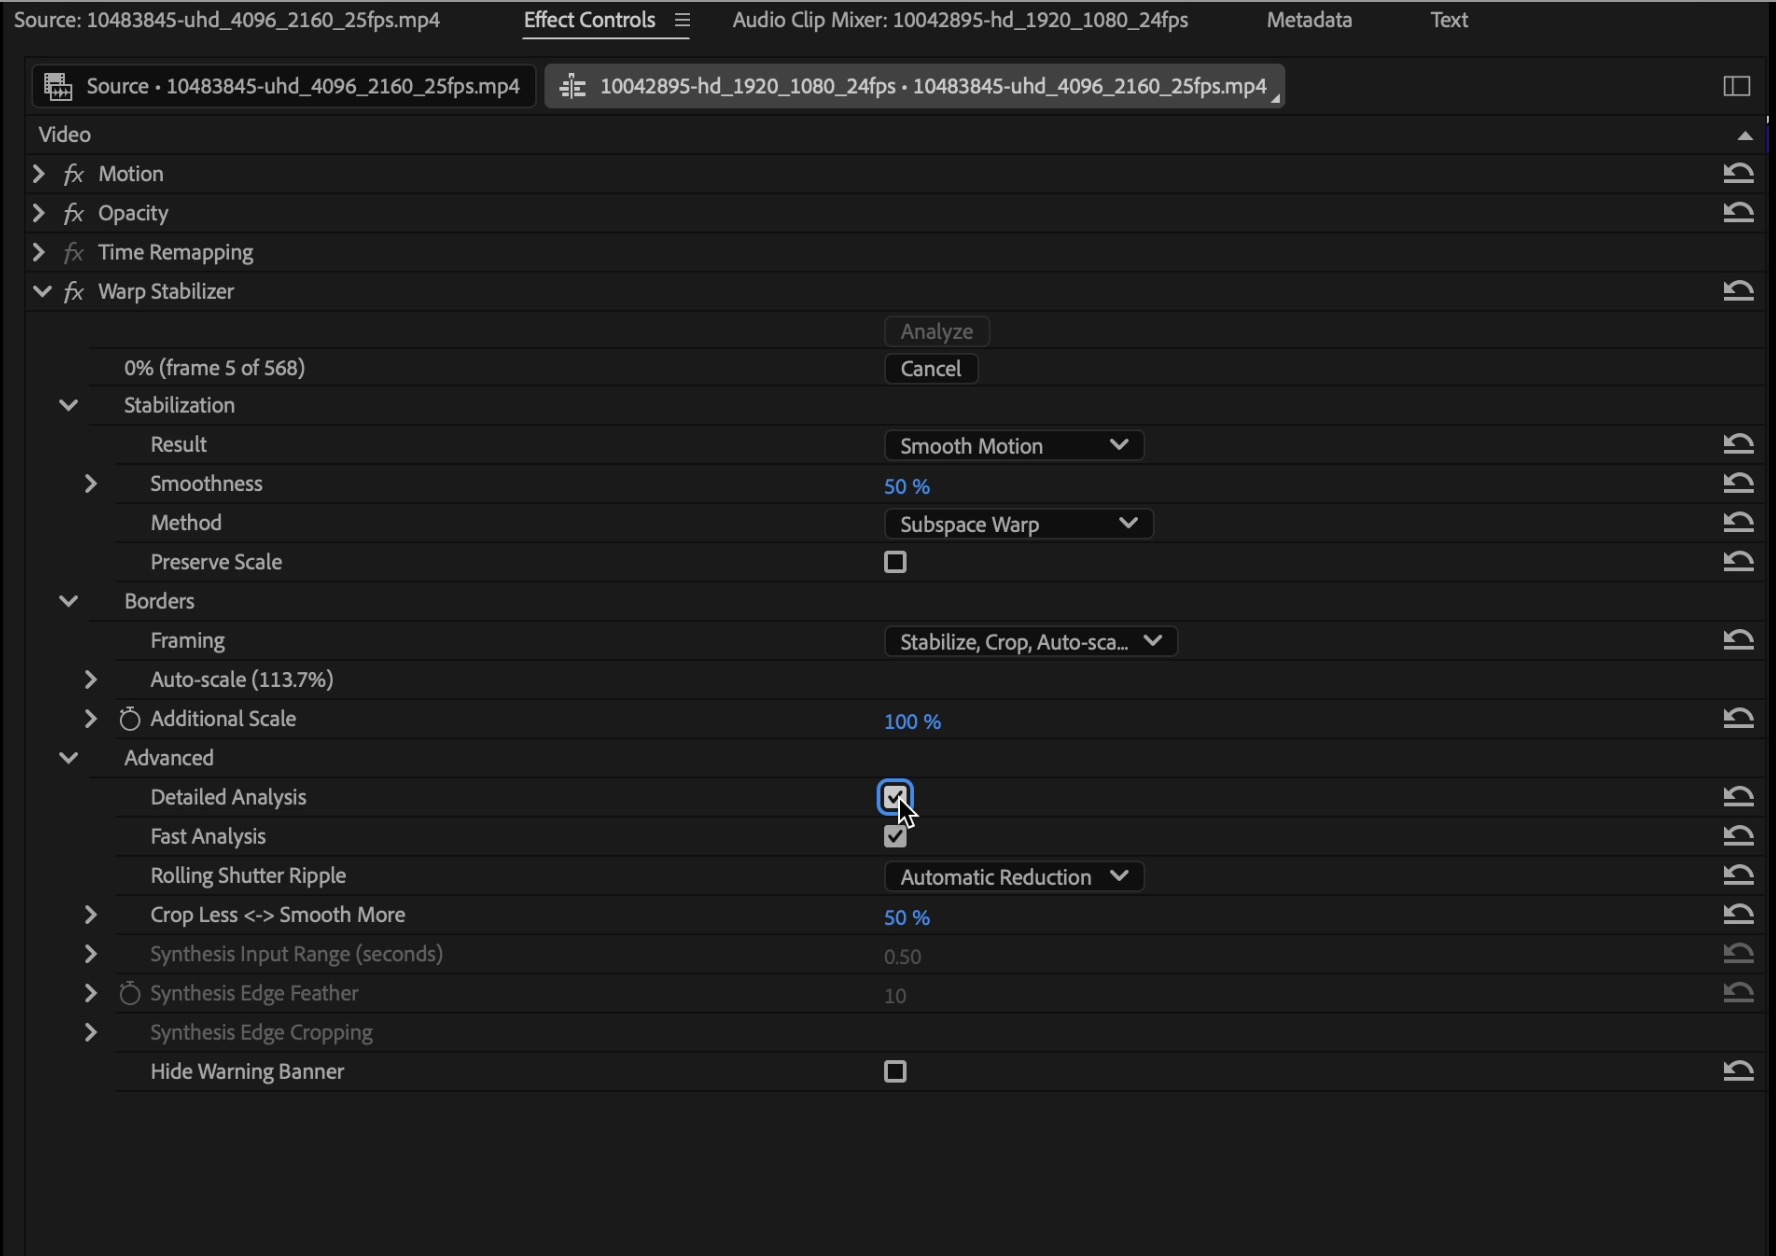
After applying Warp Stabilizer, Premiere Pro will automatically analyze the footage.
Step 4: Fine-Tune Warp Stabilizer Settings
To get the best stabilization results, you may need to adjust the Warp Stabilizer settings.
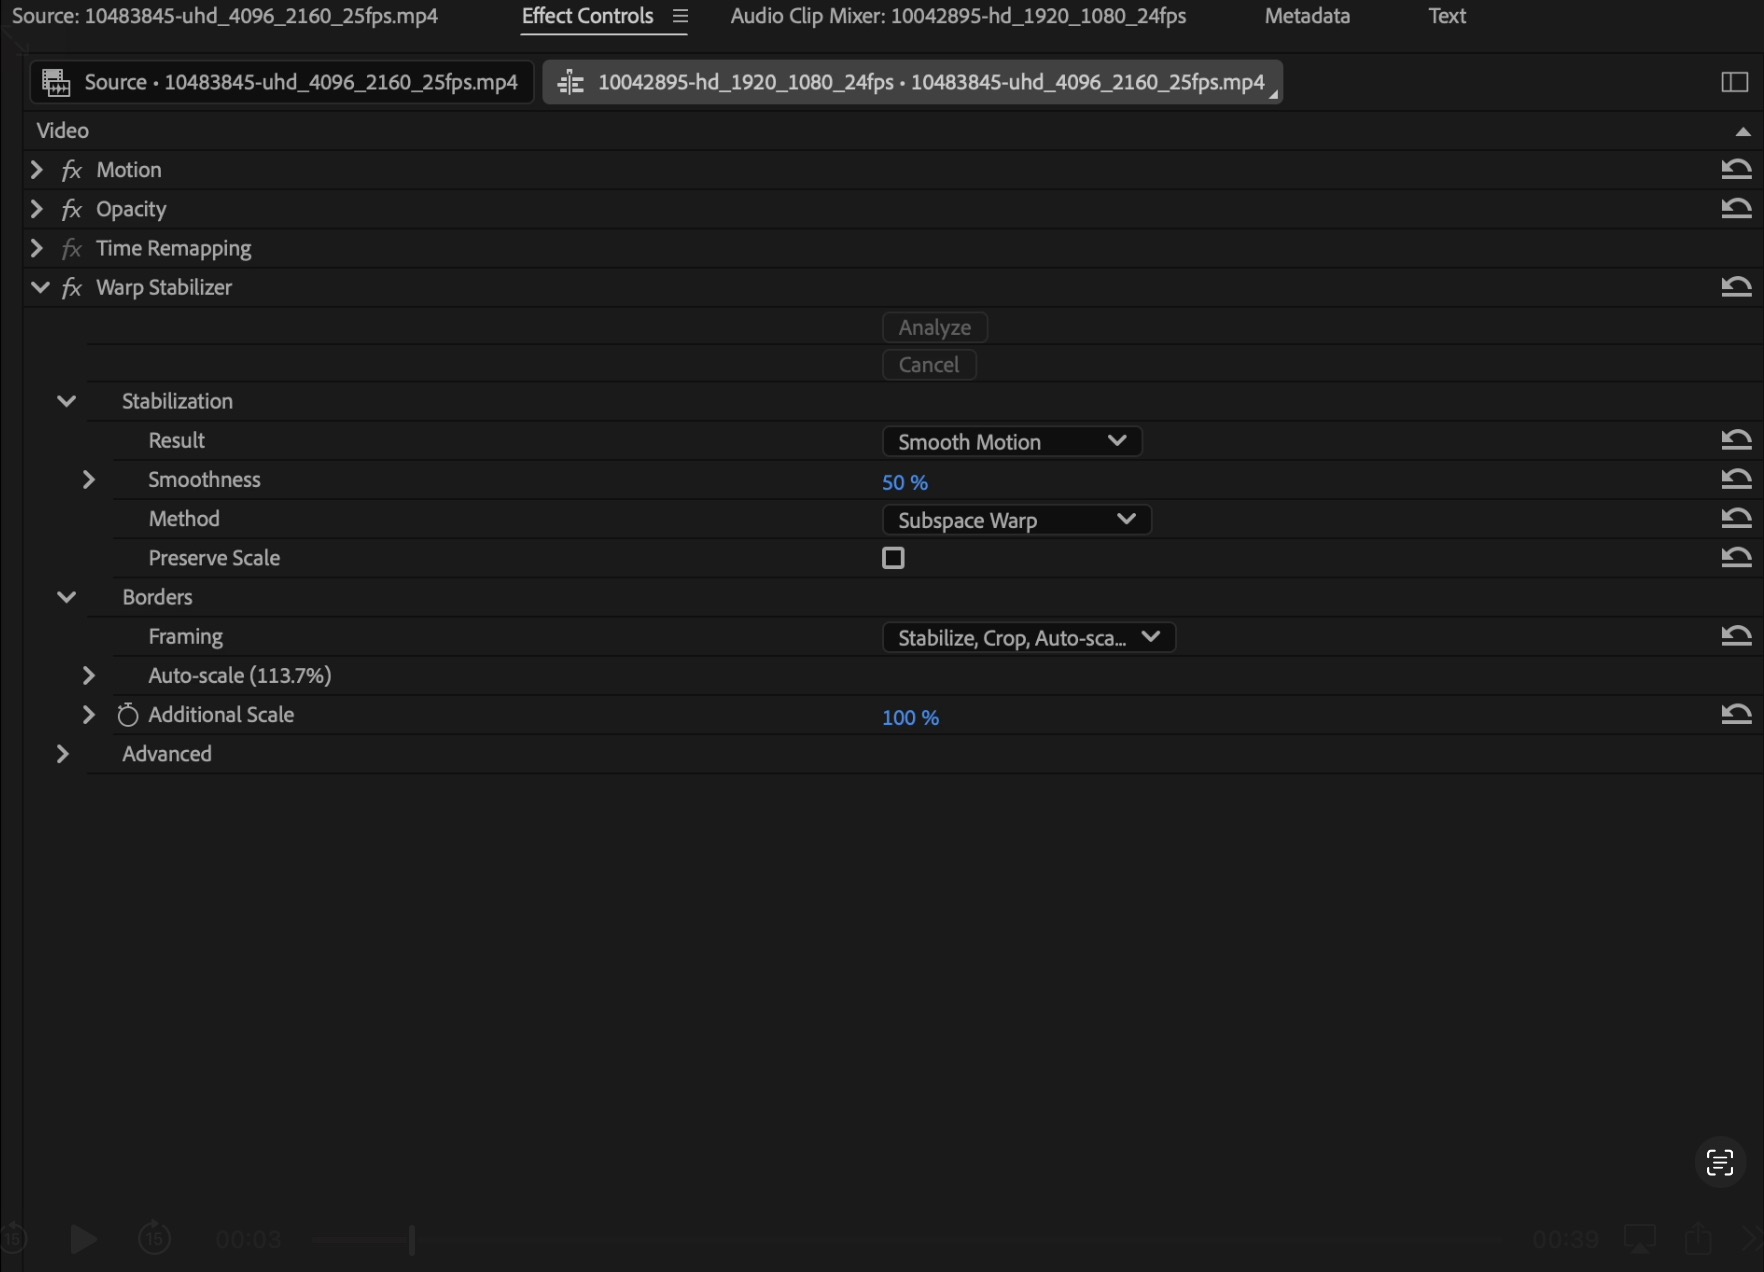

Subspace Warp (default): Best for complex movements.
Position, Scale, Rotation: Use when Subspace Warp causes distortion.
Perspective: Stabilizes clips by mimicking lens correction.
Stabilize, Crop, Auto-Scale (default): Crops the edges and scales up the clip.
Stabilize Only: Retains original edges but may reveal black bars.
Stabilize and Synthesize Edges: Fills in missing areas around the edges but requires more processing power.
Advanced Tips for Stabilizing Shaky Footage
1. Trim Shaky Sections
Before applying Warp Stabilizer, trim excessively shaky or unusable portions of the clip. This reduces processing time and improves the final result.
2. Test Different Stabilization Methods
Experiment with different methods (e.g., Subspace Warp vs. Position, Scale, and Rotation) to find what works best for your footage.
3. Use Motion Blur
Increase the Shutter Angle in the Effect Controls to add realistic motion blur to the stabilized footage, making it appear more natural.
To make your stabilized footage even more natural, consider adding realistic motion blur for smoother perceived movement.
4. Pre-Nest Complex Clips
For multi-layered edits or clips with nested effects, pre-nest the clip before applying Warp Stabilizer. This ensures better stabilization without disrupting other effects.
For scenes where stabilization alone isn’t enough—especially when tracking a moving subject—learn how to enhance your workflow with motion tracking.
Creative Uses for Stabilized Video
Stabilizing shaky footage isn’t just about fixing errors. It’s also a creative tool that can enhance your projects in unique ways:
- Action Sequences: Use Warp Stabilizer to smooth out handheld action shots, making them easier to follow. If you want to creatively reintroduce controlled motion after stabilization, try the camera shake effect for stylized impact shots.
- Cinematic Drone Shots: Stabilize aerial footage for seamless, professional-looking drone videos.
- Focus on Details: Stabilize close-ups to draw attention to fine details or products in your video.
- Time-Lapse and Hyperlapse: Apply Warp Stabilizer to time-lapse or hyperlapse footage to eliminate camera shake and ensure smooth motion.
- Creative Panning Effects: Use stabilization alongside keyframe animation to create intentional panning or zoom effects.
Once your footage is stabilized, you can apply stylized effects like the video to newspaper effect for unique editorial-style visuals.
Conclusion
Stabilizing shaky video in Premiere Pro is a straightforward process with the Warp Stabilizer effect. By following the steps in this guide, you can transform your footage into professional-quality videos with smooth, polished motion. Adjust the settings to suit your needs, and don’t forget to experiment with creative applications to elevate your projects even further.
For more tips on video editing and mastering Premiere Pro’s advanced features, check out Miracamp's Adobe Premiere Pro Course. Whether you’re a beginner or an experienced video editor, our courses are designed to help you achieve your creative goals.
FAQ Stabilizing Video in Premiere Pro
1. How does Warp Stabilizer work?
Warp Stabilizer analyzes the motion in your clip and adjusts it using frame-by-frame stabilization to reduce camera shake.
2. Can I use Warp Stabilizer on 4K footage?
Yes, Warp Stabilizer works on 4K footage, but processing times may be longer depending on your hardware.
3. Why does Warp Stabilizer crop my video?
Warp Stabilizer crops the edges of your clip to compensate for motion adjustments. You can reduce cropping by lowering the Smoothness percentage or using the "Stabilize Only" option.
4. Can I apply Warp Stabilizer to multiple clips at once?
No, Warp Stabilizer can only be applied to individual clips. To stabilize multiple clips, pre-nest them into a single sequence.
5. What should I do if Warp Stabilizer doesn’t work?
Check your clip’s resolution and sequence settings to ensure they match. Use Scale to Frame Size if dimensions are mismatched, then reapply the effect.
By mastering stabilization in Premiere Pro, you'll unlock new creative possibilities and ensure your videos always look polished and professional. Happy editing!


