

Here’s a clear, concise guide to denoising in Premiere Pro and enhancing your audio quality in just a few steps.
✅ Quick Method: Denoise with Premiere Pro Essential Sound Panel
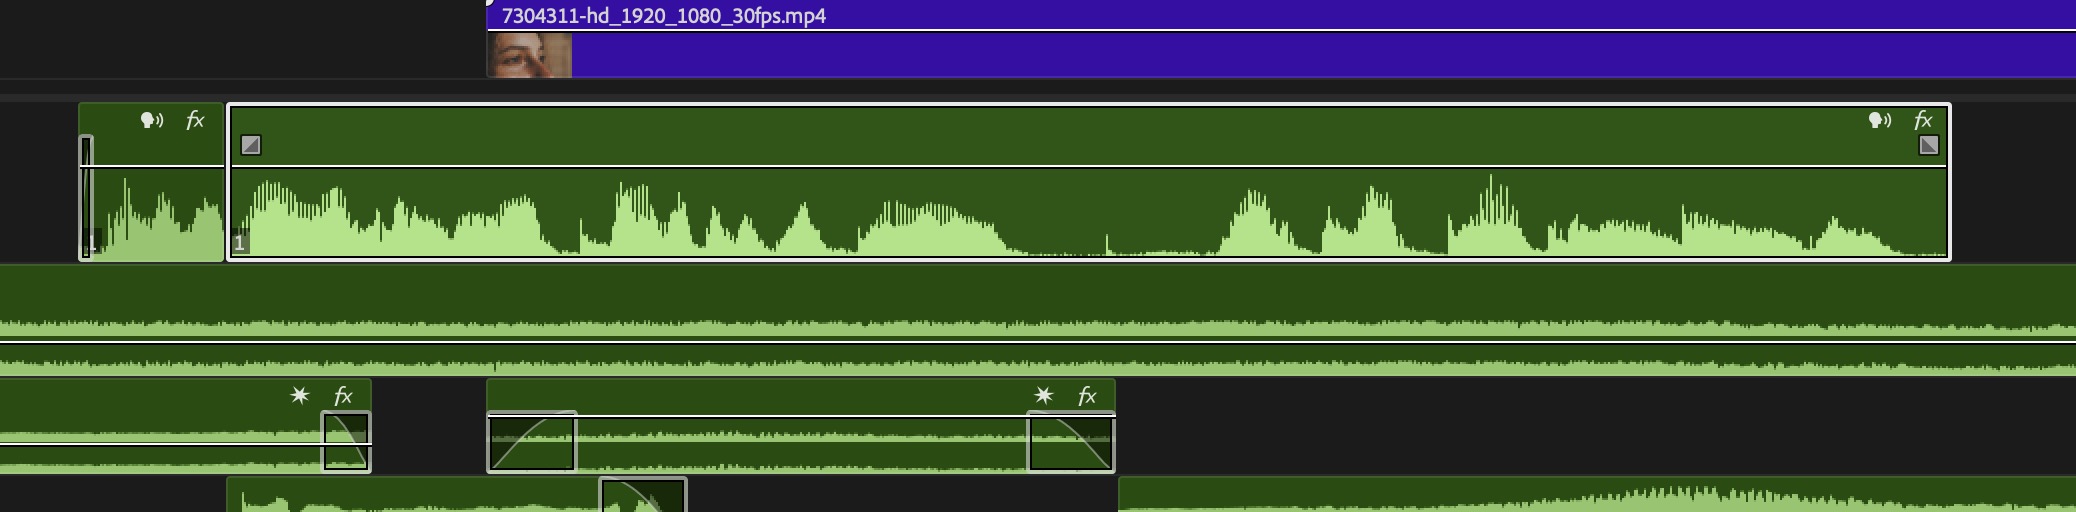
If you're looking for a fast way to clean audio in Premiere Pro, the Essential Sound Panel is your go-to.
Step-by-Step: (5SS)
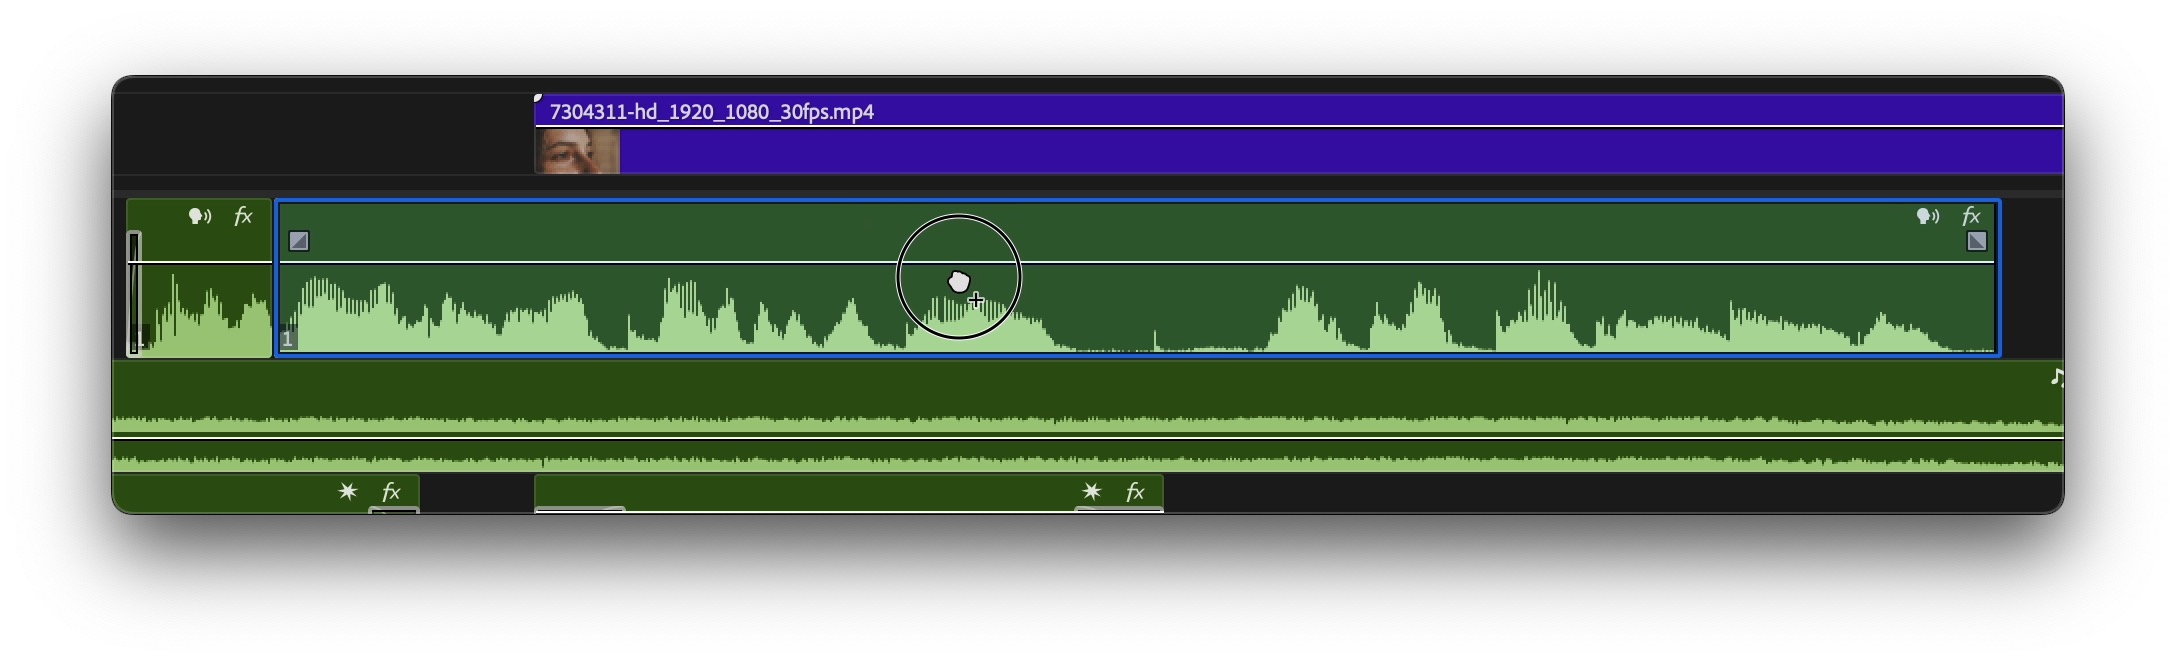
1. Select the audio clip on your timeline.
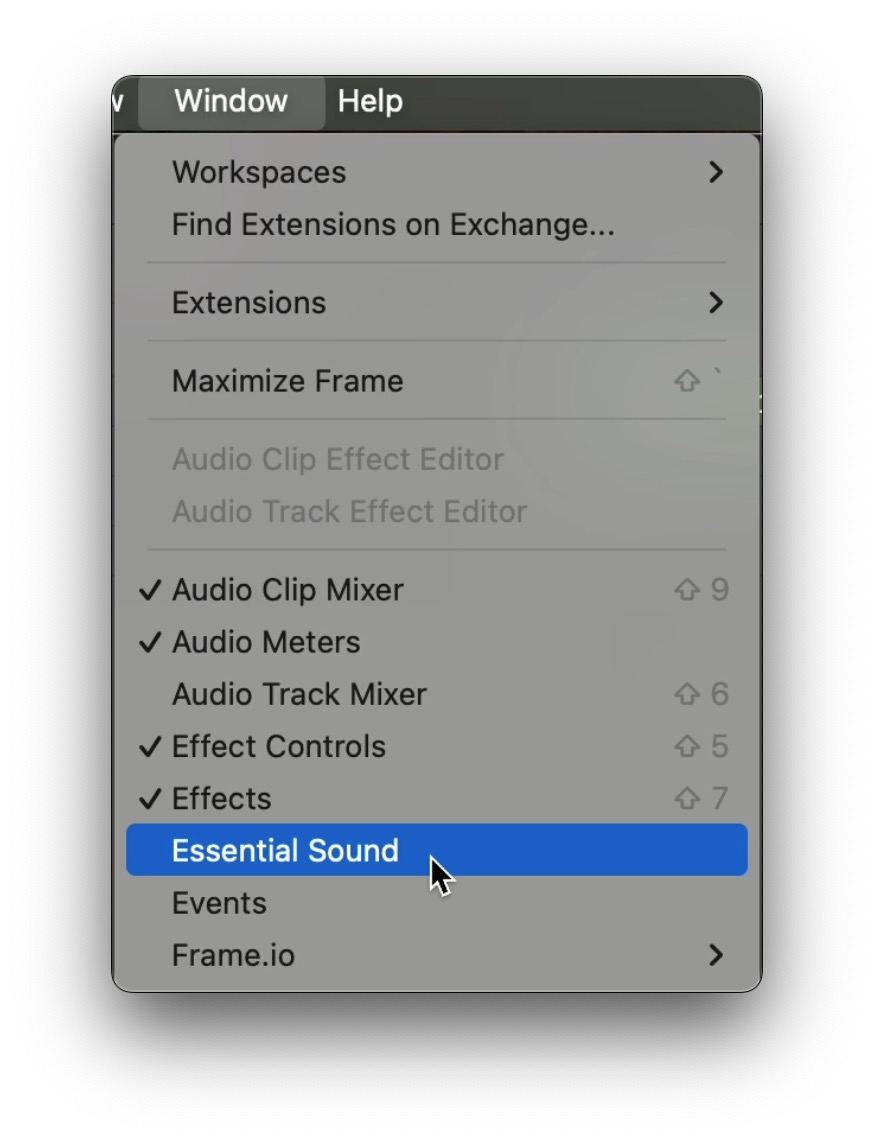
2. Go to Window > Essential Sound to open the panel.
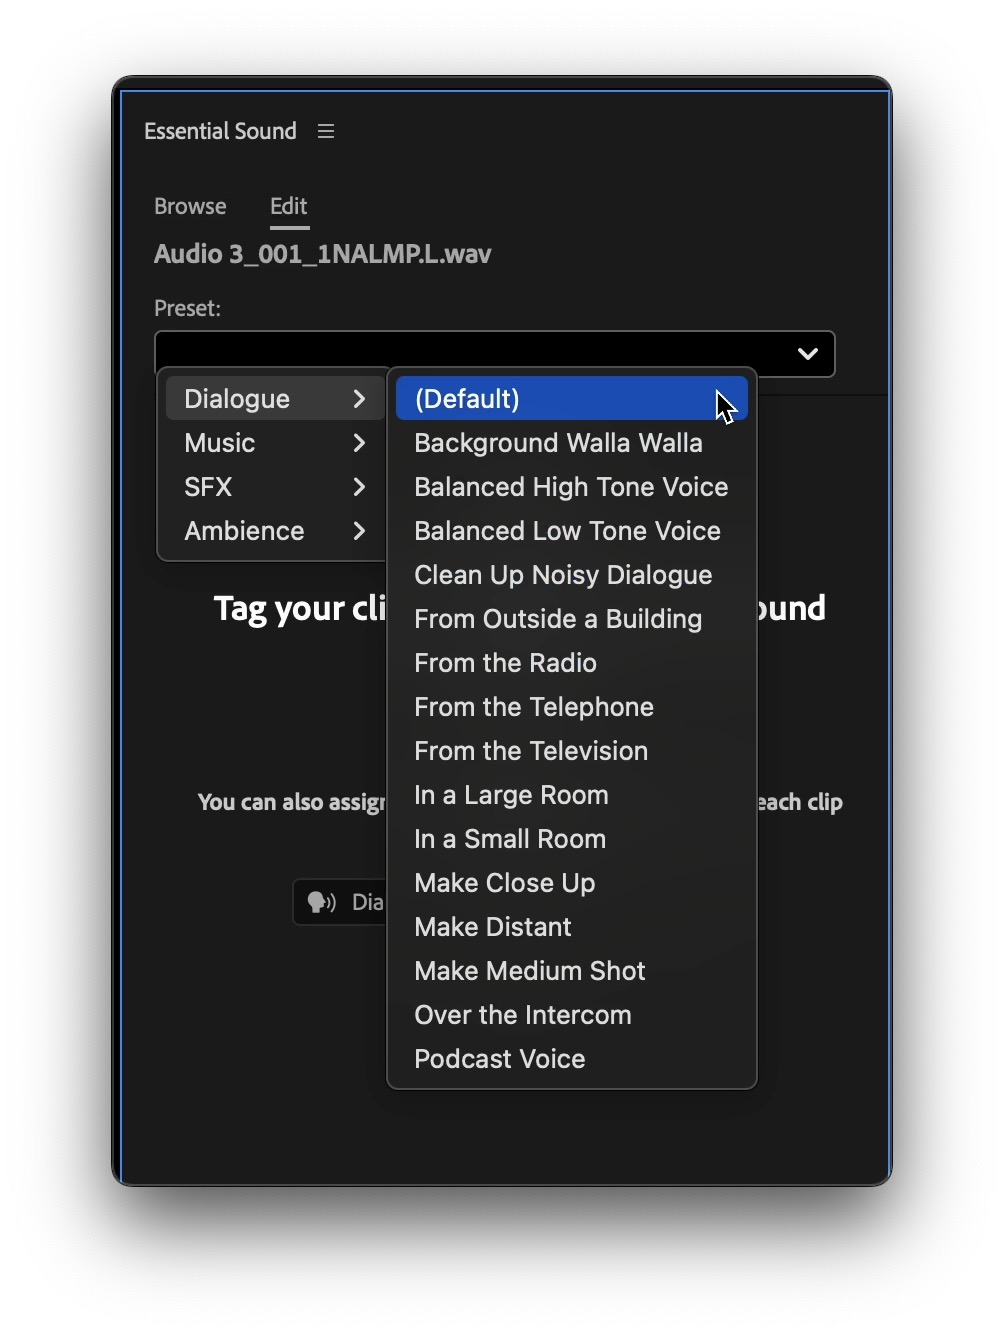
3. Click Dialogue, Music, or Ambience depending on the type of audio.
4. Under the Repair section, enable Reduce Noise.
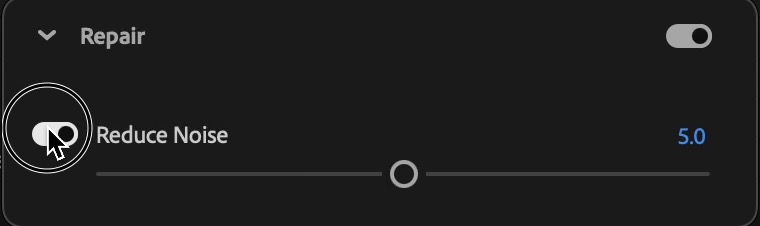
5. Adjust the slider to reduce background noise while preserving clarity.
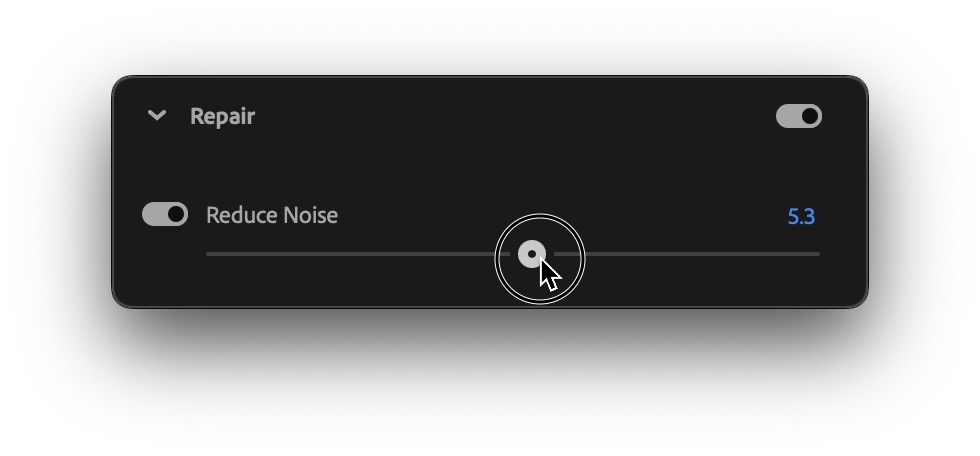
📌 Pro Tip: Start with 3–5 on the slider. Going too high can make audio sound robotic or muffled.
Advanced Method: Use DeNoise in the Effects Panel
For precise audio timing adjustments, you can also learn how to move an audio clip by one frame.
For more control, apply the DeNoise effect manually.
1. Open the Effects panel.
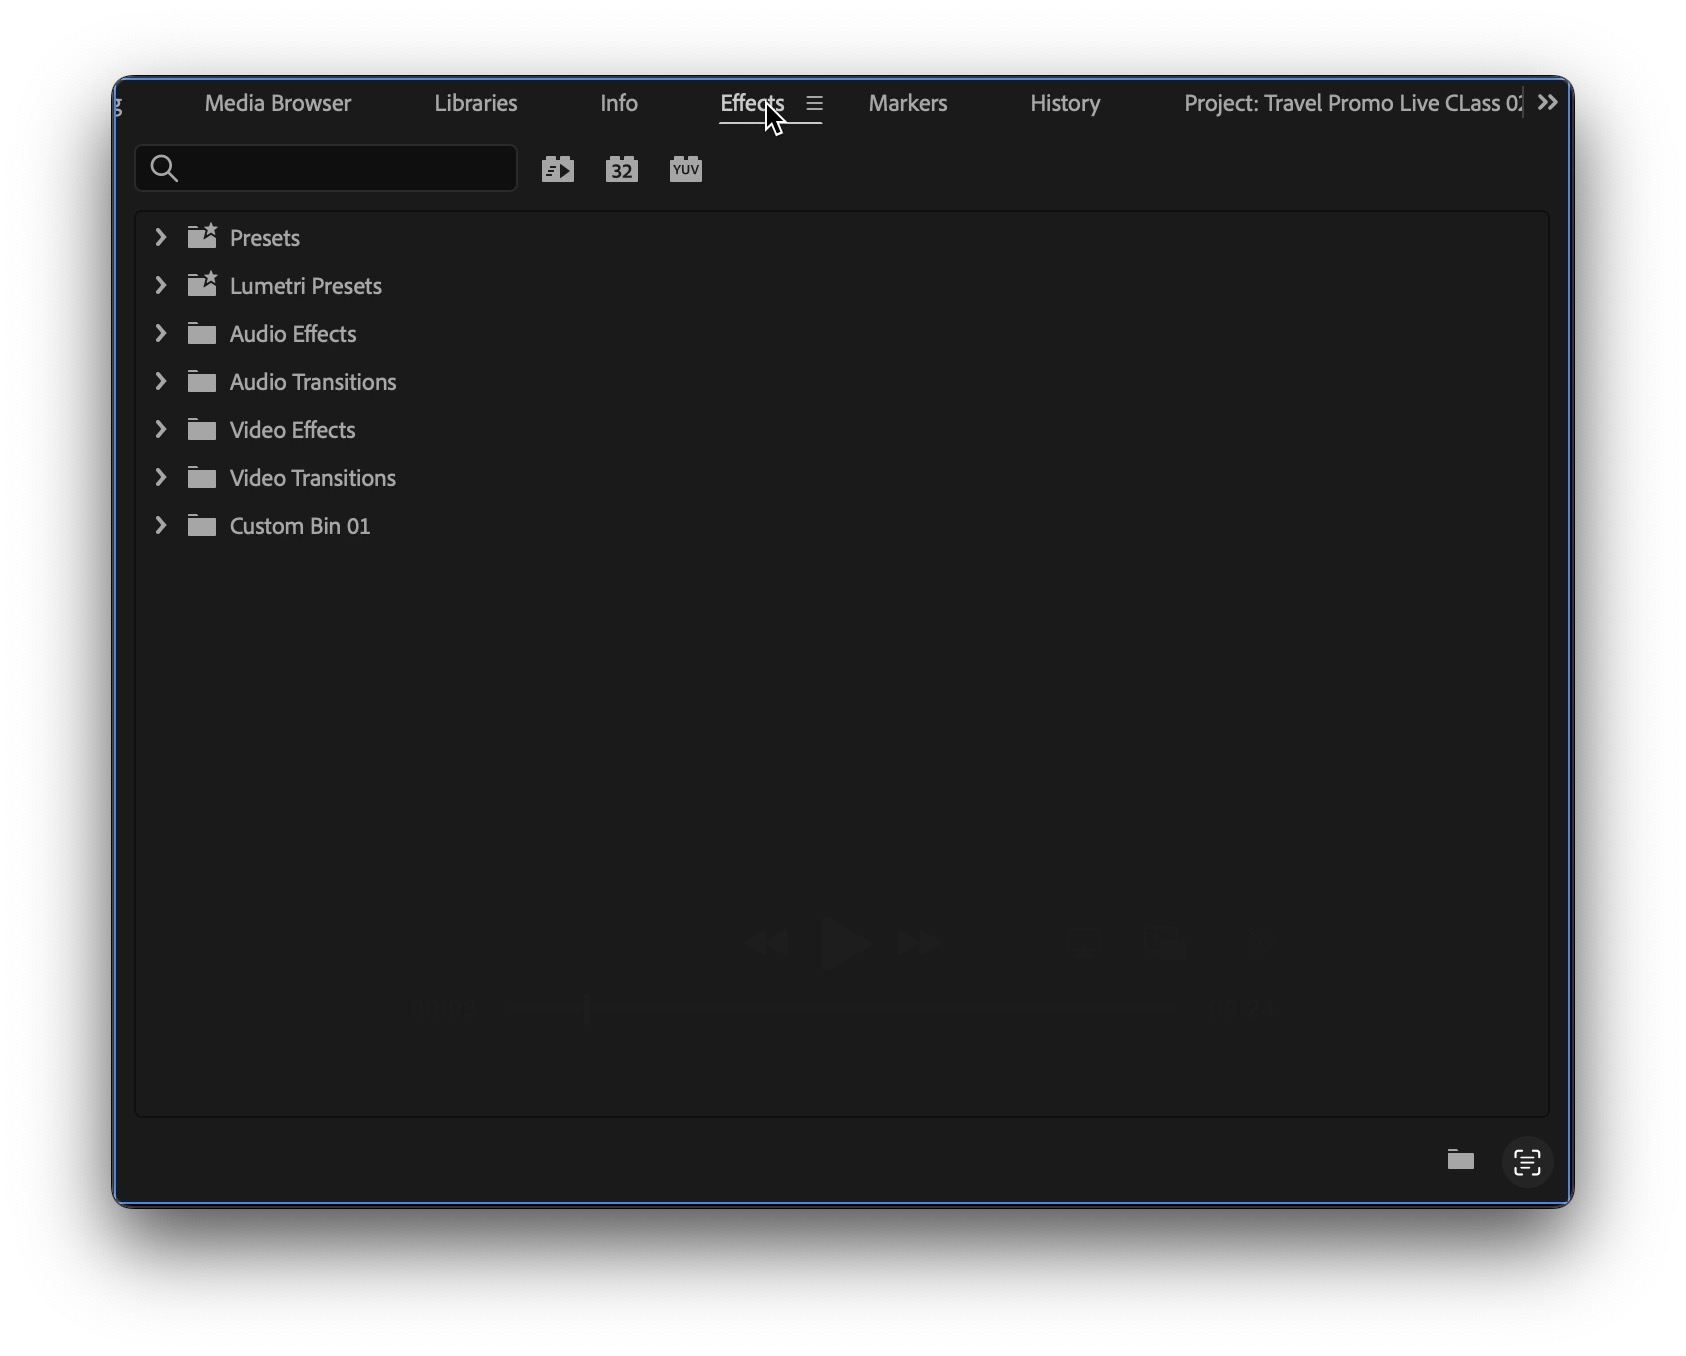
2. Search for DeNoise under Audio Effects.
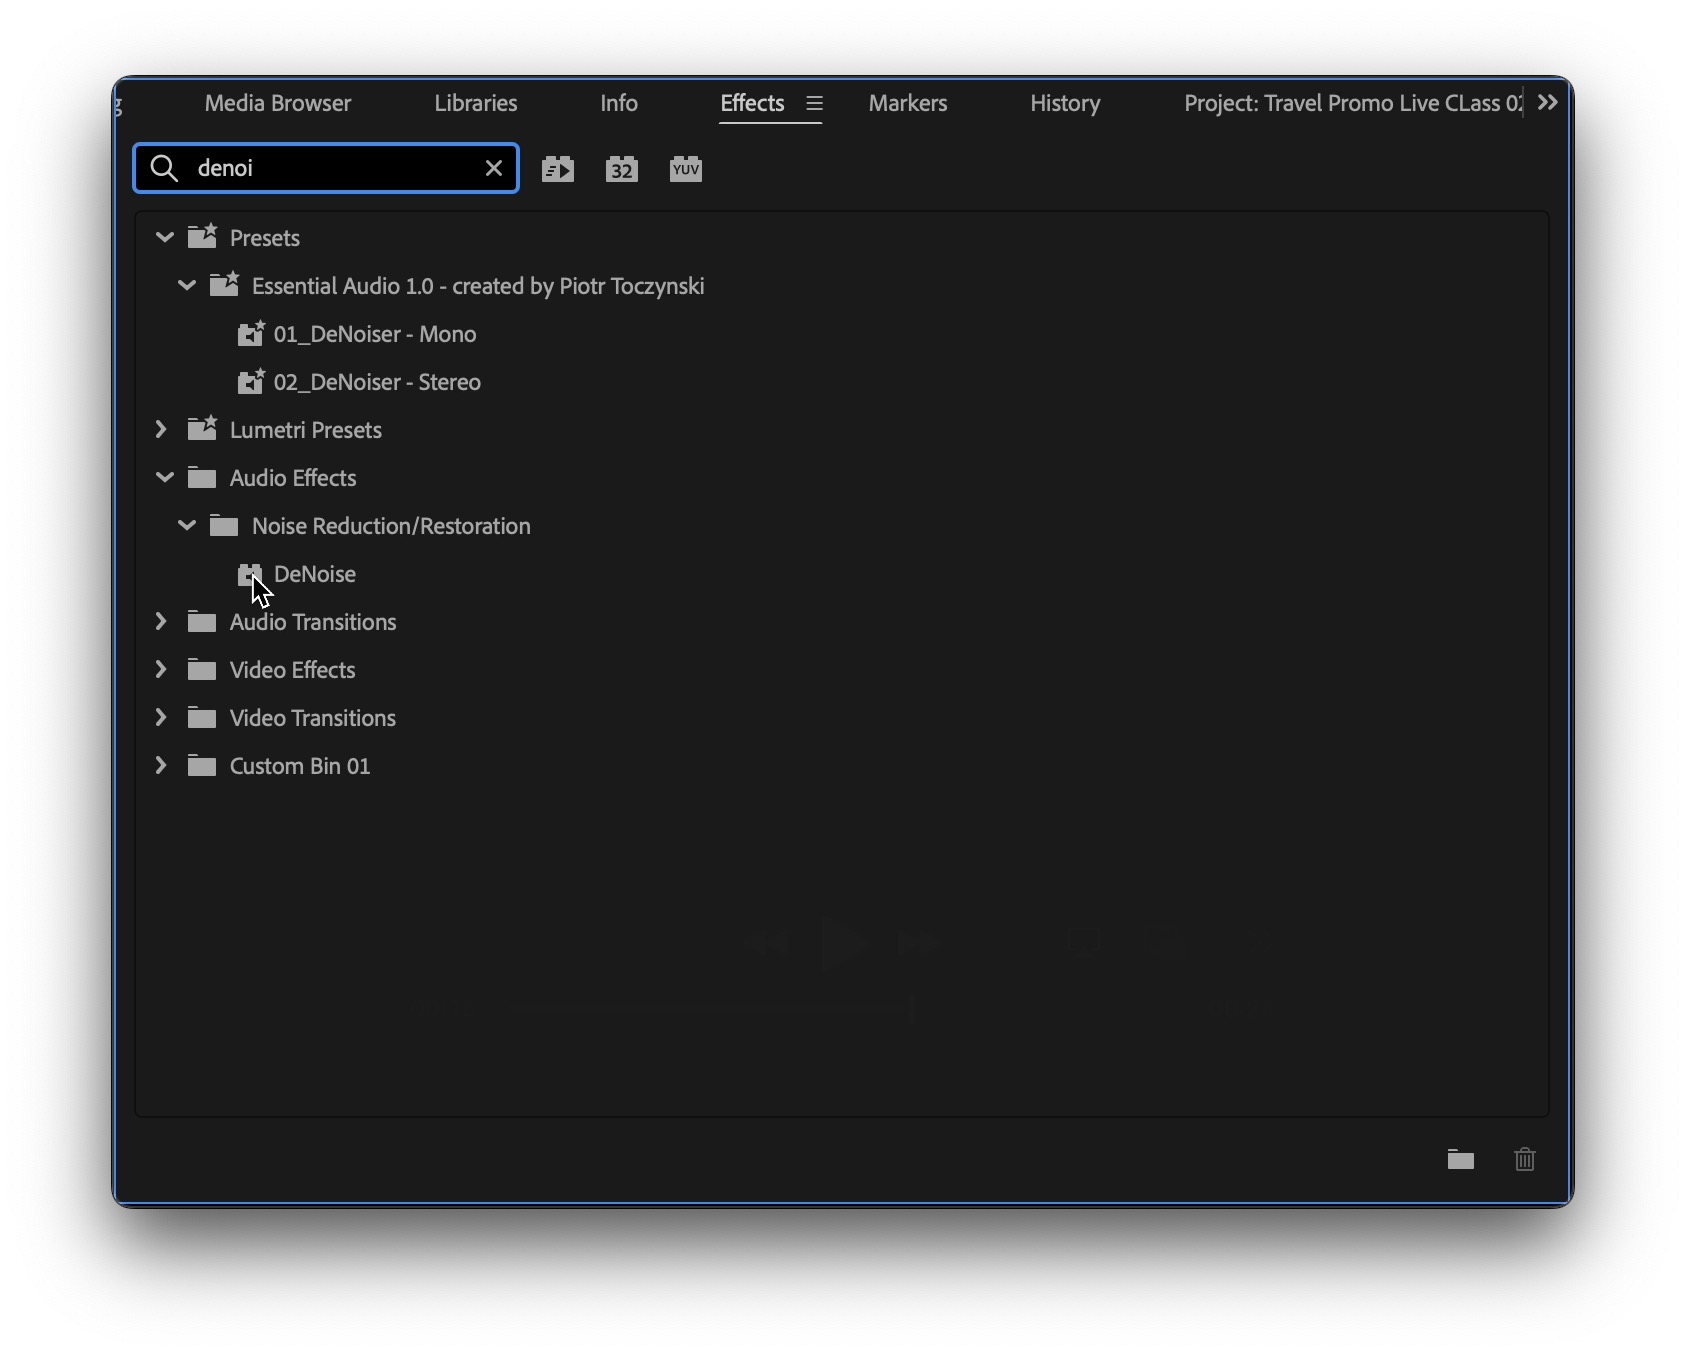
3. Drag and drop it onto your audio clip.
4. Open the Effect Controls panel and click the Edit button under DeNoise.
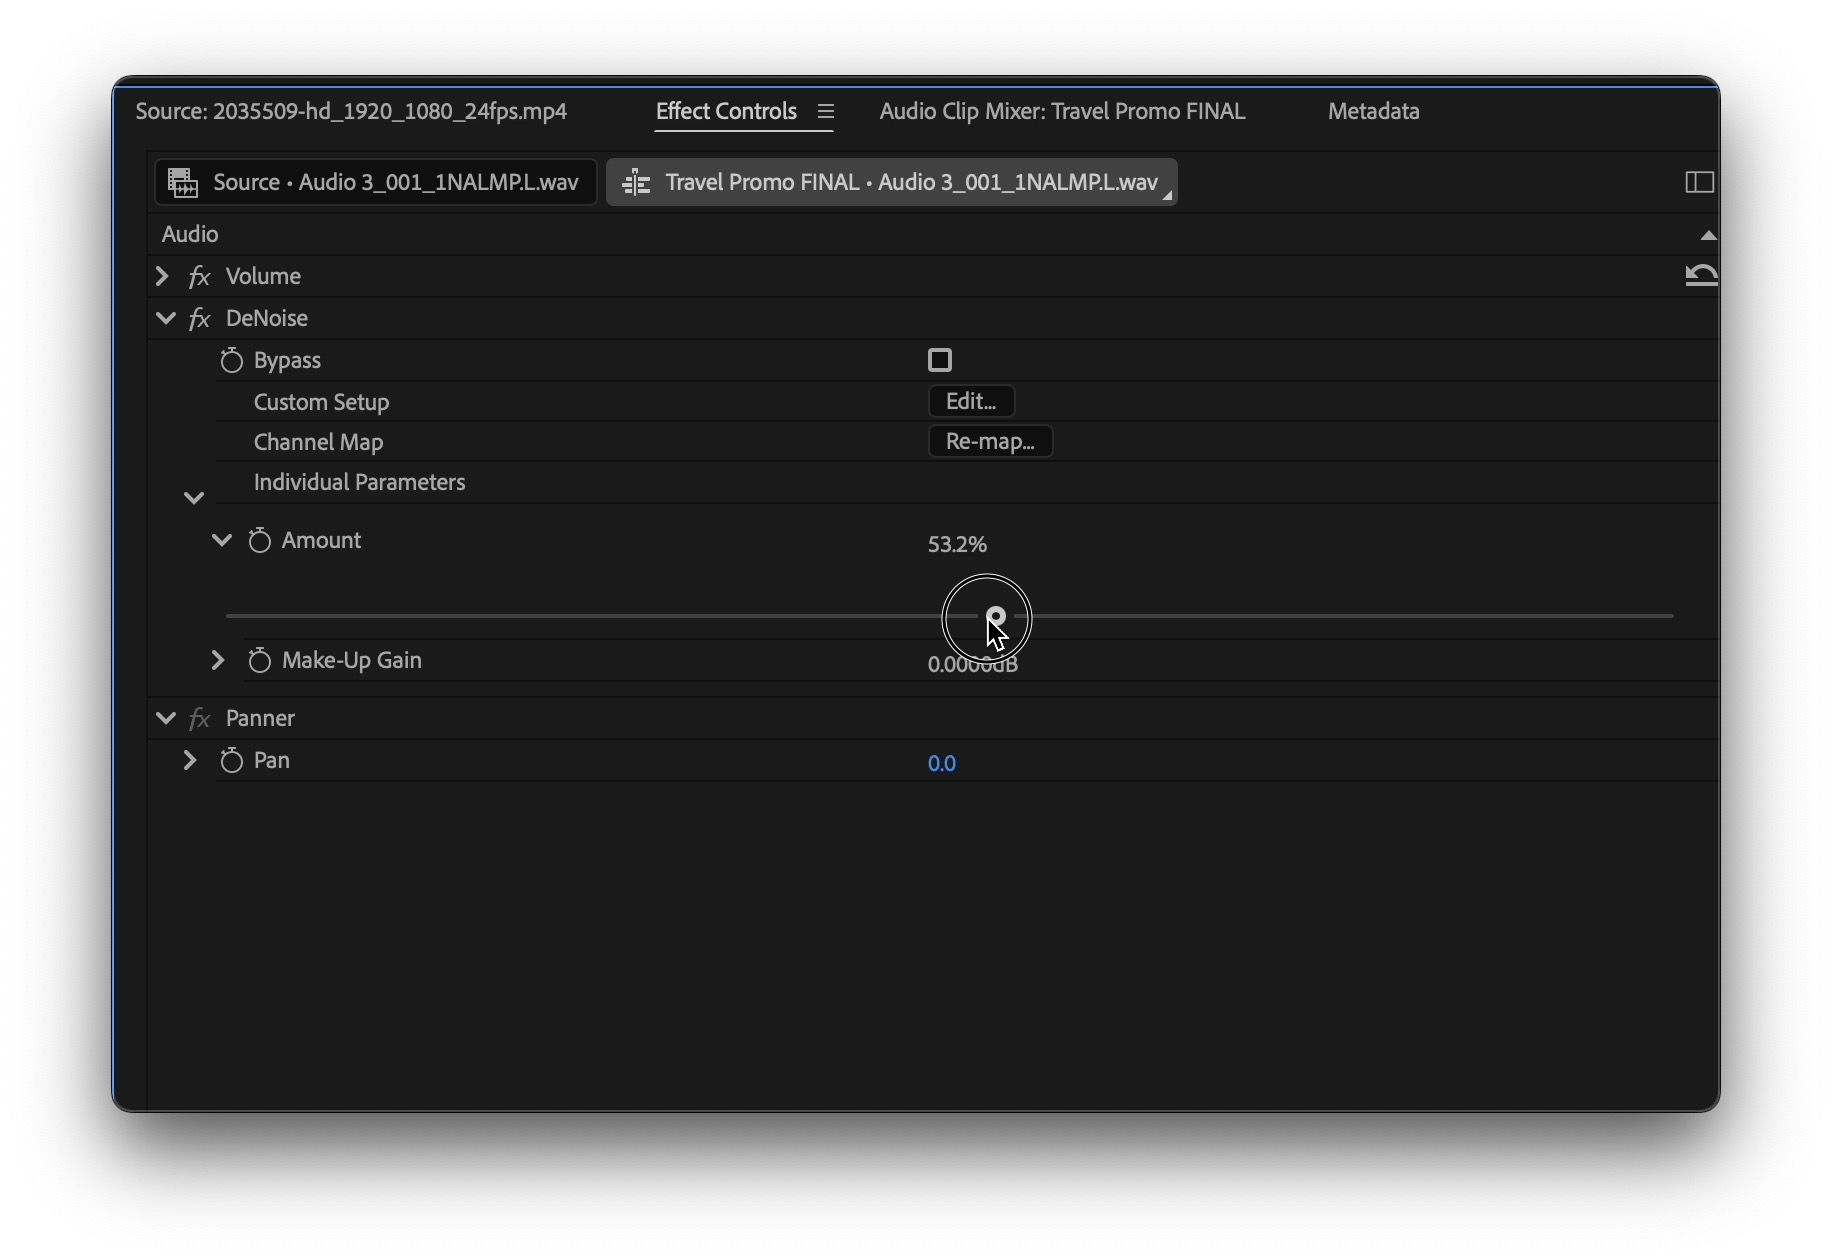
5. Set the Reduction level (default is 40%, increase gradually if needed).
Bonus Tip: Combine DeNoise with EQ for Cleaner Results
- Apply the Parametric Equalizer from the Effects panel.
- Use the High-Pass Filter to cut low-frequency rumble (below 80Hz).
- Use a notch filter to reduce specific frequency noise (like electrical hums at 60Hz).
📌 Pro Tip: Use Spectral Display in Adobe Audition for precision, or keep it simple in Premiere Pro with EQ shaping.
For a complete workflow on cleaning, mixing, and enhancing sound, check out how to edit and improve audio in Premiere Pro.
🔄 Use Adobe Audition for Deep Noise Removal (Optional)
For extremely noisy clips, right-click the audio and choose:
Edit Clip in Adobe Audition
→ Use Noise Print Capture + Noise Reduction for pinpoint accuracy.
→ Save and return to Premiere Pro with cleaned audio.
Final Thoughts: Cleaner Sound, Better Videos
Great audio is just as important as clean visuals. With built-in tools like DeNoise and the Essential Sound Panel, Premiere Pro makes it easy to remove noise and improve clarity—even if you’re not an audio expert. To enhance your projects even further, here’s how to easily add music in Premiere Pro.
🎓 Ready to take your audio and video editing to the next level?
Join the Adobe Premiere Pro Course at Miracamp to learn professional editing workflows, sound design, and real-world client techniques step by step.
FAQ
How do I reduce background noise in Premiere Pro?
To reduce background noise in Premiere Pro, select your audio clip, open the Essential Sound panel, assign it as Dialogue or Music, and enable the Reduce Noise option under the Repair section. Adjust the slider to control the intensity.
Where is the DeNoise effect in Premiere Pro?
The DeNoise effect can be found in the Effects panel under Audio Effects. Search for “DeNoise,” then drag it onto your audio clip and customize it in the Effect Controls panel.
What is the best Premiere Pro setting to remove noise?
Use the Essential Sound panel’s Reduce Noise slider for quick fixes. For more control, apply the DeNoise effect manually and combine it with the Parametric Equalizer to cut unwanted frequencies.
How do I use DeNoise in Premiere Pro?
Search for DeNoise in the Effects panel, apply it to your audio clip, then open Effect Controls. Click Edit next to the DeNoise effect and adjust the Reduction percentage to eliminate background noise.
Can Premiere Pro remove static or hiss from audio?
Yes, Premiere Pro’s DeNoise effect and Essential Sound panel can reduce static, hiss, and low-level background hum. For better results, pair DeNoise with EQ to clean up specific frequencies. If you’re dealing with duplicated or doubled audio in your timeline, here’s a full fix: how to fix double audio. For outdoor recordings, here’s a guide on how to get rid of wind noise.
Is DeNoise available in Premiere Pro Free Trial?
Yes, the DeNoise effect and Essential Sound panel are included in the free trial of Premiere Pro and available in all paid versions.
Can I remove noise from voice recordings in Premiere Pro?
Yes, assign the audio clip as Dialogue in the Essential Sound panel, then use the Reduce Noise option. Adjust EQ and gain for better vocal clarity after reducing background noise.
Why does my audio sound robotic after denoising?
Overusing noise reduction can create artifacts. If audio sounds robotic, reduce the DeNoise intensity, and consider using volume automation to clean only the noisy parts.
What’s the difference between DeNoise and Reduce Noise in Premiere Pro?
Reduce Noise is a simplified slider in the Essential Sound panel, while DeNoise is a more advanced effect found in the Effects panel that allows manual adjustments for better precision.
Can I remove room echo with DeNoise in Premiere Pro?
DeNoise is better for hiss and hum. To reduce echo or reverb, try applying Reverb Reduction, or use Adobe Audition for detailed room tone removal.
How do I remove audio noise without third-party plugins in Premiere Pro?
Premiere Pro has built-in tools like DeNoise, Essential Sound, and Parametric EQ. These can handle most common noise issues without needing external plugins.
Does DeNoise affect voice quality in Premiere Pro?
If used carefully, DeNoise can clean up background noise while preserving vocal clarity. Over-processing may degrade voice tone, so adjust the effect conservatively.
Where can I learn professional audio cleanup in Premiere Pro?
Enroll in the Adobe Premiere Pro Course by Miracamp to master noise reduction, EQ, mixing, and professional audio techniques inside Premiere Pro.


