
Smooth transitions are essential for making videos look professional and engaging. Whether you're working on YouTube intros, cinematic films, or social media reels, knowing how to add transitions in Premiere Pro will help elevate your editing game. This guide will walk you through the process, recommend the best transitions in Premiere Pro, share resources for a free Premiere Pro transition pack, and explain how to customize transitions for different types of content.
How to Add Transitions in Premiere Pro
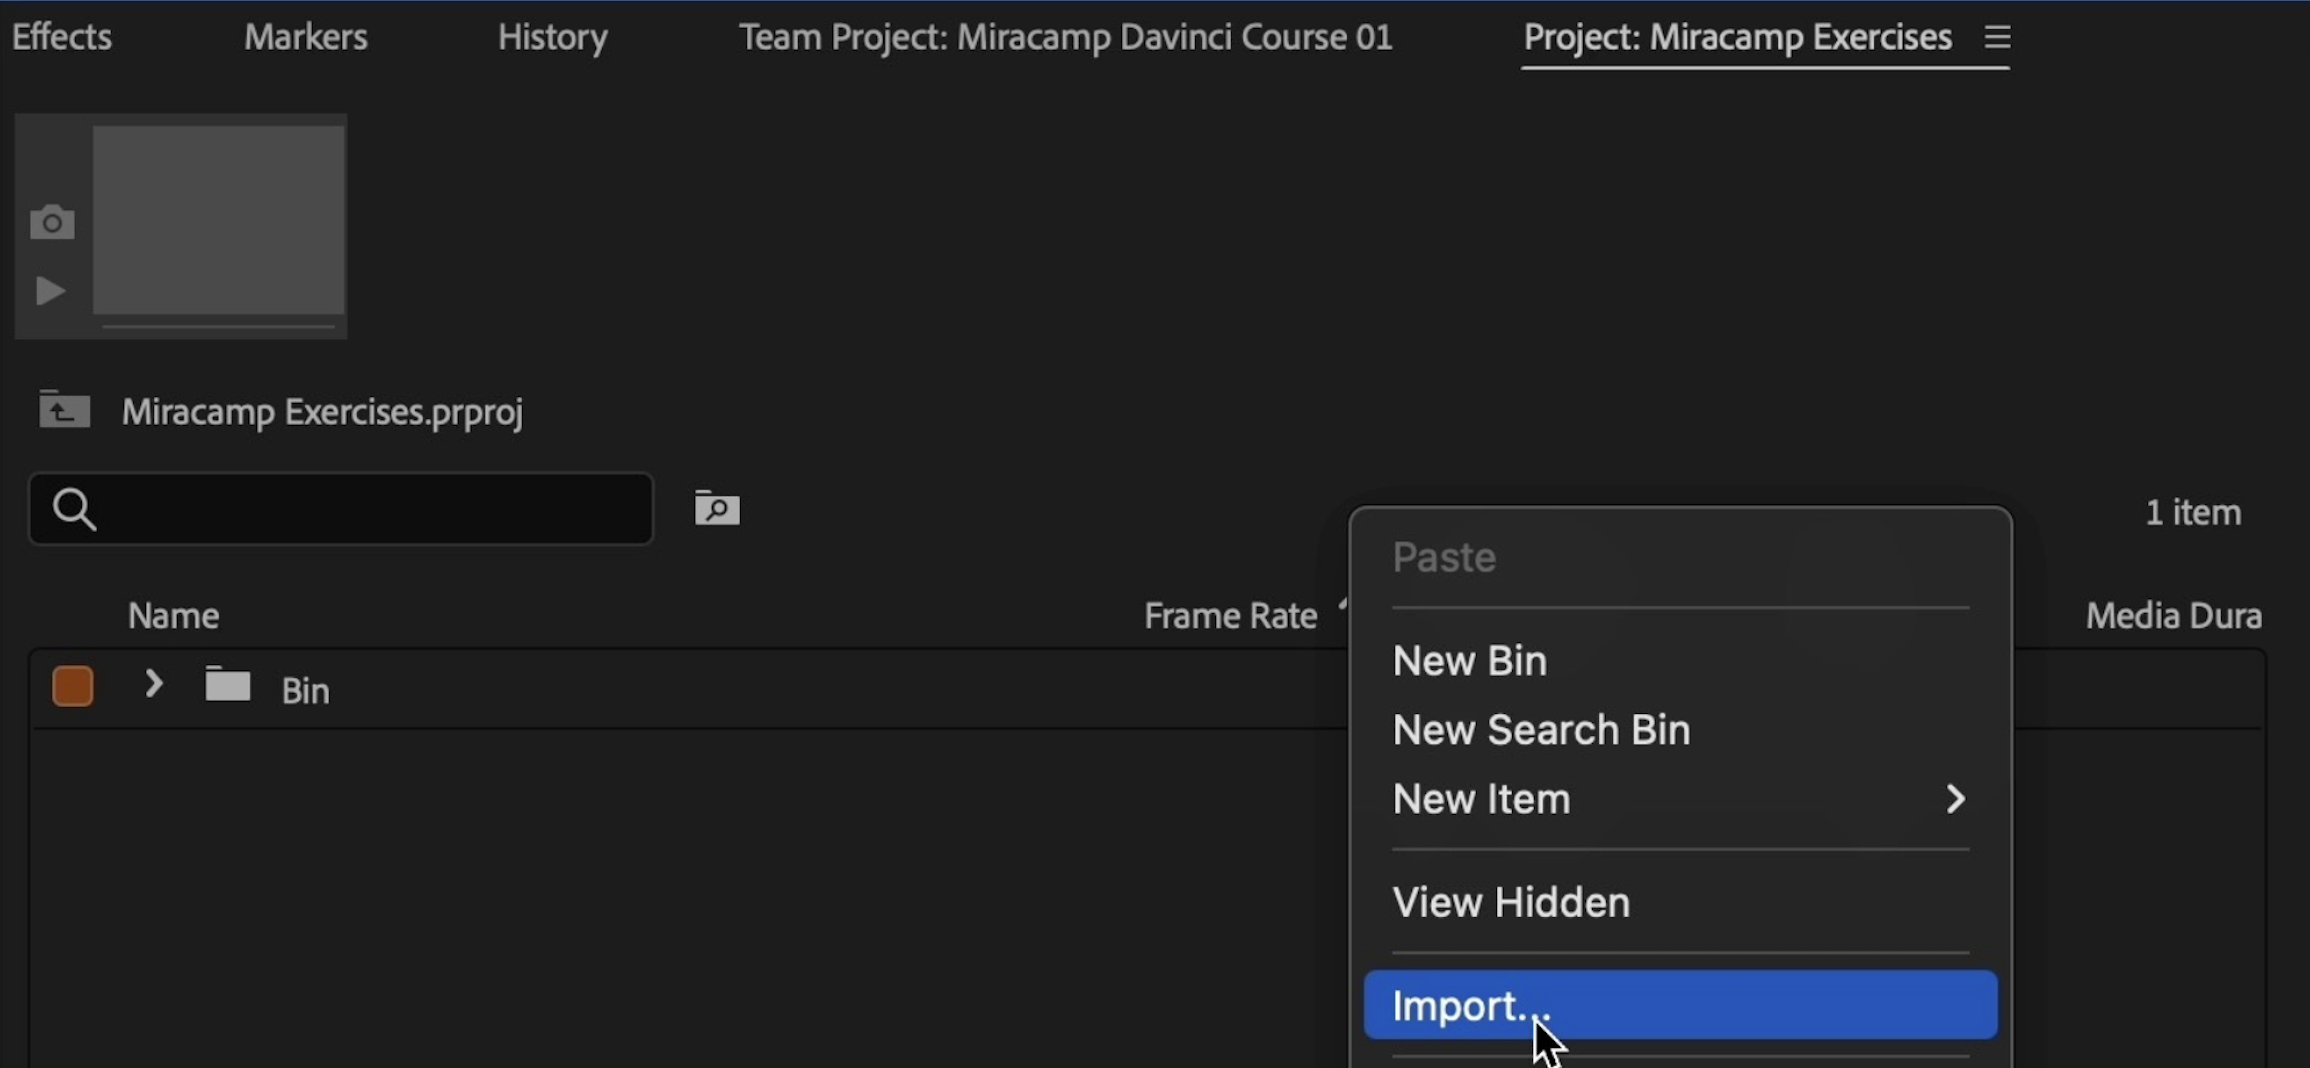
Adding transitions in Adobe Premiere Pro is simple:
1️⃣ Import your footage.
2️⃣ Open the Effects Panel.
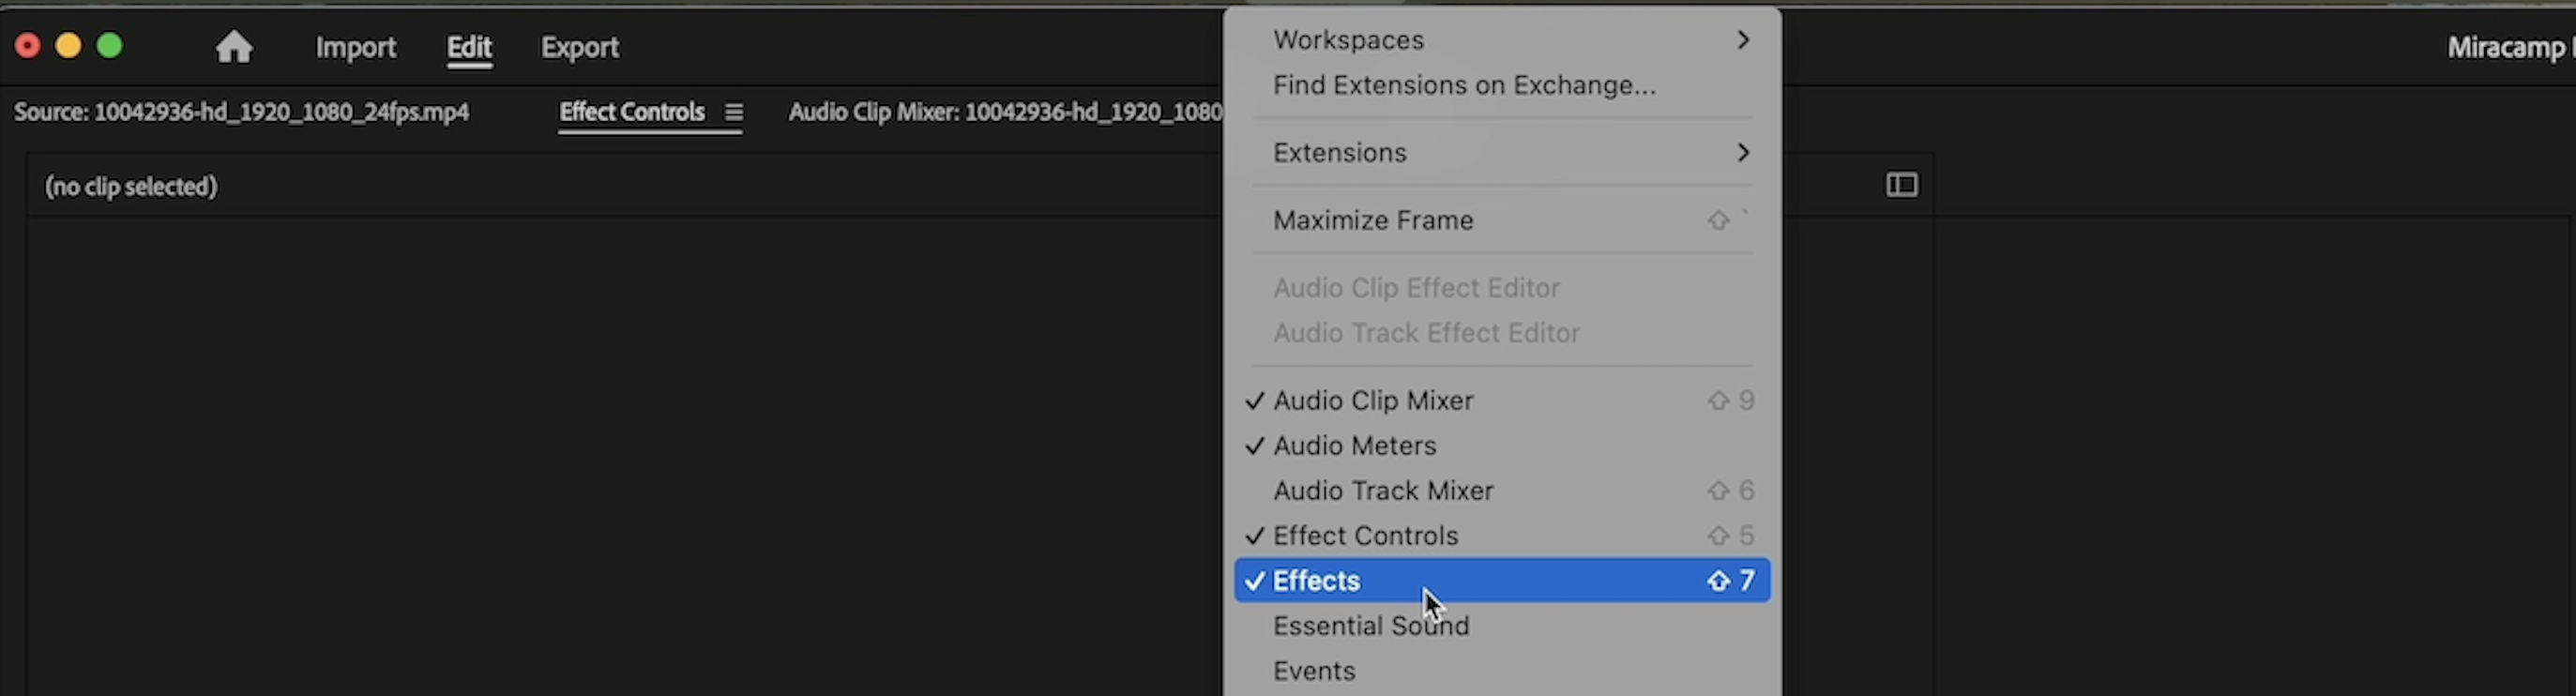
3️⃣ Go to the Video Transitions folder to find different transition effects.
4️⃣ Drag and drop transition between two clips on the timeline.
5️⃣ Adjust the transition’s duration and settings in the Effect Controls Panel for smooth blending.
📌 Pro Tip: To apply a transition quickly, select the edit point between two clips and press Ctrl + D (Windows) / Cmd + D (Mac) to add the default transition (usually Cross Dissolve).
Best Transitions in Premiere Pro
While Cross Dissolve and Dip to Black/White are popular, here are some of the best transitions in Premiere Pro that will make your videos stand out:
1. Smooth Zoom Transition
- Creates a seamless zoom-in or zoom-out effect.
- Great for YouTube intros, travel vlogs, and music videos.
2. Luma Fade Transition
- Uses brightness levels to blend two clips smoothly.
- Perfect for cinematic storytelling and documentary-style videos.
3. Glitch Transition
- Adds a digital distortion effect for a modern, techy feel.
- Ideal for gaming videos, tech reviews, and action-packed content.
4. Whip Pan Transition
- Creates a fast horizontal or vertical camera movement effect.
- Works well in dynamic commercials and high-energy content.
5. Film Roll Transition
- Simulates a filmstrip rolling effect for a vintage look.
- Best for old-school, retro, and indie-style videos.
📌 Pro Tip: Use keyframes in the Effect Controls Panel to fine-tune the speed and direction of your transitions for a more polished result.
cjIf you want to explore more unique transitions, you can also try the frame slide effect for slick, modern scene changes.
Transitions in Adobe Premiere Pro | Video Presentation
Where to Download a Free Premiere Pro Transition Pack
If you're looking for free Premiere Pro transition packs, many websites offer high-quality transitions at no cost. Here are some reliable sources:
- Mixkit – Free transitions with easy drag-and-drop functionality.
- Motion Array – Free and premium templates for Premiere Pro.
- Videvo – Offers free motion graphics and transitions.
- Filmora Effects Store – Contains free transition effects for Premiere Pro.
📌 Pro Tip: Always check for royalty-free licenses before using free transitions in commercial projects.
You can also download Miracamp’s curated list here: free Premiere Pro transition packs.
Best Transitions For YouTube Intros
- Use Smooth Zoom, Glitch, or Whip Pan to grab attention instantly.
- Keep transitions short (0.5 – 1 second) to maintain fast pacing.
Best Transitions For Reels & Instagram Stories
- Swipe, Spin, or Push transitions work well for mobile-friendly, vertical videos.
- Use Auto Reframe in Premiere Pro to optimize transitions for 9:16 aspect ratio.
For fast-paced vertical edits, you can also try a stylish spin transition, which works especially well for Reels and TikTok.
Best Transitions For Cinematic Films
- Luma Fade, Film Roll, or Dissolve transitions create a seamless, professional look.
- Keep transitions subtle to maintain realism and storytelling flow.
Best Transitions For Corporate & Business Videos
- Cross Dissolve and Dip to Black/White are ideal for professional, clean transitions.
- Avoid excessive transitions to maintain a polished, high-end feel.
📌 Pro Tip: Adjust transition timing and blending modes in the Effect Controls Panel for smooth and natural-looking edits.
How to Change Default Transition in Premiere Pro
If you frequently use a specific transition, setting it as the default transition can save time:
1️⃣ Open Effects Panel and right-click your preferred transition.
2️⃣ Select "Set Selected as Default Transition".
3️⃣ Now, pressing Ctrl + D (Windows) / Cmd + D (Mac) will apply this transition automatically.
📌 Pro Tip: You can also change the default transition duration under Preferences > Timeline to customize how long transitions last by default.
And if your timeline gets cluttered, here’s how to delete all transitions at once in Premiere Pro.
Conclusion: Master Transitions in Premiere Pro
Understanding how to add and customize transitions in Premiere Pro is key to enhancing video flow and storytelling. Whether you're editing for YouTube, social media, or professional films, the right transition makes all the difference.
🚀 Want to level up your Premiere Pro skills? Join our Adobe Premiere Pro Course at Miracamp and master professional editing techniques, cinematic transitions, and advanced video workflows!
FAQ Adding Transitions in Premiere Pro
How do I add transitions in Premiere Pro?
To add a transition, open the Effects Panel, go to Video Transitions, drag your chosen transition between two clips in the Timeline, and adjust its duration in the Effect Controls Panel.
What are the best transitions in Premiere Pro?
Some of the best transitions in Premiere Pro include Smooth Zoom, Glitch, Whip Pan, Luma Fade, and Film Roll. These transitions create dynamic, cinematic effects for different video styles.
Where can I download a free Premiere Pro transition pack?
You can find free transition packs on sites like Mixkit, Motion Array, and Videvo.
How do I change the default transition in Premiere Pro?
To change the default transition, right-click on your preferred transition in the Effects Panel, select "Set Selected as Default Transition", then press Ctrl + D (Windows) / Cmd + D (Mac) to apply it automatically.
What is the best transition for YouTube intros?
For YouTube intros, use Glitch, Smooth Zoom, or Whip Pan transitions to grab attention and keep the energy high.
Which transitions work best for Facebook Reels and Instagram Stories?
For Facebook Reels and Instagram Stories, use Swipe, Spin, and Push transitions optimized for vertical (9:16) videos.
What transitions should I use for cinematic films?
For cinematic films, use Luma Fade, Dissolve, and Film Roll transitions to create smooth, natural scene changes.
How do I make transitions smoother in Premiere Pro?
Use the Effect Controls Panel to fine-tune the transition duration and ease in/out settings. Adjust the blending mode if necessary for a more natural transition. If Premiere Pro isn’t letting you place transitions correctly, check this troubleshooting guide: not letting me place transitions — how to fix it.
Can I use keyframes to create custom transitions?
Yes! Add keyframes to Position, Scale, and Opacity in the Effect Controls Panel to create your own smooth transitions.
Where can I learn more about transitions and video editing in Premiere Pro?
Join the Adobe Premiere Pro Course at Miracamp to master advanced transitions, color grading, and cinematic editing techniques. 🚀


