

Adding subtitles to videos in Premiere Pro improves accessibility, engagement, and viewer retention. Whether you're creating YouTube videos, films, or corporate content, subtitles help make your videos more professional and audience-friendly.
Premiere Pro Auto-Captions Tutorial – Add Subtitles Fast
Adobe’s Speech-to-Text tool can automatically generate captions in Premiere Pro, saving time on manual input.
Step 1: Open the Text Window
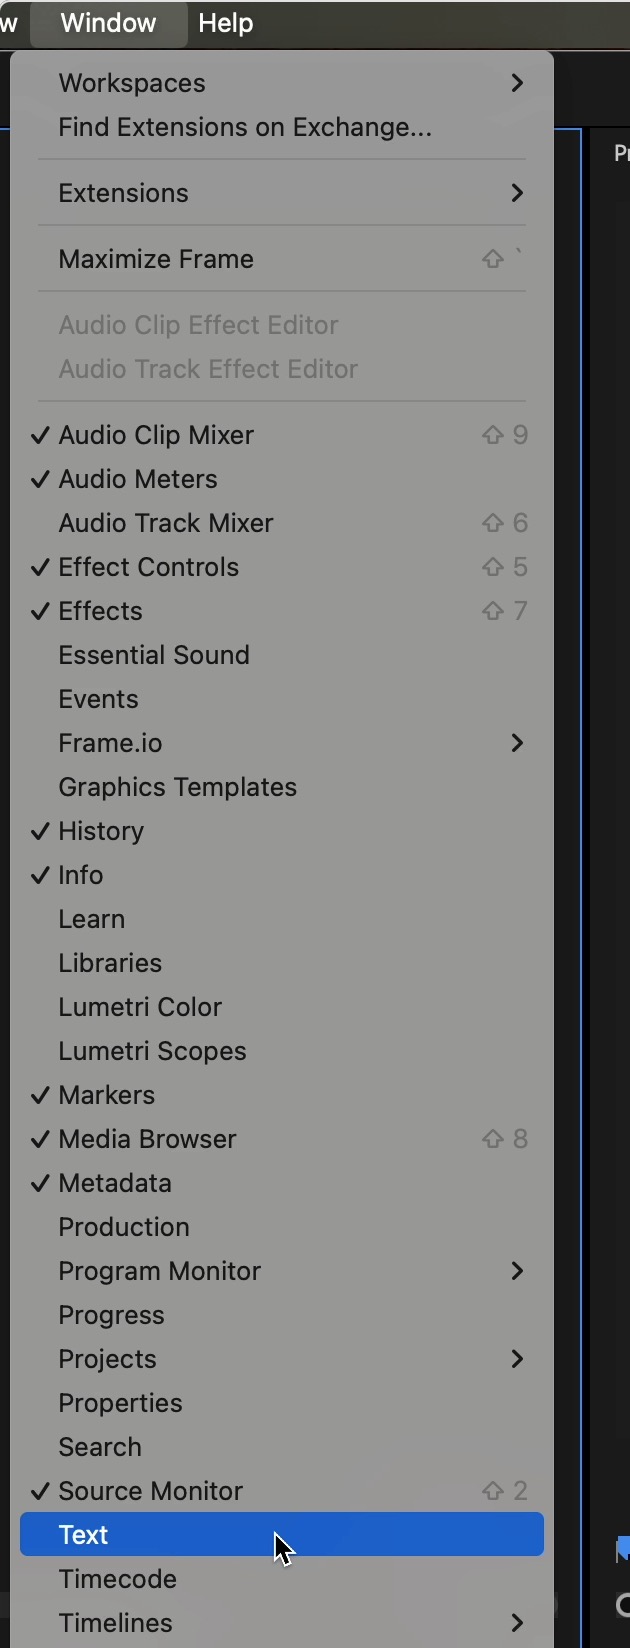
Step 2: Open the Captions Tab
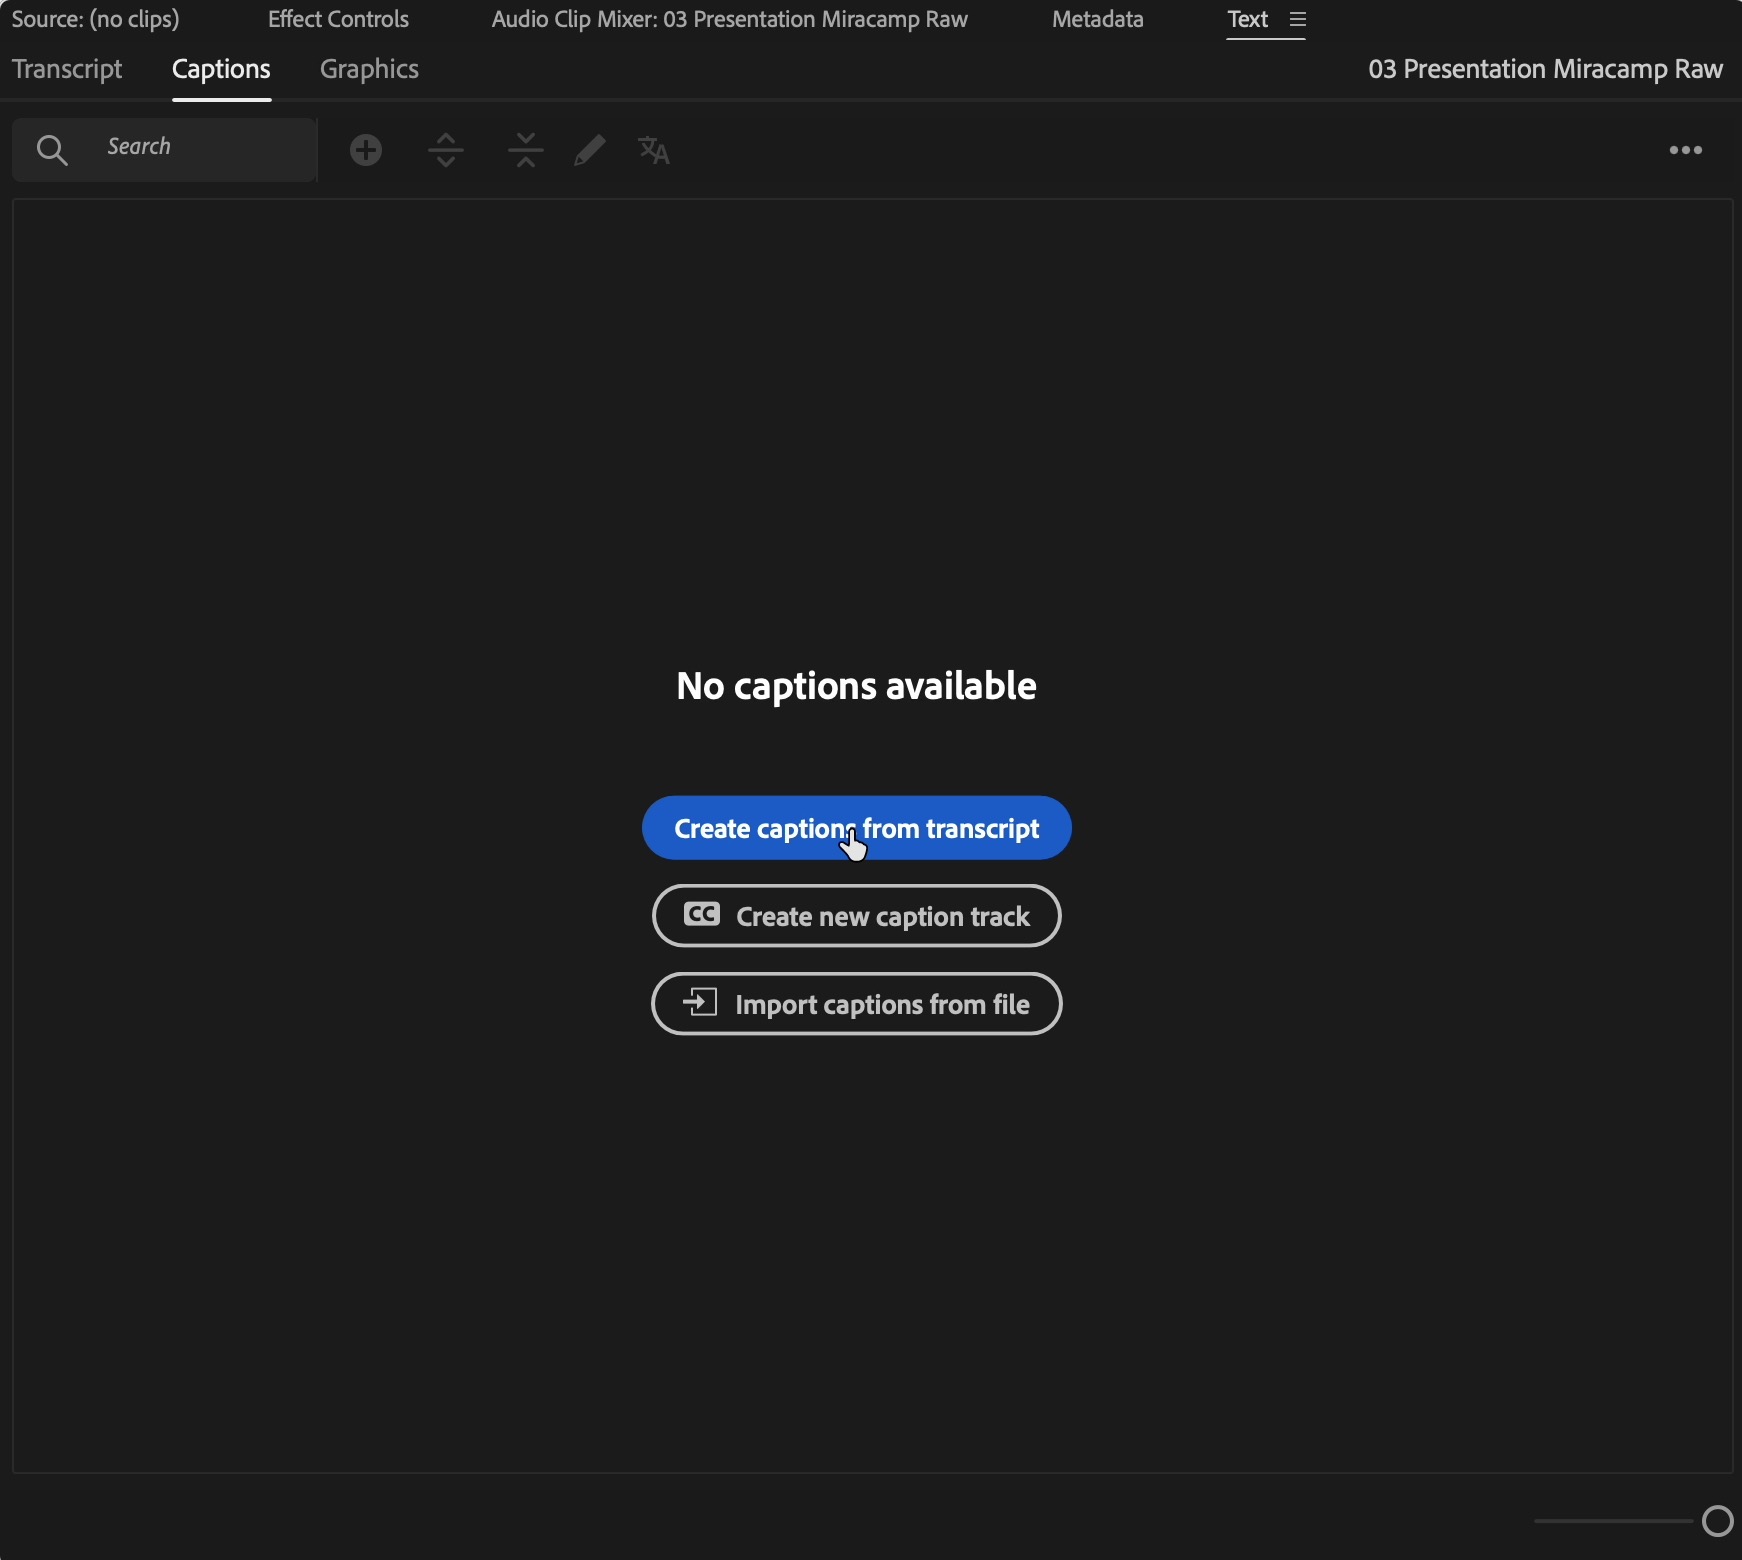
Step 3: Click “Create Captions from Transcript”
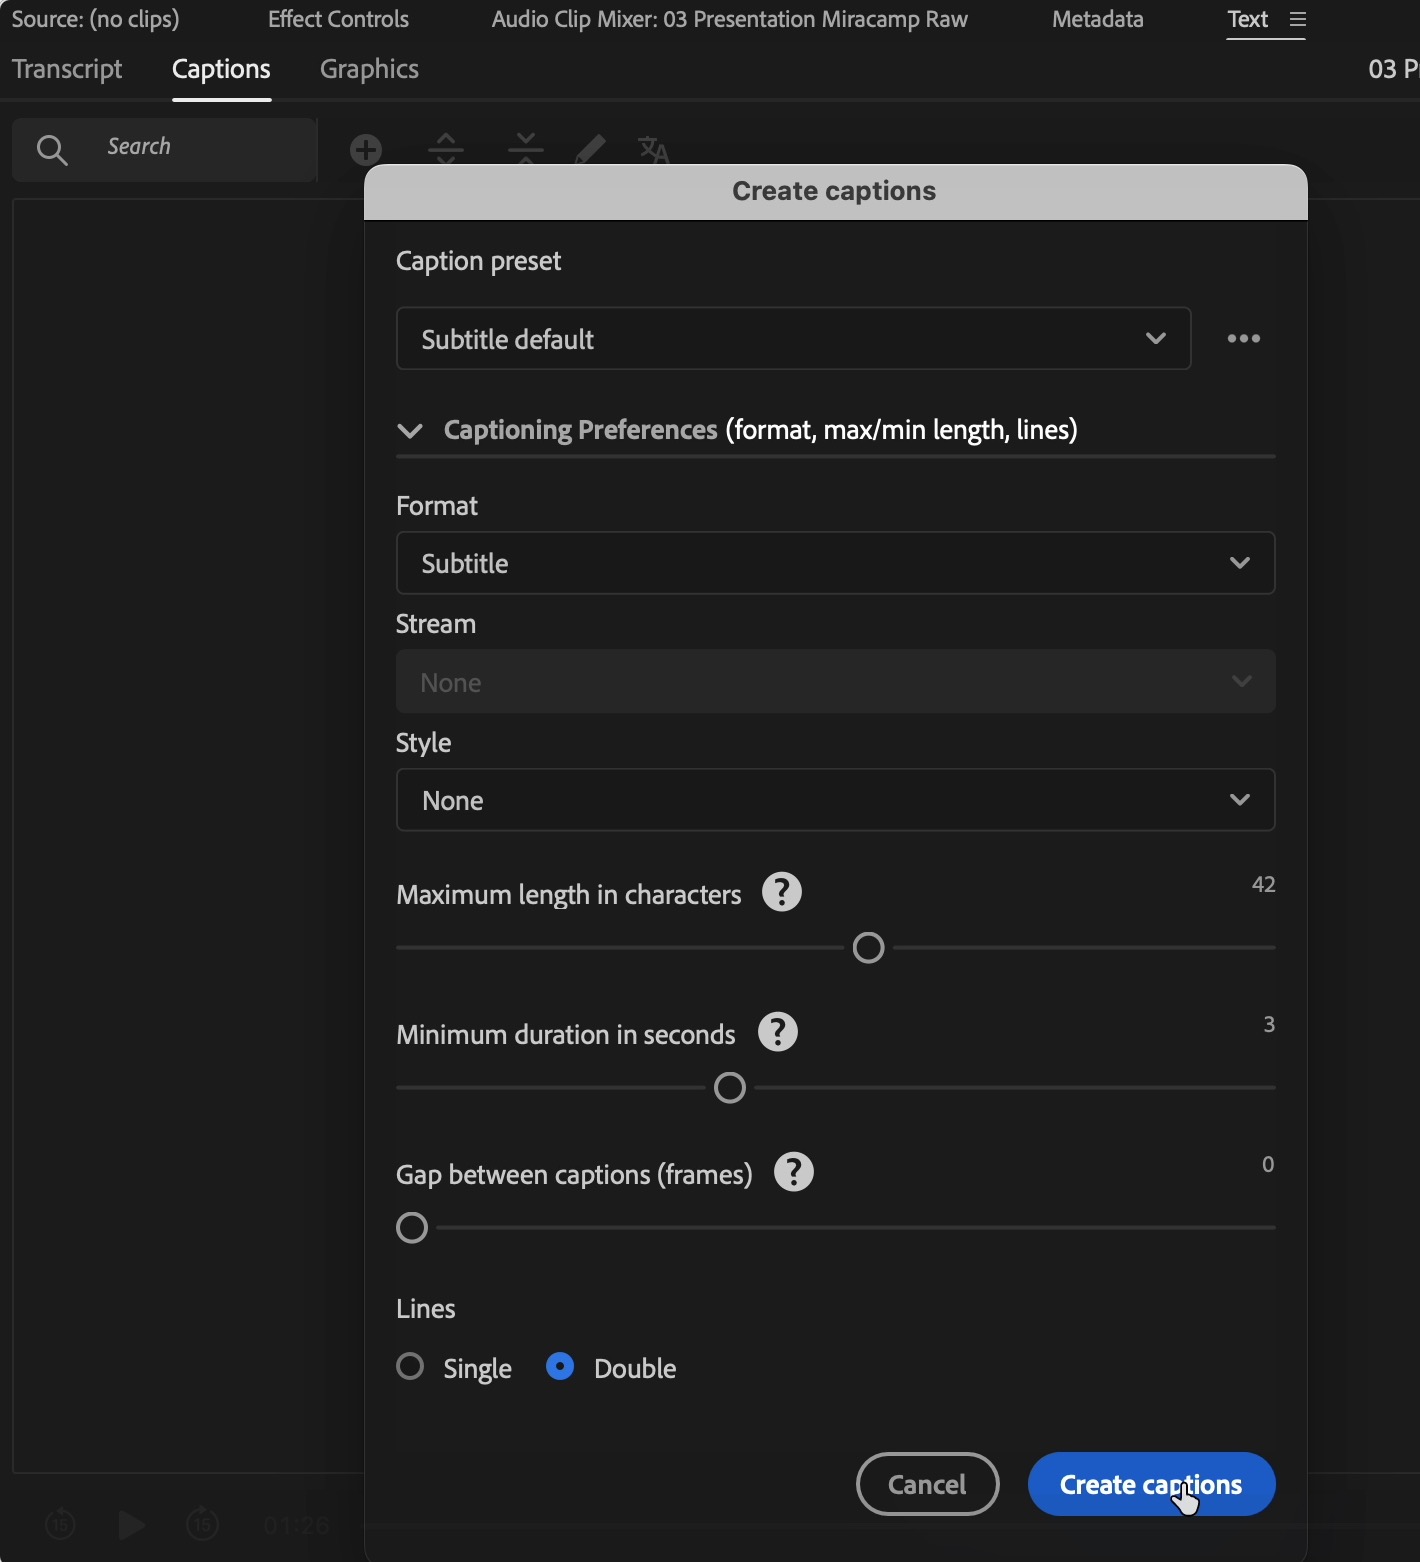
Step 4: Adjust Caption Settings

Step 5: Review Generated Captions
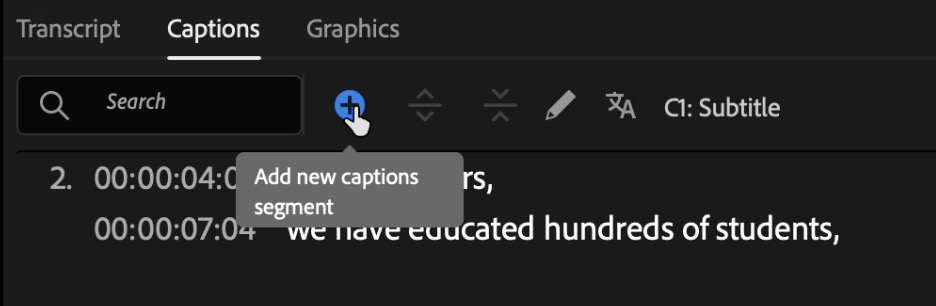
Step 6: Add New Caption Segment
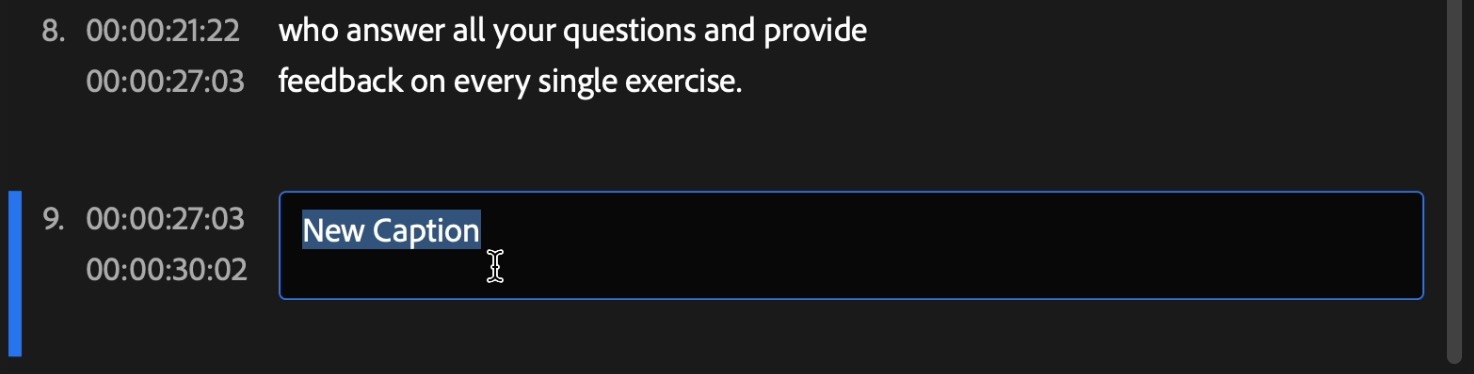
Step 7: Edit the New Caption
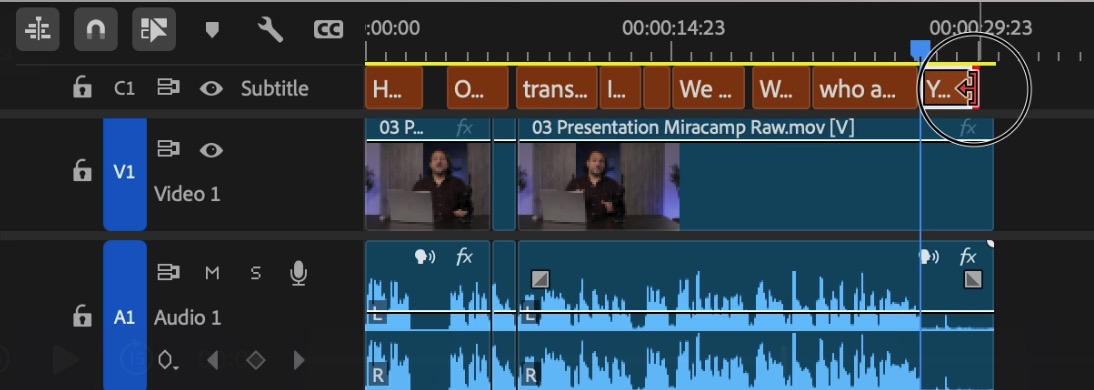
Step 8: Adjust Captions in Timeline
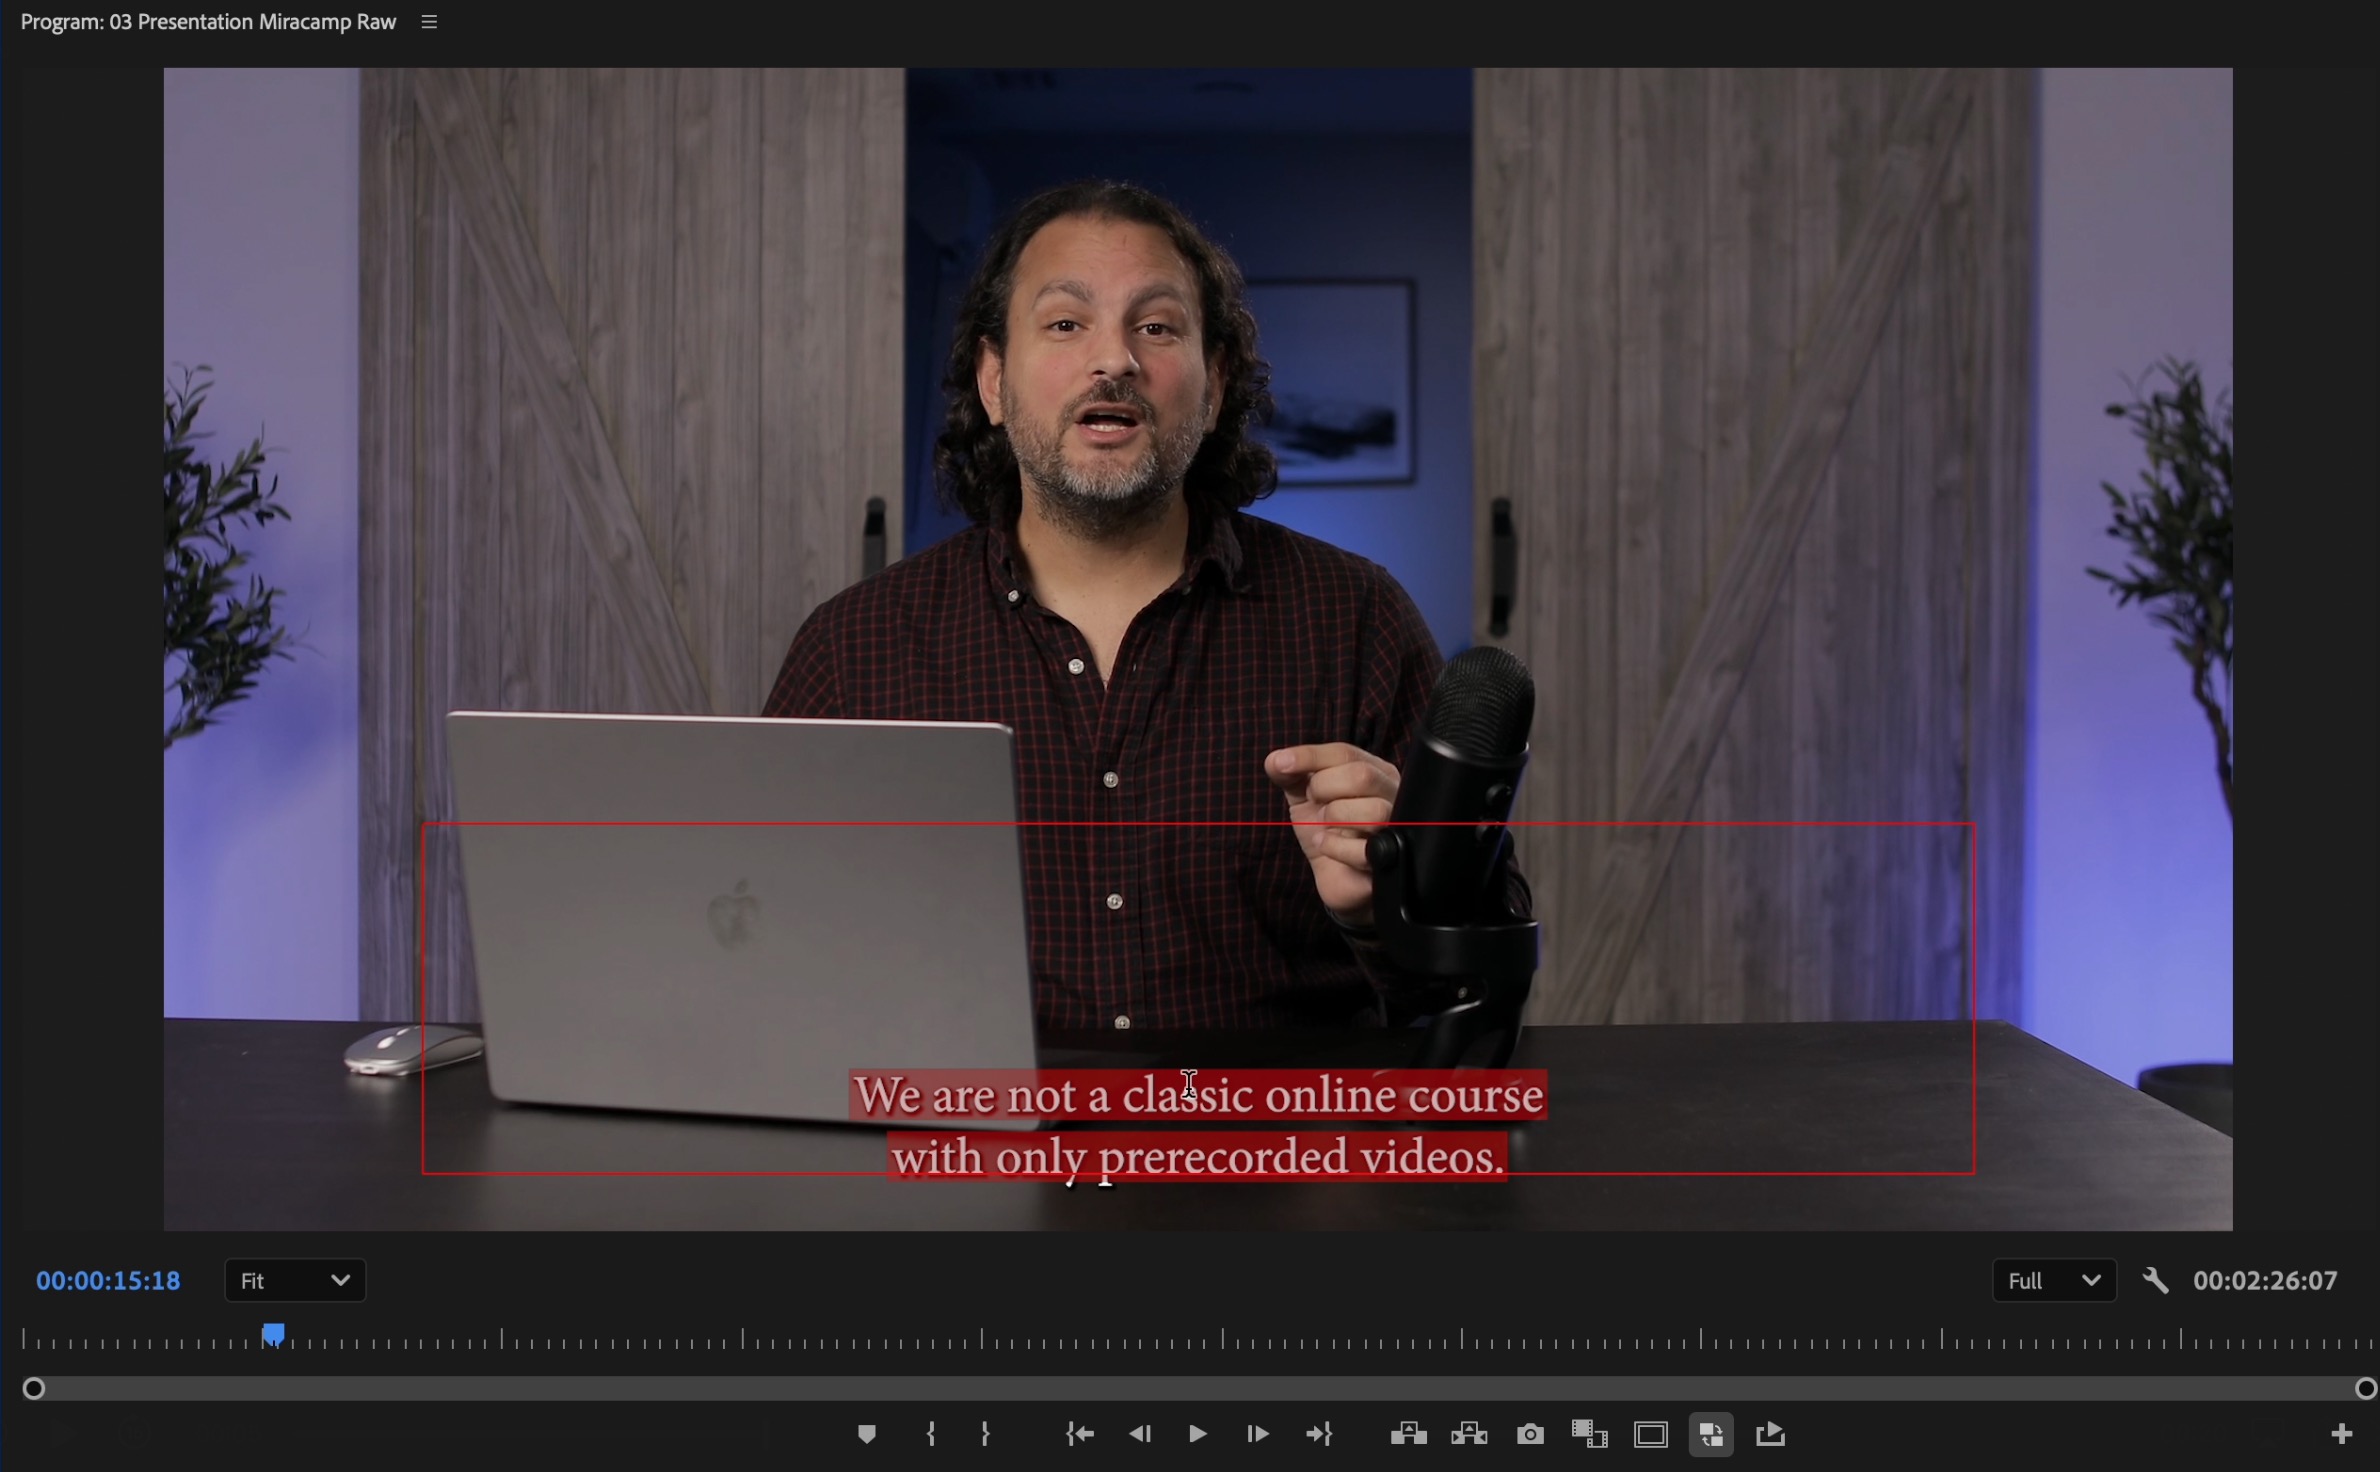
Step 9: Preview in Program Monitor

How to Import Subtitles into Premiere Pro (SRT, VTT, SCC Files)
If you already have a subtitle file, you can import it into Premiere Pro.
Step 1: Import an SRT File into Premiere Pro
- Go to File > Import and select the SRT file.
- Drag the subtitle file into the Timeline above the video track.
- Premiere Pro will automatically sync the subtitles with the video.
Step 2: Adjust Subtitle Settings
- Open the Captions Panel to modify text, timing, and formatting.
- If needed, manually adjust subtitle placement.
- Preview your video to ensure proper subtitle alignment.
How to Customize Subtitles in Premiere Pro
Step 1: Change Font, Color, and Size
- Select a subtitle in the Essential Graphics Panel.
- Adjust the font, size, and color to match your video style.
- Use background boxes to improve subtitle visibility.
Step 2: Adjust Subtitle Placement
- Drag subtitles higher or lower in the Program Monitor.
- Keep subtitles in a consistent position for readability.
If you want to customize your subtitles even further with new typefaces, check out this guide on how to add fonts in Premiere Pro.
Step 3: Add Animation to Subtitles
- Use keyframes to add fade-in and fade-out effects.
- Apply motion tracking to sync subtitles with video movement.
To create more advanced subtitle animations such as smooth fades, motion, or dynamic text reveals, you can follow this guide on how to add keyframes in Premiere Pro.
How to Export Videos with Subtitles in Premiere Pro
Once your subtitles are ready, you can export them in different formats.
Option 1: Burn Subtitles into Video (Hardcoded)
- Go to File > Export > Media.
- In the Captions tab, select "Burn Captions into Video".
- Click Export to render your video with permanent subtitles.
Option 2: Export Subtitles as a Separate File (SRT)
- Go to File > Export > Captions.
- Select SRT, VTT, or SCC format for external subtitle files.
- Click Export to save the subtitles separately.
This option is ideal if you need to upload subtitles separately to YouTube or Vimeo.
Adding Subtitles in Premiere Pro Manually
If you prefer full control over subtitles, you can add them manually in Premiere Pro.
Step 1: Create a Subtitle Track
- Open Premiere Pro and import your video.
- In the Timeline, go to Window > Text > Captions.
- Click Create New Caption Track and choose "Subtitles" from the dropdown menu.
- Select your preferred subtitle format (Burned In, Open Captions, or Closed Captions).
Step 2: Add Subtitle Text
- Drag the subtitle track above your video in the timeline.
- Double-click the subtitle box to open the Text Panel.
- Type your subtitle text and adjust timing in the timeline.
Step 3: Adjust Subtitle Timing
- Drag the subtitle clips to sync them with dialogue.
- Split longer subtitles into shorter, readable segments.
- Use fade-in and fade-out effects for smoother transitions.
Final Thoughts: Enhance Your Videos with Subtitles in Premiere Pro
Adding subtitles in Premiere Pro is a crucial step in making your videos more engaging, accessible, and professional. Whether you're adding manual captions, importing an SRT file, or using Adobe’s Speech-to-Text tool, subtitles enhance the viewer’s experience.
Want to Master Premiere Pro Like a Pro?
Join the Adobe Premiere Pro Course by Miracamp to learn advanced editing techniques, workflow optimizations, and expert-level video production skills!
FAQ Adding Subtitles in Premiere Pro
How do I add subtitles in Premiere Pro manually?
To add subtitles manually in Premiere Pro, open the Captions Panel, create a new subtitle track, and type your text. Adjust the timing in the timeline to sync with the dialogue, then customize the font, size, and placement in the Essential Graphics Panel.
How do I automatically generate subtitles in Premiere Pro?
To generate subtitles automatically in Premiere Pro, use the Speech-to-Text tool. Go to Window > Text > Captions, click "Transcribe Sequence", and select your language. Premiere Pro will generate a transcript, which you can convert into subtitles with one click.
Can I import subtitles into Premiere Pro?
Yes, you can import subtitle files like SRT, VTT, or SCC into Premiere Pro. Go to File > Import, select your subtitle file, and drag it into the timeline above your video. Premiere Pro will automatically sync the subtitles with your footage.
How do I edit subtitle text in Premiere Pro?
To edit subtitles in Premiere Pro, open the Captions Panel, select the subtitle clip, and modify the text in the Text Panel. You can adjust the font, size, color, and placement using the Essential Graphics Panel.
How do I sync subtitles with my video in Premiere Pro?
To sync subtitles in Premiere Pro, manually adjust each subtitle clip in the timeline. Drag the subtitles left or right to align them with the dialogue. Use waveforms in the audio track to match speech patterns for precise syncing.
How do I change the font and color of subtitles in Premiere Pro?
To change subtitle font and color in Premiere Pro, select a subtitle in the timeline, open the Essential Graphics Panel, and adjust the font style, size, color, and background opacity. Use contrast to ensure readability.
How do I add animated subtitles in Premiere Pro?
To add animated subtitles in Premiere Pro, apply keyframes in the Effect Controls Panel to create motion effects. You can add fade-in, fade-out, and tracking animations to make the text more dynamic.
How do I export a video with burned-in subtitles in Premiere Pro?
To export a video with burned-in subtitles in Premiere Pro, go to File > Export > Media, select the Captions tab, and choose "Burn Captions into Video". Click Export, and the subtitles will be permanently embedded in the video.
How do I export subtitles separately as an SRT file in Premiere Pro?
To export subtitles as an SRT file in Premiere Pro, go to File > Export > Captions, choose SRT format, and save the file. This allows you to upload subtitles separately on platforms like YouTube and Vimeo.
How do I fix subtitle timing issues in Premiere Pro?
If subtitles are out of sync in Premiere Pro, manually adjust the subtitle clips in the timeline. Use waveforms in the audio track to align the subtitles with speech. Premiere Pro also offers automatic syncing options to help refine accuracy.
Can I translate subtitles in Premiere Pro?
Premiere Pro does not have a built-in translation tool, but you can export your subtitles as an SRT file, translate them in a text editor or translation software, and re-import the translated SRT file into Premiere Pro.
What is the best subtitle format to use in Premiere Pro?
The best subtitle format for Premiere Pro depends on your use case. SRT files are widely supported for external subtitles, while burned-in subtitles are best for videos that need permanent captions.
How do I enable closed captions in Premiere Pro?
To enable closed captions in Premiere Pro, add a subtitle track, select the closed captions option, and ensure the captions are correctly formatted. When exporting, choose a format that supports closed captions for playback.
Can I use AI-generated subtitles in Premiere Pro?
Yes, Premiere Pro includes an AI-powered Speech-to-Text feature that automatically generates subtitles. You can edit, format, and sync these AI-generated subtitles to match your video content.
How do I ensure subtitles are readable in Premiere Pro?
To make subtitles readable in Premiere Pro, use a bold font, increase text size, apply a background box, and ensure proper contrast. Position the subtitles at the bottom of the screen without covering important visuals.
How do I add multiple subtitle tracks in Premiere Pro?
To add multiple subtitle tracks in Premiere Pro, go to the Captions Panel, create a new subtitle track, and add a second set of captions. This is useful for adding multiple languages or different subtitle styles.
What should I do if Premiere Pro subtitles are not displaying?
If subtitles are not showing in Premiere Pro, check that the subtitle track is enabled, ensure the captions are visible in the Program Monitor, and verify that subtitles are properly formatted in the Captions Panel.
What’s the difference between open and closed captions in Premiere Pro?
In Premiere Pro, open captions are permanently burned into the video, while closed captions can be toggled on or off during playback. Closed captions are preferred for broadcast and online platforms.
How do I remove subtitles from a video in Premiere Pro?
To remove subtitles in Premiere Pro, select the subtitle track in the timeline and delete it. If subtitles are burned-in, you will need to re-export the video without captions.


